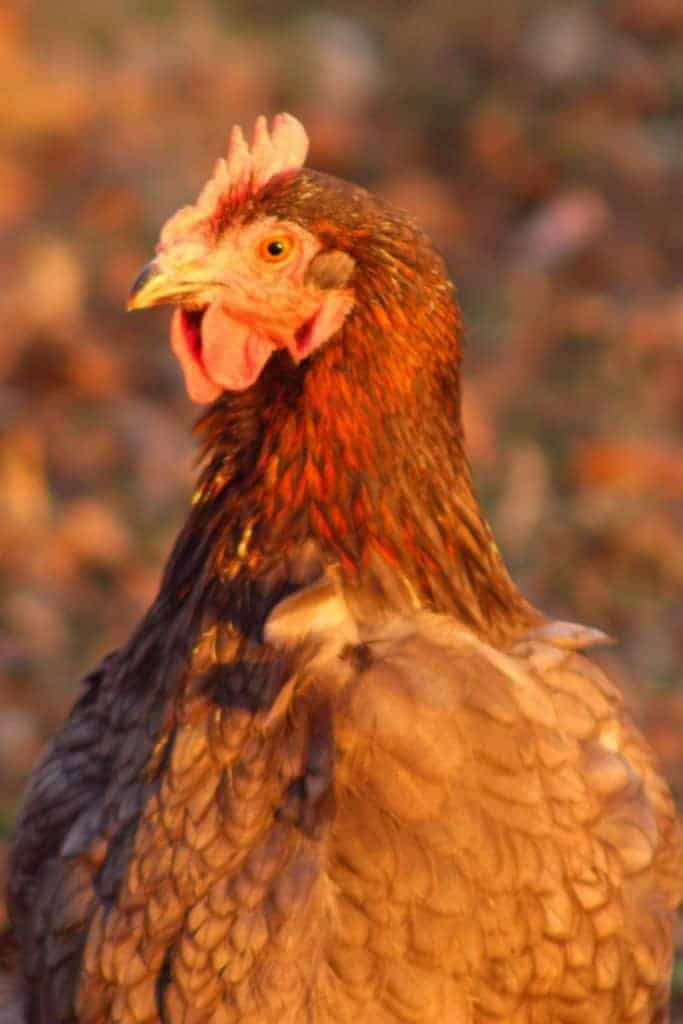
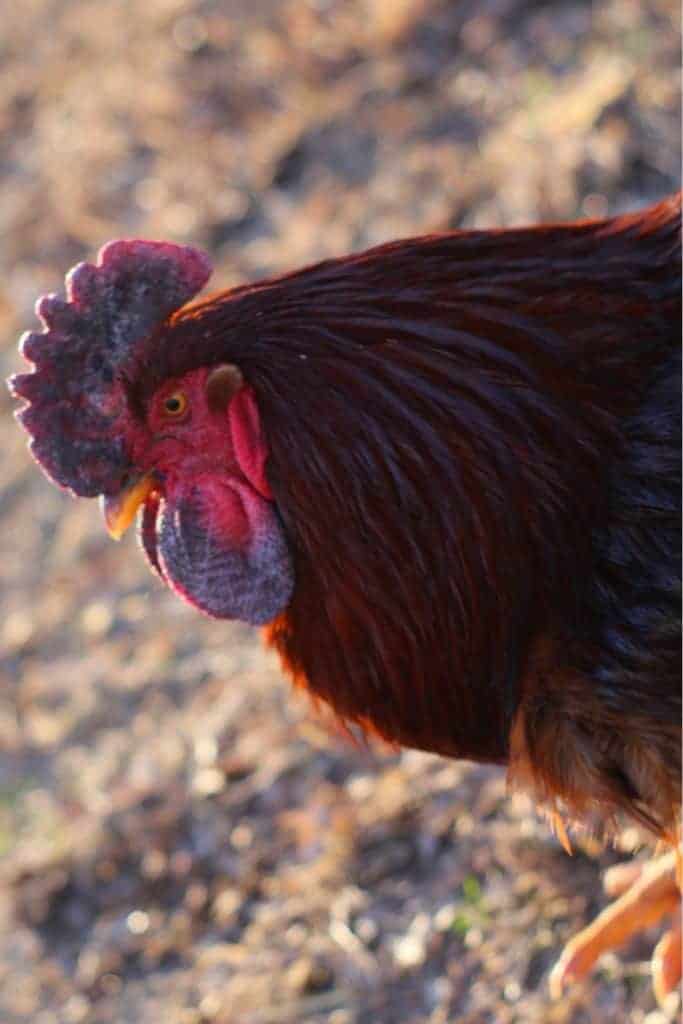
I love chickens! And I can say it’s been a great journey raising them in my backyard. From finding out where can I buy chickens, spoiling them, and raising baby chicks — it’s a good life!

There is a lot to love about raising chickens. Not only can you expect a regular supply of the freshest eggs directly from your backyard, but you’ll also get great companions with wonderful personalities.

Yep, those personalities also have their own daily routines which mostly involves walking around, looking for treats, and pooping everywhere.

If you haven’t started raising chickens yet, you might wonder “Where can I buy chickens?”   Luckily, there are a lot of options.

Three little chickens

Where can I buy chickens?  

You have lots of options, from local breeders to friends to established hatcheries. Below, I discuss each of these options.

Regardless of where you buy chickens, be sure to ask if the breeder or hatchery is NPIP certified. NPIP stands for National Poultry Improvement Program.This means they’ve gone through a licensing procedure from the government so, among other things, they can legally ship chicks in the mail.

The reason this is important is because while there are many wonderful breeders who aren’t NPIP certified, if you’re just starting out and overwhelmed by your options, you can be sure that if a breeder has gone through the process of being NPIP certified, they have at least some minimum of standards for the chickens they sell.

When you have more experience, you’ll rely on NPIP certification less, but if you’re starting out, it makes choosing a breeder easier.

I personally purchase my chickens from a variety of places such as hatcheries, online, and from local farm breeders. Here are some of the places to start looking.

Breeders

The best breeders strive for perfection in their breeds, and you’ll likely buy chickens that are healthy and well-cared-for.

One common option is Facebook groups about chickens or general agriculture or your area, or other online forums. If you do look for a breeder on Facebook, please be sure to look for groups in your general area – it does no good to try to find a local breeder in a group of 100,000+ members.

Private breeders are probably the most expensive source of chickens but you’ll get higher quality chickens and possibly breeds you can’t buy elsewhere. If you plan on showing chickens, this is your best bet to get the bloodlines you want.

BE SURE TO DO YOUR HOMEWORK! Don’t just trust someone online who claims they’re a breeder, especially if you’re looking for a specific breed. There are a lot of people who sell expensive chicken breeds falsely claiming they’re purebred. Icelandic and Ayam Cemani are two such breeds.

Hatcheries

If you’re wondering “where can I buy chickens” if there’s no breeders close to you, then baby chick hatcheries are a good option.

They are widely available across different states and breed a variety of chickens and bantams.

I do sometimes worry about having chicks mailed. Luckily, we have understanding postal workers, but I still have to coordinate with them when I expect my chicks to arrive, make sure I’m home, and still worry that the chicks will be in some place too hot, too cold, etc.

I’ve come home in the past only to realize about 2 hours later that there were chicks on my porch (not where packages are usually dropped off).

So for the sake of my sanity, I now drive to the hatcheries 8 hours round trip so the chicks don’t have to go through the shipping process. But that is not possible for everyone and shipping usually works out fine.

Cackle Hatchery

This is the one I use if I want chicks shipped to me. Newly hatched chickens can be shipped overnight (or even 2 days) because the chicks absorb their yolks before they’re born and don’t require food or water for up to 3 days.

Cackle Hatchery is a US-based (Missouri) chick hatchery and breeding farm. They’re a good quality breeder with good customer service. I have not had a single chick die on the way to my home from the hatchery. You can read my review of this hatchery here.

Murray McMurray

Another great hatchery based in Iowa, US. I have used them in the past and can attest to their great customer service. They’ve been around for over 100 years so there is the quality in their brand.

Meyer Hatchery

I have not personally used this hatchery. According to their website, they allow you to buy a few chicks of multiple breeds. You can buy any size and mix ‘n match multiple breeds of chicken or any kind of poultry. They ship them safely, too!

Note that almost all hatcheries have minimum orders, and you need to pay for shipping. Be sure they ship chicks either overnight or two day, and that they have some sort of refund policy.

A common question I get from soon-to-be owners (after where can I buy chickens) is whether chickens need vaccines, since most hatcheries offer this service.

It’s up to you, but I don’t personally vaccinate my chickens. You can learn more about vaccines for chickens here, and discuss your particular flock with your local avian vet.

Local Farm & Garden Supply Stores

If you prefer to raise only a few chickens then visiting your local feed store is easier than going through the whole hatchery process. You can buy one or a hundred, unlike hatcheries which usually have minimum orders.

These stores usually order and sell chicks in the spring, and don’t have a huge supply. First come, first served!

Just understand that you will be limited to very common breeds and types of chickens. Plus most farm stores don’t do the best job taking caring for them.

They’re not experts and usually can’t tell a chicken from a bantam or tell you what organic feed to buy without a chart. And don’t expect them to accurately tell you the gender of the chicks.

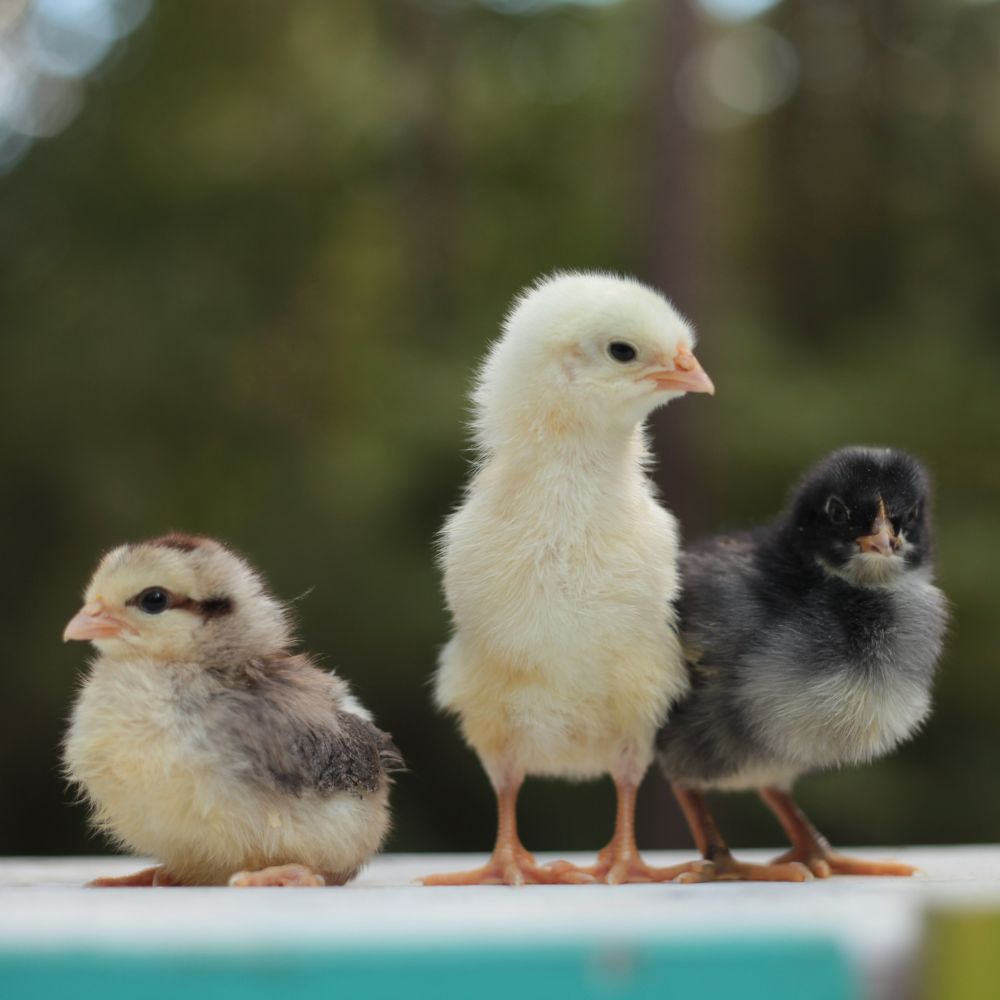
Look for chicks that are active, interacting with other chicks, and with no poop on their bottoms (this is called pasty butt.)

I’ve had mixed results buying chicks from local farm stores. I would choose a hatchery or a local breeder over them.

Summary

Raising your own backyard flock needs good planning and maintenance but altogether enjoyable and fulfilling. Hopefully, with the ideas in his article, you’ll no longer ask yourself “where can I buy chickens?”

Bonus: Baby Chick Starter Box

Getting started for the first time (or the 10th time)? Treat yourself (and your chicks) to a goody box.

Necessity is truly the mother of invention and such is the case when we set out to make DIY horse feeders out of barrels.

For those who follow this blog but didn’t know, in addition to our myriad chickens, we also have horses.

Horses that like to spill their grain and paw at ground feeders until they’ve wasted their meal. Not fun. At least for me, who buys the grain.

After years of experimenting with this or that feeder, we finally settled on making our own DIY horse feeders.

We needed feeders that couldn’t be knocked over easily, were relatively lightweight, and easy to DIY.

I usually do farmwork myself, and let’s face it, I’m a middle aged woman who’s given birth to 2 kids, so I needed something I can easily lift and replace if the DIY horse feeders somehow, magically, find their way to the ground.

They also need to be easy to clean, and made of plastic so cleaning was easy.

We made these feeders for less than $20, they’re easy to clean and care for, each horse has yet to smash them to smithereens (I’m bitter about past failed purchases, can you tell?).

The DIY horse feeders have saved us a LOT on our feed bill because each horse can’t paw and throw their food to kingdom come.

They’ve also kept their weight on easier because each horse is consuming ALL their food and not mashing a portion into the ground.

Would these DIY horse feeders work for chickens?

Possibly, but because of the size, you run the risk of a hen jumping in and pooping on the feed, so a smaller contraption would probably work better. Just my opinion.

If you’re looking for an easy, 15 minute solution (yes, each feeder only took about 15 minutes to make) to making your own DIY horse feeders, check out our plans below.

DIY horse feeders for grain

What do you need to make DIY horse feeders?

We got our food-grade barrels from a local fellow who somehow procures them (don’t ask me how, I’ve never asked.)

You can also buy them online, but a better bet might be to look for restaurants in your area that get food in them but don’t use them once they’re empty.

You’ll need:

50-gallon food-grade plastic barrels

A jigsaw

A drill with a wide bit

A landscape timber or 4×4 post

4-inch screws

2×4 cut into 24-inch sections

Post hole diggers

For this DIY project, we used repurposed food-grade 50 gallon barrels. The trick here is to make sure they’re food-grade plastic and have never had anything except food in them.

You can tell they’re food grade by the number indicated on the plastic, and the barrels we sourced used to contain coffee. So, they’re safe, not exposed to toxins, and easy to cut.

Plastic is necessary because in order to make a place for the horses to stick their head in, you’ll have to cut away part of the plastic.

You still need to clean them out even though they’ve only had food in there, so we filled up the entire barrel with water, and added about 1 tablespoon of bleach and allowed it to sit overnight.

The next day, we emptied the barrels, cut them (see below), and then scrubbed a final time with water mixed with melaleuca essential oil to fully sanitize them.

DIY horse feeders for grain

Cutting the barrels

First, decide how deep you want your DIY feeders. Ours are about 6 inches deep, so we needed to cut away about half the barrel, leaving a 6 inch lip so the feed doesn’t fall out.

Using the drill, poke a couple holes in the barrel, then stick the jigsaw in to cut away. You’ll need to also remove part of the top of the barrel.

While it might seem logical to keep it on to keep rain, etc out, we found the horses weren’t as willing to stick their heads into the barrel, and if they scare, you’re running the risk of them knocking their heads on the top, or possibly pulling the feeder out of the ground.

All in all, the rain hasn’t really made it a huge mess in the feeders since the horses gobble their feed pretty quickly.

Fixing the barrels to the posts

Since the purpose of the DIY horse feeders is to keep the feed off the ground, you’ll want to fix them to posts.

We found the best way to do this (with the least likelihood the horses will pull the barrels off the posts) is to screw the barrels between the post and an additional board.

Place your 4-inch screws a couple inches apart to make the connection even sturdier.

Placing the posts in the ground

If you’re handy and have the time, you can place the posts in concrete. However, we wanted to make sure we could move them later if necessary and we didn’t want to mess with concrete.

We’ve only had the horses pull the feeders out a couple times.

Gas post hole diggers work best, but manual ones work well also and don’t require buying 2 stroke fuel.

We made sure each horse has their own DIY horse feeder. Our horses like fighting and bickering with each other, so the separate feeders has made eating time a little quieter. If your horses are more peaceful companions, or they’re smaller, you might be able to get away with 1 feeder per 2 horses.

Got chickens that love treats? Me too.

Often, I can’t walk into the coop without practically being mauled, and if I have dried insect treats, it’s over.


This article is inspired by my new book, Cluck Cakes, which shows you how to make 11 gourmet treats for your hens! They’re organic, all natural, and hens LOVE them! Get your copy here!


I might as well get out the riot gear, she loves them that much, and gets everyone else riled up.

Giving that hen a treat is one of the highlights of my day. She’s not my favorite hen, but she’s the most amusing.

I’ve been getting a lot of emails lately asking me about this very topic. It seems I’m not the only one who wants to give treats to my favorite hen!

Luckily, treats for your chickens are easy to come by – some are already in your garden!

Here’s some suggestions that make my chickens go crazy.

In this article, I use the word “treat” liberally – some of these treats you can give them every day (and probably should), while others are a “once in a while” treat.

Homemade chicken treats are super simple with these chicken treats DIY ideas. Your hens will come running!

Bugs from the garden

I get a lot of questions about bugs and chickens. What’s this bug? Can my hen eat it?

While I’m not a bug expert, I regularly collect grubs, worms, and whatever tasty (to a chicken) goodies I find when working in the garden.

Lots of protein makes nice eggs!

Grubs and plant-munching caterpillars are favorites in my flock.

I do try to avoid giving them worms from the garden because I want the worms for my soil, but occasionally one does slip through to them.

My hen, Floppy Head (so named because her comb flops over) is partial to a big clump of dirt (for example, when I’ve begun to dig up a new bed) because she can dig and scratch through for whatever goodies she can find.

Floppy Head is a rescue from a big-industry chicken farm, so I like to think the hen is having the time of her life, for the first time in her life.

Give your chickens any bugs you find, and know you’re helping them do their job. To us, they’re gross bugs, but to a chicken they’re a tasty treat!


Sunflower seeds

Sunflower seeds are a great treat to give your chickens, since they’re high in protein. This year, we’re growing a large garden of sunflowers so we can grow seeds for our chickens.

We have about a half-acre plot in front of a wooded area that we’re devoting to sunflowers, and I can’t wait to get started. We’re focusing on black oil sunflower seeds since we can also make cooking oil from them.

For now, until the seeds come in, we buy sunflower seeds from a feed store, and our chickens thank us with crazy and amusing antics.

Egg shells

Egg shells should be a regular part of your hens’ diet because of their calcium content.

When I started giving my big-industry rescue hen, Floppy Head, the extra boost in calcium, she started laying regularly again.

If you want to see hens riot, come to my place when I give them eggshells. Between Floppy Head and Big Red, I pretty much need riot gear.

Even the young roosters get in on it (though my rooster, Leedle, could hardly be expected to act so undignified).

I can’t tell you why they love them so much, but I love that the calcium in the shells makes good eggs with strong shells!

Scrambled Eggs

It seems backwards (and I’ve gotten a couple emails from people who’ve wondered if giving a hen eggs to eat is cannibalism), but eggs are a treat my chickens love. 

You can give them eggs alone, or include the shells along with the scrambled eggs. Your chickens can pick through to eat whichever they want.

When my chickens see I have eggs for them, they come running (I’ve even gotten bit a few times by an over eager hen or two!)

Mealworms

Just like bugs, my chickens go nuts for mealworms. You can feed them mealworms that are either dried or alive.

There’s folks out there with mealworm farms, and they’re easy to start and maintain, requiring little work. Mealworms eat oatmeal and vegetables, such as carrots.

You don’t need much room to start a mealworm farm, making it an easy choice for suburban homesteads that want to be a little more self-sufficient.

Your neighbors will never know there’s mealworms in plastic bin. I won’t tell. I promise.

Watermelon

It’s not quite watermelon this season, but this summer, consider giving your girls half a watermelon to pick at. Some chickens don’t do well in heat, so a watermelon is a good way to avoid overheating.

They’ll love it, and the watermelon juice will keep them hydrated and busy.

If you have chickens that live in an enclosed area, I’m sure boredom can be a factor, and something like a watermelon can deter boredom (and picking on each other).

I used to have a hen that didn’t do so well in the heat, and watermelon cheered her up!


Is there something you feed your chickens that they go wild over? Leave me a comment!

Chicken frostbite is something that can happen to the best of them. Of course, we want to avoid it, but it’s not always possible. Learn how to prevent it, and how to care for it.

Yes, chickens can get frostbite, and yes, they can spring back from it. Every year on our farm, we have to tackle frostbite on combs, wattles, and the occasional toe.

You’d think living in the South, we wouldn’t have chickens getting injured from the chilly temperatures. It’s typically in the 30s and 40s here in the winter! It’s not very much fun, but it’s just one of those parts of chicken ownership.

And honestly, we’ve not had any chickens affected long term by it. Most of the chickens just go on about their business.

In my book Chickens: Naturally Raising A Sustainable Flock, I show you how to care for your chickens so they stay healthy, regardless of the season, and there’s detailed information about chickens, frostbite, and the cold. You can buy it on Amazon or directly from me digitally.

If your chickens free range and aren’t kept in a coop during cold temperatures, they’re even more susceptible to frostbite, so it’s important to observe them daily.

In this article, I’m going to show you what frostbite in chickens looks like, when to call the vet, and how to help chickens when they do become victims of frostbite.

The information below is for informational purposes only and isn’t meant to treat, diagnose, or cure. Use your best judgement and always seek a vet’s advice first.

Worried your chickens are suffering from frostbite? Frostbite treatment is easy when you can spot it. Here's what you need to know.

What Exactly is Frostbite?

In case you’re not 100% sure what it is, here’s a working definition of frostbite (chickens, humans, etc) from Wikipedia:

Frostbite is when exposure to low temperatures causes freezing of the skin or other tissues. The underlying mechanism involves injury from ice crystals and blood clots in small blood vessels following thawing.”

It’s hard to give an exact temperature when frostbite is an issue for chickens. That is just going to depend. In our area, it’s very cold temperatures of below 20 degrees where we’ve had the most trouble.

Moisture

With chicken frostbite, there’s an extra quirk. It’s not just about cold temperatures.

Unlike conditions like hypothermia, frostbite occurs not just when temperatures are very low, but more often when there are cold temperatures plus moisture.

Yep, good ol’ moisture. Those extra bits of water droplets freeze on the skin, causing more damage than cold temps alone.

Which means that when our chickens drink water (aka dunk their wattles in the water), and can’t get dry (or run away when we try to help them dry), their tiny bodies are more susceptible to frostbite.

Chicken Frostbite Symptoms

The first thing to remember about frostbite and chickens is the condition doesn’t always present in a dramatic way. It might just be a spot here or there on the comb, rather than effecting the entire area. 

And it can also be extreme, with blackened areas that have clearly gone necrotic.

Symptoms of chicken frostbite include:

  • Dark or blackened areas on the comb, wattles, or feet
  • Swelling
  • Blisters
  • Limping
  • Lying down/not wanting to stand

It’s easy to confuse frostbite with fowl pox since they can look similar to blackened areas, but it’s important to also consider the season and other possible causes.

Chickens are unlikely to get frostbite in the summer (obviously). Fowl pox, which also affects the combs and wattles, looks more raised and scabby. You can see photos of fowlpox right here. It’s also possible to confuse frostbite with bumblefoot since both can cause the pads of the feet to swell.

While there are varying degrees of frostbite, what I’ve observed in chickens is that their skin will turn either white or black (depending on severity), and in extreme cases turn black, harden, and start to curl.

Worried your chickens are suffering from frostbite? Frostbite treatment is easy when you can spot it. Here's what you need to know.

At the point of hardening and curling, it’s likely the skin on your chickens’ combs and/or wattles has died (confirm this with a vet, however).

Toes and feet are relatively rare victims of cold weather here, although, in other areas of the USA, it’s a frequent occurrence. (If toes or feet are involved, you can follow the procedures below.)

Just remember that if this happens to your chickens, it’s not the end of their lives unless it goes untreated.

In nearly all of the cases of frostbite we’ve had on our farm, it’s been mild enough that the skin returns to normal and the chickens are perfectly fine, although it can take a while for the skin to return completely back to normal – it’s been damaged after all!

Preventing Chicken Frostbite

First, let’s talk about chicken frostbite prevention because it’s relatively easy as long as you can catch your chickens. Obviously, there are cold hardy breeds that you have to worry about less. Also, the climate you live in will make or break the risk. Regardless of the various factors, these tips will make your flock more comfortable and less likely to have a problem.

Petroleum Jelly

Petroleum jelly is approved by the Food And Drug Administration as a skin protectant, and that’s because – you guessed it – it protects skin.

Basically, it acts as a barrier between your chickens’ body and the cold and/or wind. If your chickens drink, it will help keep water off their wattles, which also helps prevent frostbite.

We apply it when we get cold snaps, and daily until the temperatures rise.

Shelter

Keeping your chickens inside on particularly cold days or chilly, wet days will reduce the chances your chickens will suffer from frostbite. It’s generally a good idea anyway since freezing rain and wind chill can kill your chickens.

Keeping chickens inside a coop with no drafts can be the difference you need. Do keep in mind that chickens need ventilation, even in freezing cold weather due to ammonia buildup. But you don’t want cold drafts.

Waterer

If your flock keeps getting frostbite because they dunk their wattles in water, then you can change to a different type of waterer, or raise their water dishes off the ground.

A small change as simple as this can make a world of difference.

Insulation

You can put straw on the ground in their coop and run, which is a great insulator. This will not only help keep their feet warmer, it will help the overall warmth of the coop.

Also, if you use the deep-litter method, your coop will naturally be warmer. If you want to learn more about the deep litter method, go here.

Worried your chickens are suffering from frostbite? Frostbite treatment is easy when you can spot it. Here's what you need to know.

Chicken Frostbite Care

This is what we do on our farm. Use your best judgment to determine what’s best for your flock.

To help chickens affected by frostbite, first identify the area(s) of concern (combs, wattles, limbs, etc).

It’s important not to warm them too quickly (which can cause nerve damage), so bring your chickens inside and allow them to get warm up.

For combs and wattles, you can apply warm water with a cloth until you see circulation return and the area feels warm or “normal.” For feet, you can place them in the lukewarm water until you see circulation return.

Apply an antibacterial ointment (natural or pharmaceutical) to help the skin become healthy and ward off infections.

Place them in a crate in a quiet area with a towel, food, and water, and keep them inside until the very cold has passed or your chickens seem back to normal.

For severe cases (an infection or need to lose a limb from frostbite damage) you should consult with a veterinarian who can advise you. They will likely know whether the affected area should be removed (even a vet inexperienced with chickens can advise you best.) They can also determine if your hen or rooster needs medication, such as antibiotics.

Summary

Frostbite stinks. But, it is something you just might have to deal with. Remember the prevention tips first. After that, you now have some information that can help you care for any flock members that fall prey to frostbite. None of it is complicated, it’s just knowing what to do.

In my book Chickens: Naturally Raising A Sustainable Flock, I show you how to care for your hens so they stay healthy, regardless of the season, and there’s detailed information about chickens, frostbite, and the cold. You can get your copy here.

Addtional Reading

Ready to start your garden, and wondering when to start seeds indoors under lights?

Well, I got answers for you. And it won’t even cost you a dime.

This article is an excerpt from my best selling book, Organic By  Choice: The (Secret) Rebel’s Guide To Backyard Gardening. You can buy it on Amazon or directly from me (saves 20%, shipping is included, and get the digital version free).

When you start seeds indoors, it’s an effective and affordable way to get a good variety of plants budding in your garden.

Yes, you can buy starts, and sometimes, I even do that, especially with the more difficult to germinate varieties (looking at you, cauliflower.).

Indoor seed starting gives you a wide range of possibilities on how and what to grow, and knowing the basics and when to start seeds indoors will allow you to harvest organic crops earlier in the spring and into all summer long.

How to know when to start seeds indoors

Remember that when you’re planning to start seeds indoors, timing is everything.

It’s easy when all your seeds come in the mail and you’re still being bombarded with catalogues to feel like you have to get everything done ASAP.

Breathe. Pace yourself.

Keep a “when to start seeds indoors chart” handy and make a schedule and try to tackle just a couple tasks a day so you avoid feeling rushed (more on this below). 

A “when to start seeds indoors chart” will help you count back from your last expected frost date the indicated number of weeks growth is required for that particular seed before moving it outdoors.

Review your garden layout plans (if you haven’t done that, here’s my square foot gardening layout article) and have the right equipment handy.

square foot gardening plant spacing

Specifically, plan out the seeds that you’re trying to grow and what part of your garden you’ll grow them. Most seed companies include basic growing information on their packet labels.

Keep in mind that weather is unpredictable so “when to start seeds indoors” guides on your packets are just an approximate.

Review the “when to start seeds indoors chart” below for general guidance and Organic By Choice for specific guidance about the best time to start seeds in your area.

Some common dates for when to start seeds indoors

11 weeks before last frost date: Early greens like lettuce, spinach, mustard, collards, and kale. See my article “What seeds can you start in January?”

10 weeks: Herbs like basil and oregano, broccoli, onions, early greens

9 weeks: Pepper, onions, shallots, tomatoes, shallots

8 weeks: Peppers, tomatoes, leaf lettuce, cabbage

7 weeks: Lettuce, radicchio

6 weeks: All the above plus delicate herbs like calendula, thyme, and lemon balm

5 weeks: Tomatoes, melons, cucumber, squash

If you want a full chart plus expert growing tips, there’s a full encyclopedia in my book, Organic By Choice.

Additional tips to start seeds indoors with success

Find the right container

There are plenty of seed growing containers out there, such as peat pots, seedling flats, and even egg cartons.

You can still get a great harvest even if you're growing a garden in small spaces!

Pretty much, you can use anything as long as it can contain the growing medium for at least 2-3 inches deep, depending on the vegetable variety. (Don’t forget to poke some drainage holes and label them.)

However, the key is finding the right size container. For example, you’ll probably need a large growing container for lettuce, especially if you start it in January and plan to put it in your garden in April.

Take a look at your plants and decide how long they’ll be in pots indoors. This is an indicator of how big the growing pot should be.

square foot gardening plant spacing

Use an effective growing medium

A good seed-starting mix must be fresh and sterile with a light and fluffy texture (I show you how to make an organic seed mix in Organic By Choice.).

This allows the medium to hold enough moisture to aid in germination. You can choose to buy commercial bagged mixes, coconut husk fibers, or compressed pellets of peat that expand when wet.

Provide adequate light

It is important to make sure that your seedlings get the right amount of sunlight to grow after they germinate.

Window sills often cannot provide enough light for seeds, so most gardeners use artificial lighting for starting seeds indoors under lights.

You can also use plant lights with a timer system.

square foot gardening plant spacing

Five Steps To Start Seeds Indoors

There are five easy steps to start your seeds indoors and move them to the garden to grow fully.

Use an organic seed-starter mix

You can use a commercial starter mix, or make your own (you can read more about how to do this in Organic by Choice).

Remember that at this stage, you won’t need any compost (in fact, it can make things a bit difficult if it makes the soil very heavy).

Everything that your new babies need to grow is already in the seeds.

square foot gardening plant spacing

Know how deep you need to plant your seeds

Your seed packet will indicate when to start seeds indoors, but they might skip how DEEP to plant the seeds.

The rule of thumb is to plant seeds twice as deep as they are long. This works great for squash, cucumbers, etc, but what about tiny seeds like lettuce?

I tend to broadcast these seeds then thin because it’s faster and less eye strain (those seeds are TINY!).

If you’re braver than I am, you can plant 2-3 seeds and then thin. Similarly, plant 2-3 tomato seeds and then thin when the second set of leaves emerges so just the strongest seedling remains.

It’s best to moisten the potting soil before planting seeds so they’re not dislodged and disturbed.

Water seedlings only to keep the soil moist and not soggy

One favorite trick I use is to wait for the soil to slightly dry up in between watering sessions. A wet environment invites disease.

Feed with warmth and sun

As indicated above, using a light to start your seedlings and keep them going is a good idea. While seeds don’t need light to germinate, they do need warmth.

The trick is not each vegetable variety requires the same amount of warmth. They like to keep us on our toes.

For example, spinach won’t start if the soil temperature is over 70 degrees, but tomatoes won’t germinate if the soil temp us UNDER 70 degrees. Knowing the warmth needed to germinate is really important (and something I show you in detail in Organic By Choice).

As for light, you can use artificial light for starting seeds indoors under lights, or choose a south facing location.

Hardening off

Once you’ve managed to start seeds indoors, you’ll eventually want to put them outside in your garden. You can’t just slap them outside, or they’ll go into shock (especially if one day it’s 40 degrees, the next 70, and the next 40 again).

No vegetable has time for that.

Gradually transitioning your seed start to the outdoor weather is key.  

Knowing when when to start seeds indoors isn’t difficult, and following these steps, you’ll have more success starting an organic garden full of healthy vegetables!

square foot gardening plant spacing

Getting started with gardening this year? Feeling overwhelmed? (Or just want to get it right the first time?) You need help in choosing the right organic gardening supplies.

You can choose to grow organic for life and you can start today.

With the right tools, gardening becomes easy, enjoyable, and successful. Let’s do a quick rundown of the most basic organic farming supplies you need to have.

Basic Organic Gardening Supplies 

These organic gardening supplies make organic gardening for beginners super simple. Here's what every woman should have on hand when growing vegetables!

  1.    Classic Organic Gardening Tools

In planning every garden, you need to have the basic supplies to be able to fill your pots, till the soil, and maintain the growth of your crops.

Must have gear includes tillers, rakes, hoes (not that kind…the kind that help dig out naughty weeds that have sprung up where they shouldn’t).

When looking for rakes and hoes, be sure they’re the right height for you. I’ve purchased some supplies in the past that were too short; I ended up hunching over. Not fun.

  1. Apparel

You don’t want to get sunburned trying to grow fresh tomatoes or bummed because your toes are soaking wet, do you?

Essential organic gardening supplies include a hat and waterproof boots. Muck boots are great to keep your socks from getting soaked, and a hat will not only provide shade for your eyes, it’ll also catch sweat and keep you cooler when the temperature rises.

Gloves are another organic gardening supplies must-have. After a while, you’ll start to get blisters. Definitely not fun!

Any gloves you buy should be comfortable to wear and not rub you anywhere. These are your protection against cuts, blisters, prickers, and sunburns.

  1.    Pots & Other Containers

Some crops need a little extra time or babying before they can be transplanted. Pots are one of those organic gardening supplies you should always have on hand.

If you plan to grow herbs, then putting them in pots is a good idea; you can put them out when the weather is better (a lot of herbs are heat-loving) and bring them inside so you can still enjoy them when the weather turns cool again.

  1.    Starter Mixes

Starter mixes are part of the organic gardening supplies you need for seed starting. The nutrients support healthy seedling growth, and the right starter mix can make or break you.

You can also make your own starter mix (there’s a great recipe in my book, Organic By Choice: The (Secret) Rebel’s Guide To Backyard Gardening.)

  1.    Heat Mats

Successful gardening starts with successful germination. Any kind of vegetable seed will only take root when the soil temperature remains within that particular plant’s requirement. Some will need more warmth and in such cases, you should use a seedling heat mat.

  1.    Compost

If you want to grow organic for life, you need to fertilize your soil. The easiest and least expensive (and pretty much the best) way to do that is with compost.

It’s one of those must-have supplies, and you can either buy compost from a reliable supplier who you trust or make your own.

  1.    Row covers

As your organic garden grows, you need to provide extra care for your seedlings, especially in the early spring when your plants deal with a lot of temperature and weather changes. The plants are also at risk of being destroyed by pesky insects and animals.

Row covers will protect them, keep pests at bay, and overall are one of the best tools you can use to protect your babies from harsh conditions. Look for supplies from brands that feature UV resistant material with screened ventilation.

  1.    Netting

Nets act as temporary fences to protect your plants from thieving pests and other destructive elements. Deer or rabbits, for example, might try to snack on your young, tender, vegetable plants.

Netting will keep them away and snacking on something else. Keep calm and protect thy plants!

  1.    Twine

Garden twine help keep things under control in your garden, particularly tomato plants, if you plant to stake them (I didn’t do that last year trying to save a buck on cages. Very bad idea – my garden was a mess of tomato vines come August). Hemp twine is a good, all-natural twine.

  1.   Burlap

Something else to keep on hand, that most people overlook, is burlap. It can be used to wrap your plants (VERY handy if you need a quick row cover when the temperature suddenly drops), protect and screen your plants from harmful pests, prevent soil erosion, germinate seeds (great for lettuce and carrot seeds), among other ideas.

It is inexpensive and biodegradable, perfect to lay in your garden bed anytime.

  1.   Organic Insect Sprays

— And sprayers, of course. Experts say that what you spray and how you spray it creates a big difference in the outcome of your garden. Insecticides and herbicides should come from safe and natural ingredients. Look for high-quality garden sprays for better performance and good results.

You can learn how to make your own organic insect sprays in my book, Organic By Choice: The (Secret) Rebel’s Guide To Backyard Gardening.

  1.   Moisture Meter

Nothing is worse than either overwatering or underwatering your plants. These risks can be avoided with supplies like a moisture meter. It is one of the powerful gardening tools that measure the water in plants at the root level.

This list should give you the perfect head start in growing your first garden. The next you can do is to look for brand-specific organic gardening supplies that will match your expectations and budget. If you have other great gardening tools and tips that you can share, we encourage you to share them to help fellow gardeners to start going organic today!