With it getting hotter, I wanted to show you a DIY automatic chicken waterer we made right on the homestead.
It cost us under $5 to make, but it solves so many problems on the farm. The last thing we want is for our animals to be thirsty or get heat stroke, and this DIY automatic chicken waterer prevents health issues.
Here’s a step-by-step video, and there’s also directions below.
The chickens love that it makes water available all day, and I love that it’s close to the ground and shallow enough that chicks won’t drown in it (unless their seriously committed).
It’s easy to disassemble and clean and because it’s made of plastic and rubber, it’s easy to sanitize.
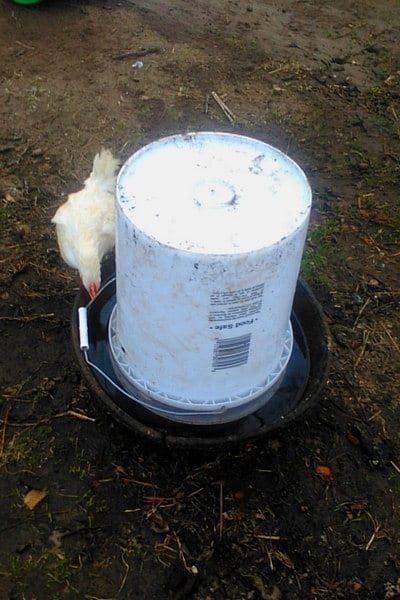
Here’s the DIY automatic chicken waterer we made:
You can use galvanized steel instead of rubber, if you prefer.
Seriously, this took us about 5 minutes to make. Once you have the materials, it’s super simple.
What you’ll need to make this DIY waterer:
- A 5 Gallon bucket
- Plastic top that fits on the bucket
- A 1/2″ to 1″ drill bit
- Electric drill
- Ground feeder or oil pan
Here’s how to make it!
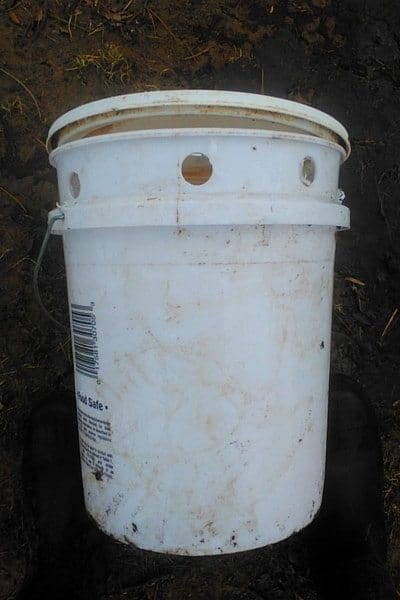
Start with a 5 gallon bucket
We found one at our local big box store, but you can buy it on Amazon as well.
The most important part of choosing a bucket is to make sure it’s food grade, since your chickens will drink from the DIY automatic chicken waterer.
How do you tell if it’s made of food grade plastic? If it has a 2 and the HDPE designation, it’s safe for food.

If you do use a bucket that’s been hanging around, either clean it with bleach or avoid making a DIY waterer with it altogether if you don’t know what’s been in it.
Our bucket was brand new and cleaned with bleach when we brought it home.
Drill holes in the bucket
We got a 1″ drill but for about $3.
With the bit, drill evenly-spaced holes as close to the top of the bucket as possible – it’s these holes that will create the automatic part of your DIY chicken waterer.
If you don’t have the right drill bit, here’s what we use:
You want to DIY holes so they’ll be large enough to let out enough water, but not so large that the water will come gushing out and all over the place.
Drill a hole in the top
We were able to source a bucket top for our DIY waterer at our local big box store.
Once you’ve drilled holes in the 5 gallon bucket, drill a 1″ hole in the top.
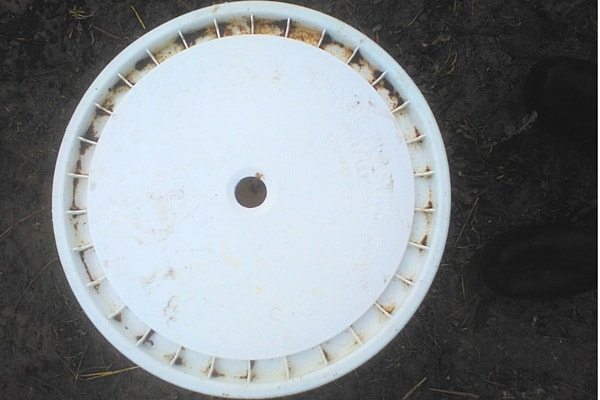
Secure the top to the bucket by snapping it into place.
This forms an air-tight seal when under water so the pan refills only when the water level has sunk low enough.
Get a ground feeder or oil pan
We used an old ground feeder for horses that we had lying around, which made this project super cheap, since we just had to buy the bucket and top.
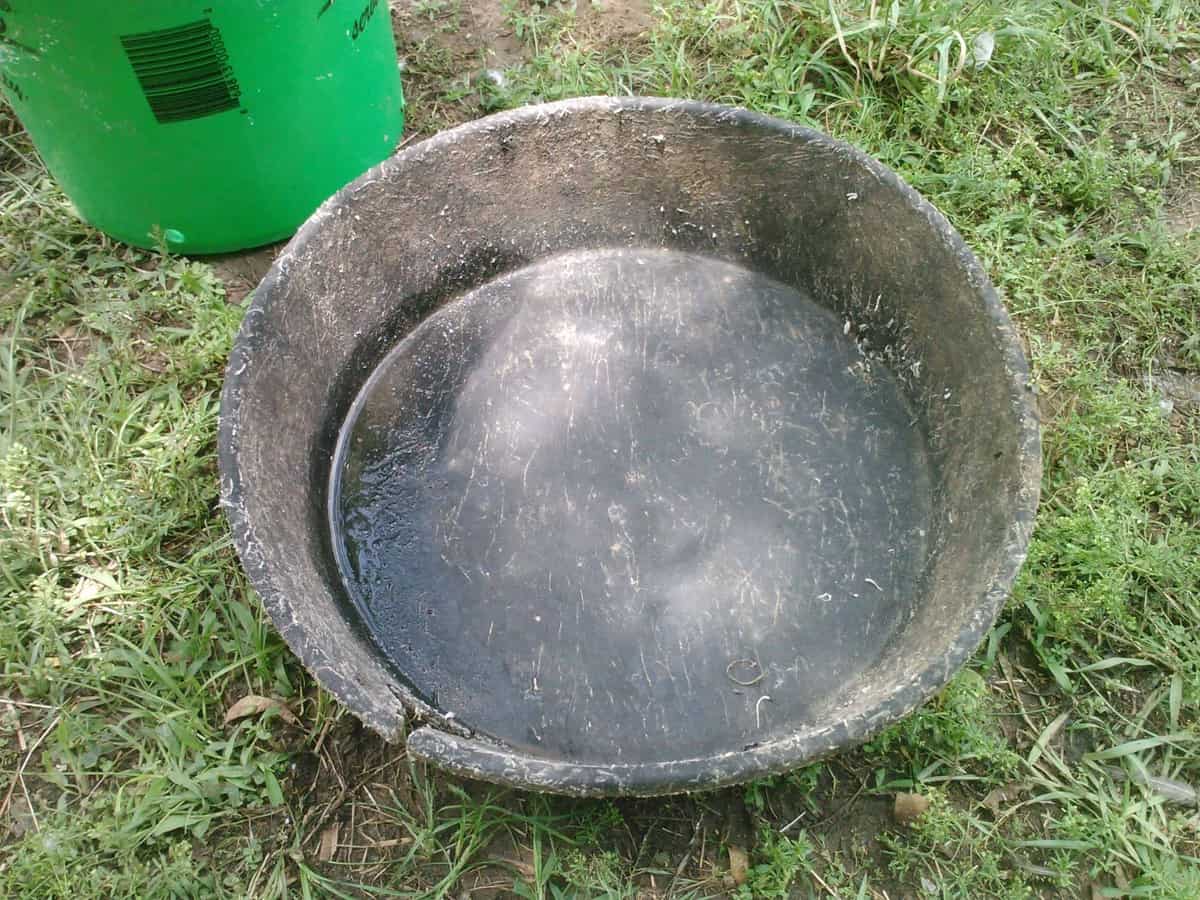
Ours is rubber, but a galvanized steel one will work well since it also will be easy to clean.
Whatever you use, the water line must be able to rise higher than the holes you drilled in the 5 gallon bucket when it’s inverted and placed into the ground feeder.
Here’s the rubber one we use (and next to it is the steel one, if you prefer):
Fill the bucket with water
Through the 1″ hole, fill the bucket with water.
After the bucket is full, quickly flip it upside down and place it into the ground feeder or oil pan.
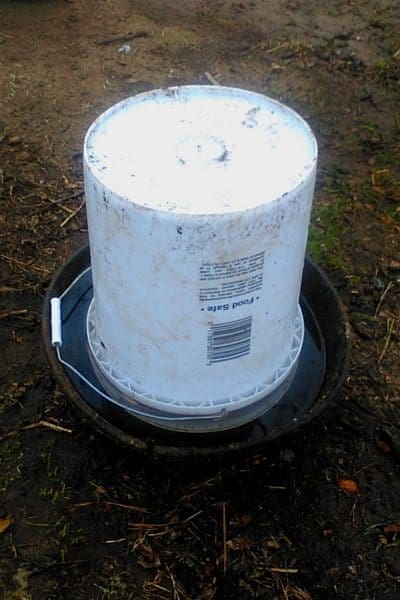
The ground feeder will fill up with water, and should stop filling once the water line exceeds the holes in the 5 gallon bucket.
Anytime your flock drinks down the water, the bucket will automatically fill.
Doesn’t get much easier than that, and our flock loves to drink water from it!
Have the DIY waterer mastered? How about trying a DIY automatic chicken feeder?
I’d like to hear from you!
Would this DIY automatic chicken waterer work for your flock? Why or why not? Email me at [email protected] or comment below!

Maat van Uitert is a backyard chicken and sustainable living expert. She is also the author of Chickens: Naturally Raising A Sustainable Flock, which was a best seller in it’s Amazon category. Maat has been featured on NBC, CBS, AOL Finance, Community Chickens, the Huffington Post, Chickens magazine, Backyard Poultry, and Countryside Magazine. She lives on her farm in Southeast Missouri with her husband, two children, and about a million chickens and ducks. You can follow Maat on Facebook here and Instagram here.


This is great, and not just for the chickens. I can see this being good for several animals.
Thanks for sharing.
Glad you like it! Which animals will you use it with? My goats love it!
Sometimes, like this for example, the simplest projects are the best! thanks for this idea
Even out in the run mine would perch on the edge of the bucket and poop inside, so a lid is a must.
Any ideas on one for ducks? They dirty the water so fast
My chicks are always filling up my water containers with “scratch” . Seems they are on a mission to clog it up. I have resorted to putting the waterer up on a brick to try to keep it free flowing. I will try to get this set up this weekend. More water is always better
Glad you like the idea. I think a lot of people have to put their waterers either on a brick or hang it from the roof. When we kept our chicks inside over the winter it was almost impossible to keep the waterers clean – I know your pain!
I just made it my chickens AND ducks are drinking out if it I put it in bricks put a lid on it and put a hole in the top for the hose to go in ! Thank you it was easy!!!
A really simple one to make for ducks as well if your having issues with them dirty in the water is to drill a few holes in the bottom of the bucket and install poultry nipples and then silicone the outside then hang. Ducks catch right on how to use it.
This is clever! I wonder if this would work with a smaller bucket/pan. My teeny tiny quail would drown for sure if I made one this size. Also, they are living in a rabbit hutch and I’m not sure the wire would withstand the weight of the five gallon bucket.
Hi – yes, it would work. you can use smaller buckets and as long as it created that air tight seal, it will work. With quail, though, the mason jar waterers are pretty cost effective.
If you have a Firehouse Subs nearby you can get a pretty red pickle bucket with a lid for 2 dollars.
I made several feeders similar to this. I drilled the holes in the bottom of the pail and a bit closer together, bolted the pan to the bottom of the pail, fill it up and let gravity do the rest. The cover keeps the chickens out of the feed. Just pop the cover off and pour more feed in to refill. Just an observation–I don’t think you would need that big or that many holes for water. One half inch hole would do the job and not spill as much water when inverting the pail.
This is a great alternative to the metal galvanised buckets that you can buy in the feed store, this would also sit nicely on a home-made lightbulb in a flat tin cookie can to keep it warm in the winter! It will be great to ensure the girls don’t run out of water in the summer And the white bucket will keep the water cool
thank you very much for this idea. I will go and dry it out. I am pretty sure I can use a plastic bowl instead of the oil pan as well.
I am using one like that now an the chickens and I love it. Thanks for all the tips.