Fluffy chicks are the best and learning how to hatch chicken eggs (and hatch eggs at home without an incubator) is a ton of fun!
Letting Mother Nature (who knows how to incubate chicken eggs perfectly) do her thing is always best, but if your hens aren’t broody (wanting to sit on eggs) or if you want to maintain a precise environment for your hatching eggs, incubating them is a good option.
If you want to know how to hatch chicken eggs without an incubator, we’ll cover that, too.

First things first. It usually takes 21 days for a chicken egg to fully incubate. A day is the full 24 hours after you put the egg in the incubator, so I write the next day’s date on the egg to remind myself what day I started incubating. So, if I put eggs in the incubator on January 18, I write 1/19 on the egg. I tend to see external pipping (when the chick starts to break the egg) on day 19, but it can take up to 28 days in some cases. (Full disclosure: I’ve never personally had an egg take that long to hatch but it reportedly happens on occasion). I use a Little Giant Still Air incubator that I bought locally for about $50. I’ve had a good hatch rate with it, it’s easy to figure out, and it’s a great starter incubator. It’s important to run it for 24 hours before you put eggs in to ensure the temperature is correct and stays steady.

1. Choosing eggs to incubate. Don’t incubate eggs older than 10 days, and eggs no older than 7 days are best. If you come across a bunch of eggs you’re not sure about, and want a test, put the egg gently in water and do an egg float test.
If you’re saving eggs for a few days before putting them in the incubator, store them at room temperature. I use an old egg carton, and I store them pointy side down. This is to protect the air bubble at the fat end. More on that later.
Do not refrigerate them. (note: if it’s winter, the sooner you gather the eggs the better, but if they’re cold for a couple hours, it’s ok. Bring them back to room temp before incubating). Put only unbroken eggs in your incubator.
You can make sure they don’t have any cracks by candling them before you put them in the incubator. (If you’re wondering how to hatch eggs from the grocery store, you can’t because they’re not fertile. If you don’t have any chickens, or if you don’t have a rooster, you can check out Craigslist and see if anyone’s selling hatching eggs near you).
(Hint: Keep small hands away from the incubator! While this might seem intuitive, if you’re an obsessive temperature and humidity checker like me, you can inadvertently place the incubator in a place where children can get inside. And you might just find an omelette on your floor. Not fun for anyone (ok maybe for your kids).
2. Maintain a temperature between 100°-102° with a still air incubator and 99-99.5 with a forced air incubator. Your goal is to keep the temperature inside the egg as close to 99.5° as possible. Since you can’t actually take the temperature inside the egg, the best you can do is maintain a slightly higher temp outside the egg.
I’ll admit it. Occasionally I’ve let the incubator get too hot, especially when I was first starting out. It got as high as 113° one day while I was out running errands, and I swore I killed all the chicks. I had an 80% hatch rate, which means I’m either incredibly lucky or small, short changes in temperature do not necessarily mean disaster. By all means, keep your temperature between 100°-102°, but if the worse happens, don’t panic and assume all is lost.

3. Keep your humidity between 40-50% days 1-18, then increase to 50%-60% on days 18-21. Humidity is important, especially in the last days of incubation. If the humidity is too low, you run the chance of your chicks getting “shrink-wrapped”, and unable to break out of the egg. The last thing anyone wants is to get super excited for hatch day, only to have fewer eggs hatch because the chicks died. I keep a digital thermometer in the incubator that measures both temperature and humidity. It’s been a lifesaver (literally) and it keeps me from guessing. I try to adjust the temperature by opening and closing the vents instead of turning the dial. It’s a slower and less dramatic change.
4. Turn your eggs at least 3 times a day from days 1-18, then don’t turn them at all on days 18-21. Turning your eggs an odd number of times each day is important for embryo development. In nature, a hen turns her eggs constantly. Don’t turn your eggs after day 18 – let the chick orient itself to break the shell and hatch. Remember the air bubble I mentioned? When the chick is being born, it “pips” (breaks) into that air bubble, then pips into the external world. To help the chick hatch, keep the incubator shut (we call this time “lockdown”) and don’t open it unless necessary.
5. Candle your eggs starting on day 7. If you have darker eggs, you might have to wait until day 10, but you definitely want to candle them at some point. Candling an egg just means looking at the inside by shining a light through the egg. You should see veins and eventually a chick moving in there (which is the coolest thing ever, aside from seeing a human in the womb). If by day 10, you only see the yolk (looks like a shadow and the rest of the egg clear), then the egg either wasn’t fertile or the embryo never developed. Eggs that don’t develop need to be removed.

6. Once they’re born, move the chicks to the brooder. Congrats! You made it to day 21, and now you have baby chicks. You can leave chicks in the incubator up to 3 days. When you move them to the brooder (I do it the day after they’re born, once they can stand and walk ok), make sure your brooder is at least 95° but not too hot or the chicks will overheat (you’ll know if they start panting). I usually keep mine 95° – 100°.
Newborn chicks have a harder time regulating their own temperature, so I keep a thermometer in the brooder too. I use straw in my brooder because we have it on hand. Some people use wood chips; if you use wood chips, use larger ones so the chicks don’t try to eat the finer shavings.
We love and recommend this chick starter (below) because our chicks love it and we love the extra herbs mixed in:
- OUR MOST POPULAR CHICK STARTER!
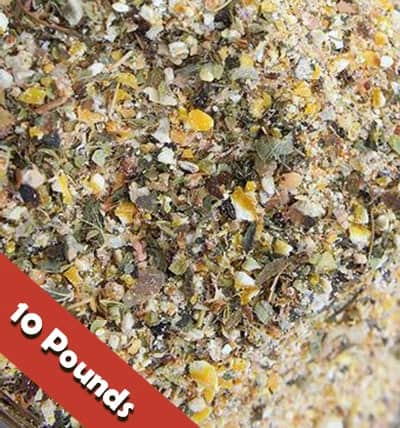 $26.99Herbal Non-GMO Chick Starter & Grower Feed With Oregano & Garlic10 POUNDS✔️ 18% PROTEIN SUPPORTS GROWING CHICKS✔️ EASY TO RAISE HEALTHY LAYERS✔️ 24 HOUR ACCESS TO BENEFICIAL HERBS LIKE OREGANO & GARLIC✔️ CHICKS LOVE IT!

7. Give your chicks a probiotic in their water. I used to think probiotics were a useless trend, but after losing some newborn chicks inexplicably, I gave them a try on a friend’s recommendation, and every one since (knock on wood) has been very healthy. All you do is add it to their water, and I heavily recommend them. The probiotics help establish good gut flora and aid in helping the chicks poop correctly, and avoid pasty butt (pasty butt is when a chick’s feces dry and cover their vent, and they’re no longer able to poop correctly). Pasty butt is a #1 killer of newborn chicks.
What if you’re off-grid? If you’re interested in how to incubate chicken eggs with a heat lamp, or how to hatch eggs at home without an incubator, or how to incubate chicken eggs without electricity, for example if you’re off-grid, as long as the temperature in the incubator is at these levels, you’re doing ok. Make sure whatever you’re using as an incubator is able to consistently maintain these temperatures. Newspaper makes a good insulator, as do styrofoam ice coolers (that you buy at the grocery store). The styrofoam will be less of a fire hazard and easier to maintain the temperature. You will also need a cover for your homemade incubator, as well as a way to turn the eggs easily without disrupting the temperature or humidity.
You can always let the hen incubate the eggs for you if you’re off grid. Silkies are a good choice, since the breed tends to go broody.
If you want to improve the quality of your chicken eggs for hatching, give the girls a calcium supplement, such as crushed egg shells (mine go NUTS for these) or oyster shells. The added calcium increases the strength of the shells.
Hatching eggs really is that easy! If all your eggs don’t hatch, don’t worry. A 80% hatch rate is normal, and if your first hatch yields a 50% hatch rate, you’re doing great! Have fun, watching the chicks grow up is a blast!
Want to see a chick being born? Check out my video! http://youtu.be/dg5nXWU0n9k
Maat van Uitert is a backyard chicken and sustainable living expert. She is also the author of Chickens: Naturally Raising A Sustainable Flock, which was a best seller in it’s Amazon category. Maat has been featured on NBC, CBS, AOL Finance, Community Chickens, the Huffington Post, Chickens magazine, Backyard Poultry, and Countryside Magazine. She lives on her farm in Southeast Missouri with her husband, two children, and about a million chickens and ducks. You can follow Maat on Facebook here and Instagram here.


Great timing as we are getting ready to hatch some eggs this year. One quick question/correction…. you said fresh eggs float and bad eggs sink…. I think you might have typed that backwards. Thanks for sharing at the (mis)Adventures Mondays Blog Hop. I can’t wait to see what you share this week!
Thanks! You’re right, I did get it backwards. It gets hard to write here sometimes without distractions! We’re working on an office space, where I can write without my husband constantly poking me in the ribs with some question. 🙂
This was very well worded and explained the process fantastically. Thank you. I won’t be able to have chicken for a while but I aim to learn as much as I can as soon as possible
Congratulate yourself on a job well done. Assist hatching can be a scary experience the first few times. I still get the shakes while doing it. But, it’s is also rewarding, especially during the times when without assistance the chick would have died. The rewards of assisting such a tiny fragile life that ‘might have’ otherwise been lost far exceed the risks.
Have you ever use Hova Incubator?
Hi, I haven’t used that brand, but I hear good things about it!
So amazing! i wanna be use right now. Let me learning more that