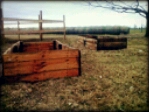
Get out the compost and make those raised beds, because spring is almost here.
My raised beds are ready for dirt and compost!
I’m starting my tomato and squash seedlings indoors, and even starting some crops outside (potatoes, anyone?). Now, before you think I’m jumping the gun, here’s the thing about me.
I love kale, and I’m not afraid to say it.
Mix it with some homemade butter and straight-from-the-garden garlic, and I’m set. I start growing it as soon as I possibly can.
I can even get my husband to eat it on occasion.
Getting your garden started? Want to reap a better harvest?
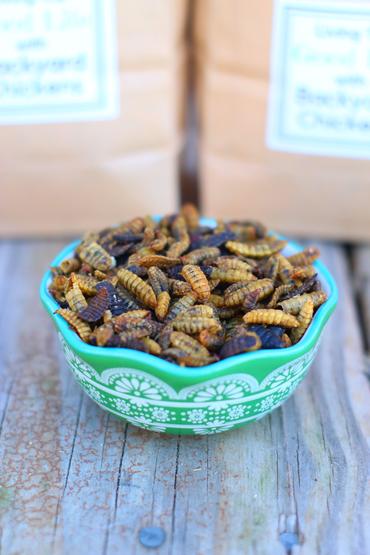
I’ve never been a big fan of radishes and arugula, but I’m starting them soon for the animals, with the hope it will even further reduce our grain expenditures.
I’m starting to get the winter blues, so focusing on spring is helping me beat them. And I’m increasing my self-sufficiency at the same time!
Here’s a starter guide to the crops you can grow in early spring, for both people and animals.
The most important thing I’m doing at this stage (aside from planting!) is using mulch to cover the garden. The last thing I want is late-winter scavengers to snap up the seeds I spent so much time planting!
Arugula – Sow in the garden as soon as your soil can be worked. They’ll germinate in about 7 days, and ready to harvest in about a month.
For a continual supply, succession plant every 2 weeks until high temps will cause the arugula to bolt.
Beets – Sow seeds in early spring as soon as the soil can be worked. Plant in well-drained, sandy soil. Avoid high nitrogen fertilizers as this will encourage top growth at the expense of root development.
Aerate your soil for uniform, healthy development. Keep consistently moist. Mulch to suppress weeds.
Broccoli – Sow broccoli directly in the garden 4 weeks before your last frost date. You can set out transplants 2 weeks before the last frost date when day time temperatures are between 65 and 80 degrees.
Give your plants a boost 3 weeks after transplanting.
Cabbage – Sauerkraut anyone? Direct sow in the garden immediately after your last frost date, or plant transplants in the garden 2 weeks before your last front date.
Start seeds 6 to 8 weeks indoors before your last front date. Cabbage plants require soil rich in organic matter and consistent moisture.
Carrots – Plant seeds about 2 weeks before your last frost date. Carrots need deep, loose soil to form a strong, straight root. Keep the bed mulched to avoid competition from other plants.
Avoid forked roots by limiting nitrogen and keeping the bed stone-free. When the seedlings are about 2 inches tall, thin them so there’s 1″ to 4″ gaps between them.
You can also use alternate planting to increase your harvest and cut down on thinning. I use pre-planted seeds I created over winter to cut down on thinning.
Collards – Collard transplants can be planted 4 to 6 weeks before the last frost date in your area. Plant in fertile, well-drained soil. Soil rich in organic matter will encourage tender leaves, great for microgreens.
Kale – A favorite here! You can plant kale about 3 to 5 weeks before the last frost date. Plant in soil rich in organic matter, and cover with cold frames during hard freezes. Great for flavorful microgreens!
Kohlrabi – Put out transplants of this funky looking plant 4 weeks before your last frost date. Kohlrabi is related to the cabbage, and can be eaten in similar ways.
Mulch or use protection against severe temperatures, and the cool temps will enhance the flavor.
Lettuce – The ideal day time temps for lettuce are between 60 and 70 degrees. Lettuce is more sensitive to cold than other cool season vegetables, so be sure to cover during freezing temps.
Fertilize with a high-nitrogen fertilizer. Lettuce will grow in partial shade, and does better sheltered from the hot afternoon sun. Romaine is a favorite here (I finally steered my husband away from iceberg!)
Onions – Onions can be grown from sets, seeds, or transplants. This year I’m trying both sets and seeds.
Plant in early spring as soon as the soil is workable. Mulch to protect from hungry critters and freezing temperatures.
Peas – Direct sow in the garden 4 to 6 weeks before the last frost date in your area. They will germinate in soil temperatures as low as 40 degrees F.
Seedlings will survive a late snow and short periods of temperatures down to 25* F.
Potatoes – Plant potatoes when temps rise (if you want a permaculture indicator, plant your seed potatoes when grass begins to grow).
I cut my potatoes into 1” pieces with 2 to 3 eyes, you can also plant the whole potato. Soil should be loose, fertile and well drained. Mulch to protect from hungry critters and freezing temperatures.
Radishes – This year, I’m doing daikon, french breakfast, and regular radishes. Sow radish seeds in the garden about 4 weeks before the last frost date in your area.
They are ready to harvest as soon as they are of edible size. Succession plant for a continual supply until temps are too high. Try one more than one variety, and see which does best in your garden.
Spinach – You can transplant spinach 4 weeks before the last frost date in your area, or you can sow seeds into frozen ground. They will germinate as the soil thaws.
Transplants can be set out 4 weeks before the last frost date in your area. Spinach prefers very fertile soil, so plant in soil enriched with compost, or fertilize when the plants are about 4 inches tall.
Swiss Chard – There’s nothing better than the gorgeous colors swiss chard brings to your garden. Direct sow seeds 2 weeks before your last frost date.
Use pre-made seed tapes, or thin to 6-inches apart when seedlings are 3-inches tall. Water regularly and mulch to protect.
Tatsoi – Extremely cold hardy, tatsoi can withstand temperatures down to -15 degrees F. Tatsoi likes rich soil and plenty of moisture all through the growing season, so mulching is best.
It’s a very pretty ornamental, so consider growing it in your landscape. Space the initial planting very densely, then harvest entire plants for baby greens, but leave the final survivors to grow to maturity at about 12″ spacing.
Turnips – Plant 2 weeks before the last frost date. Any well-drained soil will do.
Consistent moisture is key for healthy root development. Although it is not necessary, the greens will be the most tender if you plant in a fertile soil.
Wheat – We’re going to try wheat for the first time this spring. Be sure to use a spring variety (winter wheat won’t produce without some hard freezes) so check that label.
Plant when the ground can be worked and after your last frost date. It’s best to use a seed drill, but if you can’t, you can broadcast the seeds and rake them into the ground, making sure to cover with hay or mulch to keep critters away.
I’d like to hear from you!
Which of these cold weather crops will you plant? Leave a comment below!
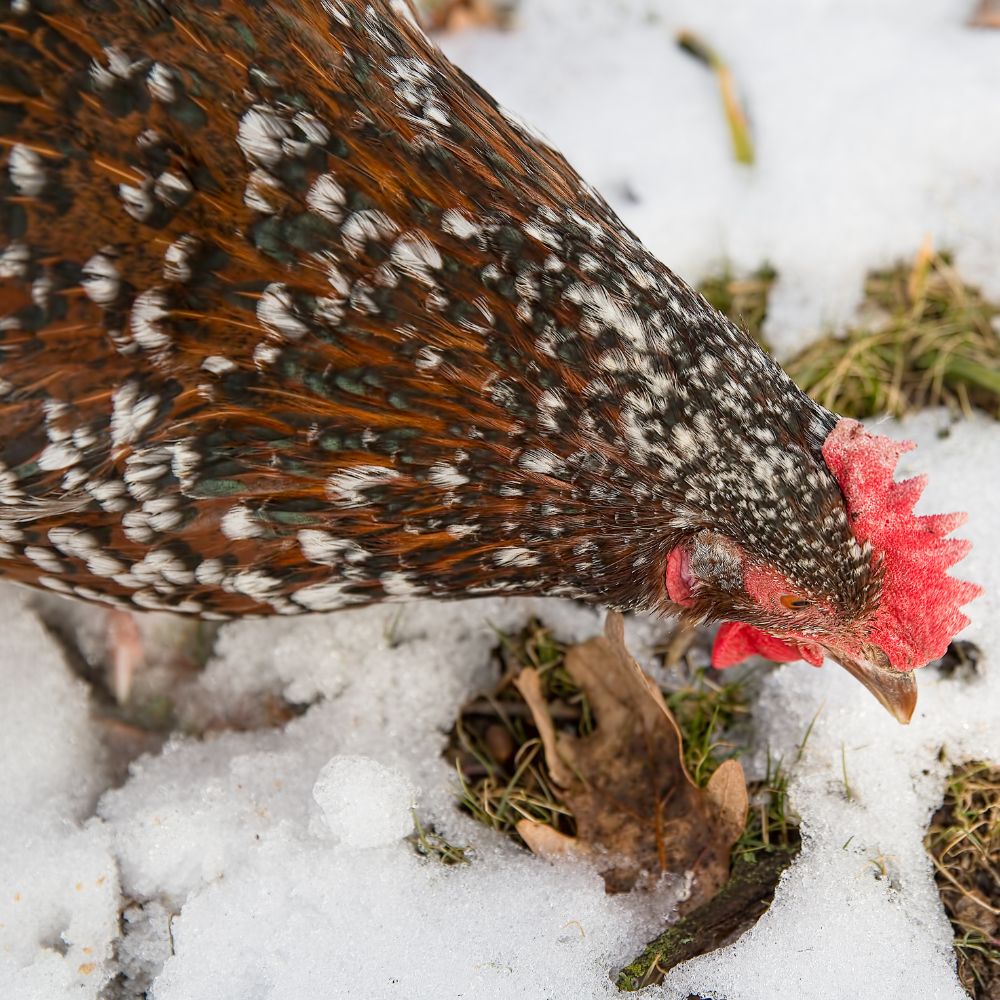
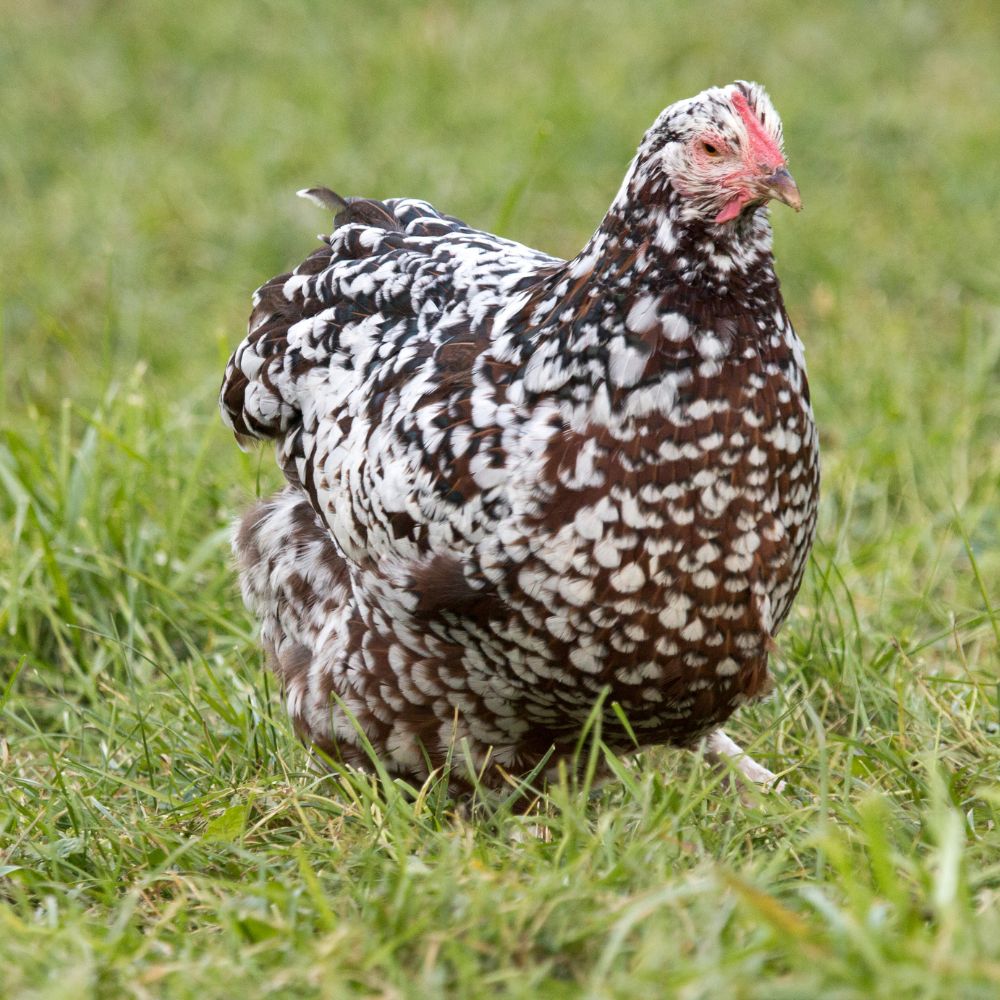
Speckled Sussex Chickens are a beautiful sight and much more. Here’s everything you need to know about this breed of chickens!
Speckled Sussex chickens have wonderful, inquisitive, and “big” personalities, not to mention the beautiful “speckles” on their feathers!Ours willingly sit on our laps or take treats from our hands – they’re the perfect pet chicken!
But they are also a very hardy and quite productive heritage breed that is regaining popularity. If you’ve been considering adding any backyard chickens to your coop, read on to learn about this wonderful breed!
Speckled Sussex Breed Characteristics
Sussex chickens have historically been raised by chicken keepers as a dual-purpose breed (for both eggs and meat), although many people today raise them as beautiful pets. There’s a standard-sized chicken and also a bantam variety. Can you imagine how adorable the bantam variety is?
This breed of chickens, as it exists today, has been around since the mid-1800s, and originated in the county of Sussex, England, hence the name of the breed.
While each color variety has its own individual influences, the Sussex chicken is largely influenced by Brahmas, Cochin, and Dorking, among other breeds.
Roosters can weigh up to 8 pounds while hens weigh about 6 pounds.
Colors
While there are three different color varieties of the Sussex chicken that the American Poultry Association recognizes, the speckled coloring is the oldest and most popular.
Speckled Sussex hens have reddish brown feathers (which is referred to as mahogany) with black and white “speckling” which gives the breed its name. Each feather has a white tip, and the number of speckles varies from chicken to chicken.
Its plumage color is a delight to the eye being of rich mahogany base color with individual feathers ending in a white tip separated from the rest of the feathers by a black bar. Baby chicks vary greatly in color from a creamy buff to dark chestnut and some also have alternate dark and light stripes lengthwise on the back.
The Speckled Sussex rooster can have green in its feathers as well!
In Britain, 8 color varieties are recognized for the Sussex breed, including the Coronation Sussex, which was developed to celebrate the coronation of Edward VIII (who abdicated the British throne, so the coronation never took place).
Appearance Details
Other than colors, there are some details you may be interested in. A Speckled Sussex chicken has a single comb, as well as red wattles and ear lobes.
Their eyes are an orange color and they sport a beak described as horn-colored (sort of ivory, gray, and often a little black).
While their feathers are fancy and full of life (in regard to their colors and speckles), their legs and feet are white…well, perhaps in reality they are off-white.
Egg Production
Speckled Sussex hens lay about 260 light brown eggs per year, and are consistent layers. The size of the egg depends on the hen; ours lay medium-sized eggs.
You can also add herbs to her nesting box to help her feel comfortable laying (while providing pest control and other health benefits).
Are Speckled Sussex Chickens Hardy
They are a heritage breed, which means they pretty much had to be hardy to survive long ago before all the modern care conveniences. Likely the only reason this breed is not necessarily on the top ten chickens to own list is that like many heritage breeds, commercial hybrids overshadowed them.
They do well in cold weather, and they also handle hot weather like pros. A very well-rounded breed indeed.
Just be sure to provide protection from the elements, as well as predators.
Speckled Sussex Personalities
Speckled Sussex chickens are wonderful to own! They are friendly and docile, but they have “big” personalities, and ours are at the top of the flock. They’re curious, the first to check out new situations, love environmental enrichment, and are intelligent pets.
Speckled Sussex chickens love attention, and love being at the center of the action. If you add one to your flock, you’re sure to have hours of fun watching her interact with other chickens and beg you for treats!
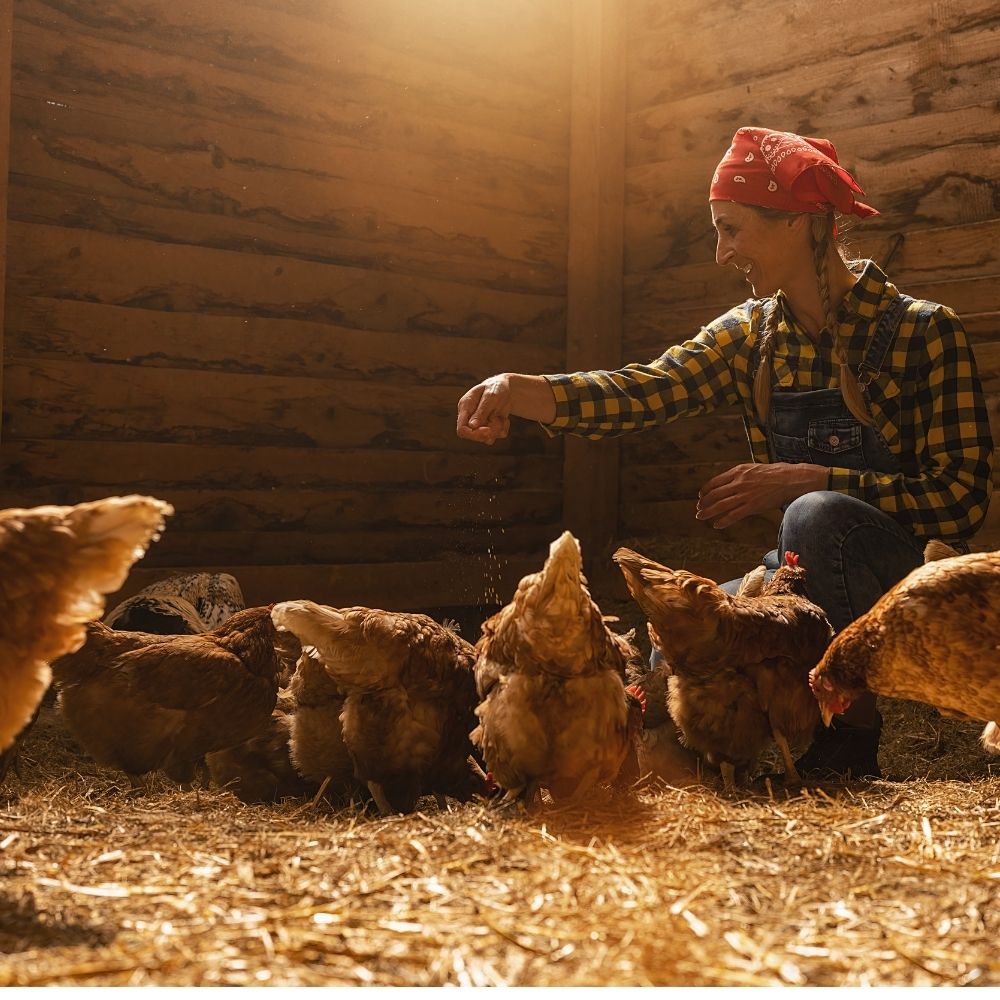
To ensure you have a pet chicken who enjoys human company, it’s important to handle them frequently when they’re chicks. If you want lap chickens, the key is to spend a lot of time feeding them treats.
They don’t require special feed, are docile, and the hens don’t get very aggressive during brooding. The roosters are equally a joy to be around! And don’t forget Sussex chicks, they are so adorable and fun to watch grow.
How to Care For the Speckled Sussex Chicken Breed
Be sure they have adequate housing – check out these coops
Provide plenty of fresh water (try warm water in the winter, they love it and it encourages them to drink)
Feed them high-quality feed (cheap filler feed does their health and production no favors)
Give them a boost to ward off pests (lice, mites, and other ugly parasites) with MitesBGone Herbal Blend
Allow them to free-range if possible (they love foraging and it’s good for them)
If you do have to keep them in confinement, provide them with a good-sized run and lots of treats
Where to Buy Speckled Sussex Chickens
You can buy Speckled Sussex chickens at any major hatchery. They’re a very popular breed! Cackle Hatchery is where we purchased ours, and they were healthy and happy when they arrived!
On our homestead, we have more than one chicken coop. But it took us some time to figure out the most workable plans. We want to help you know what your chicken coop should include.
We have something like 200 chickens on the farm, and so we have a 100 year old chicken coop and a second, more modern home for our flock.
Both chicken coop designs are great, and serve their purpose (keeping our chicken flock warm and dry) well.
In this article you will learn:
What your chicken coop should include
Big mistakes to avoid (that can cost your hens their health!)
Why roosting bars are critical
How to deter mice and predators
Chicken Coop Overview
If you are getting backyard chickens you need a coop. Or if you’re like me and have chickens but always want more, then you might need a second chicken coop. We’ll cover what your coop should include and what it shouldn’t. We will also talk about what you can include that might be a little bit fun and also functional.
The chicken coop you will keep your chickens in is perhaps one of the most important decisions you’ll make for them. And when it comes to coops, you might see all sorts of really cute ones on Pinterest. While they’re great, and if you want one, by all means go grab one, but cute isn’t necessary.
When it comes to chicken coops, above everything else, it should keep your flock out of the elements and provide shelter. It needs to keep them warm and dry during inclement weather and provide shade in the summer. It should also provide them with protection from predators. (Here are more practical tips on keeping your chickens safe from predators).
Whether your chicken coop design is picture perfect or an old shed on your property, if it keeps them safe your coop is perfectly fine. It’s also fine to add some fun elements and make it a pretty part of your home and landscaping.
If you’re a crafty person with a good sense of aesthetics (or if you live in a restricted neighborhood), dressing up your chicken coop might also be a good idea. Read more about raising chickens with neighbors.
There are, however, other things to take into consideration. Things such as space requirements, proper ventilation, cleanliness, chicken nesting boxes, and chicken roost ideas.
Anatomy of a Chicken Coop
Like I said, when it comes to coops, even the simplest structures will make a perfectly fine home for your chickens. As far as housing goes chickens are simple creatures and prefer to spend their days foraging and dust-bathing. They will even do this in inclement weather, rather than staying indoors. We love and recommend this product for dust bathing: Bathing Dust With Herbs.
That being said, there are some features that your chicken coop must have in order to be adequate housing for your flock.
What Your Chicken Coop Should Include – Guidelines (Quick List)
It should be a solid structure that’s not easy to blow over
You should have adequate space for the number of chickens in the coop
Your coop needs to have a solid roof to keep your chickens dry
Make sure there is good ventilation
Include chicken nesting boxes and an easy way to collect eggs
There needs to be a place to roost (chickens needs roosting bars)
So, let’s talk about each of these in more detail.
Space Requirements
So, let’s first talk about space requirements. Whether you build your own chicken coop or purchase one already made, the space requirements are the same. Having enough space in the coop is crucial for the health of your chickens. It will reduce stress and negative behaviors.
It can be difficult and time-consuming to stop bad behaviors or prevent upper respiratory infections once they develop. Preventing these things from the outset can save time and effort.
What are the minimum requirements for space in a chicken coop? If you free-range your chickens then you should provide 4 square feet per chicken in their coop.
For birds that will remain cooped most of the day or all the time, then 10 square feet of space is necessary. Of course, providing an additional run is ideal as well. We have two different chicken runs on our farm, and they’re slightly different.
Our first run, which is attached to our main chicken coop, is very large. We enclosed the space using hog paneling, which they can’t get through because they are large chickens.
The second chicken run is made of smaller chain link fencing. I should mention that we haven’t had many predator issues with our adult chickens. However, with our young ones, possums and hawks are a problem. However, our adult chickens are primarily threatened by dogs.
We used chain link for the second run because we found a pre-built dog run at a great price. It’s definitely spacious enough for the chickens.
Coop Space Tips
We have installed chicken wire on the lower 2 feet of the run to prevent our pigs from damaging it (when they occasionally get loose). Additionally, we had an unfortunate incident where some unidentified animal ripped open a hole in the bottom of the run. As a safety measure, we added 2-inch wire to the bottom 2 feet to prevent any further incidents and ensure the animals are kept safe.
The chicken run is protected by a 2-inch chicken wire on top, mainly to keep predators out and also to prevent the chickens from flying out. Even though the run is 8 feet high, some of my chickens are excellent fliers and tend to lay eggs in various parts of the property.
So, your run, if you don’t let your chickens free range, should complement your coop and give them extra room to spread their wings, and should be safe for your particular area. Chickens that are confined and don’t have enough space might start to develop habits like egg eating or pecking at each other. They can also develop nutritional problems.
Good Ventilation
First on our list is good ventilation, and this is really important for a few reasons. When it comes to ventilation, windows are a good thing to include, or your coop can have an open doorway that allows air circulation and fresh air.
Chickens poop everywhere, and after a time, this manure builds up, and it’s much worse when the ventilation isn’t good.
Chickens have a delicate upper respiratory system, and they’re susceptible to things like upper respiratory infections, so too much ammonia in their coop can harm your chickens.
Good ventilation and cleaning the chicken coop regularly will help prevent upper respiratory infections. Our coops have windows, and one of our coops has a 4-inch gap between the roof and the walls to allow for a cross breeze. There’s an overhang so the inside of the coop doesn’t get wet inside when it rains.
Of course, if it’s raining out (or very cold), you might want to close these windows and doors. Some sort of door is necessary, but overall, making sure there are windows in your coop will help promote good ventilation.
It’s important to keep in mind that windows and doors in the chicken coop allow sunlight to enter, which can provide your chickens with their daily requirement of Vitamin D. Vitamin D is crucial for various functions, but most importantly, it aids in calcium absorption, promoting healthy eggshells and strong bones.
So, windows and good ventilation are both good things for your chicken coop design.
Easy To Clean
Next, your chicken coop should be built so that it’s easy to clean, and this is part of good ventilation. It should have an opening large enough for an adult human to fit through in order to thoroughly clean it (read more about cleaning your chicken coop like a pro).
I see coops for sale all the time that look adorable but I can’t really see a good way for a person to get inside and pull out soiled bedding and manure and replace it with new, clean material.
Similarly, your run should be large enough so you can fit inside it. In addition to the cleanliness issue, what happens if there’s a sick or injured bird in the coop or run? How will you get it out if you can’t fit in there?
Predator Proof
Your coop should also be predator-proof, and we’ve touched a bit on this, but let’s look into it further. Your chicken coop should protect your chickens not just from predators that might wander into the coop, but also those above and those that might dig under your chicken wire and into your coop.
To ensure your chickens are protected, it’s important to keep predators out of your coop. One effective way to do this is by using hardware cloth on the run and over any gaps, such as the 4-inch gap mentioned earlier. It’s best to use half-inch hardware cloth because it’s more difficult for predators to penetrate.
To prevent predators from digging under your coop, you can use hardware cloth on the ground outside. You can either bury the cloth 4 to 12 inches deep into the ground or lay it flat 12 inches out from your coop. This will keep your chickens safe and secure.
Coop flooring is one way to keep them out. However, if you don’t have one, then burying a hardware cloth fence down into the ground and about 12-inches all around the coop will help deter them.
Remember that if mice and rats really want into your coop, they can chew through the wood. If that’s happening, consider placing hardware cloth about 12-inches high around the bottom of your coop.
Feeders and Waterers
Your coop should include a place for feeders and waterers, and what that will look like depends on what your feeders are like. Some people use PVC feeders while others use ground feeders. Still other people like to hang their feeders and waterers.
So, it’s really up to you and what works best in your coop. You should also be able to easily access the feeders and waterers.
When designing a chicken coop, it’s important to consider the chicken nesting boxes. A good rule of thumb is to have one nesting box per five hens. However, it’s always better to have more than that, and it doesn’t hurt to have too many. Since laying hens usually prefer to lay in the same nest you don’t need to worry about having a box for each chicken.
If you have 5 chickens, then 3 nesting boxes will suffice. You can add herbs and hayto the nesting boxes so your chickens have a pleasant place to lay their eggs. Mint is one option, and rodents hate mint, so it has dual purpose. Oregano, which has strong antibacterial properties, is another good option.
Nesting Box Tips
I prefer hay over straw in nesting boxes, and my chickens seem to prefer as well. Hay is generally softer and smells sweeter, as long as it isn’t moldy.
When it comes to choosing chicken nesting boxes, there are many options available. Essentially, anything that provides a quiet and dark place for the hens to lay eggs will suffice. These nesting boxes can be made from a variety of materials such as 5-gallon tubs or baskets. It is important to choose a nesting box that both you and your chickens like. It should also be one that can be easily cleaned when necessary.
Nesting boxes should be in a dark corner of the coop or you can shield them with a curtain. Chickens like to lay eggs in dark places. This is a natural thing, and when a hen lays, she’s at her most vulnerable.
Often times, if you place your nesting boxes in the “wrong area” according to your hens, they’ll choose to lay elsewhere. Hens can be very particular!
If you havemites and lice in your nesting boxes, or want to prevent them, you can use this product in the boxes.
Egg Collection
Your chicken coop should also have a way for you to easily collect the eggs. One of our coops is large enough for us to just walk into, while another coop is smaller. We use a window box to collect the eggs in that coop.
If your coop has a way for you to collect eggs from the outside, so much the better. But the last thing you want is to have to crawl through dirt and manure to get your eggs.
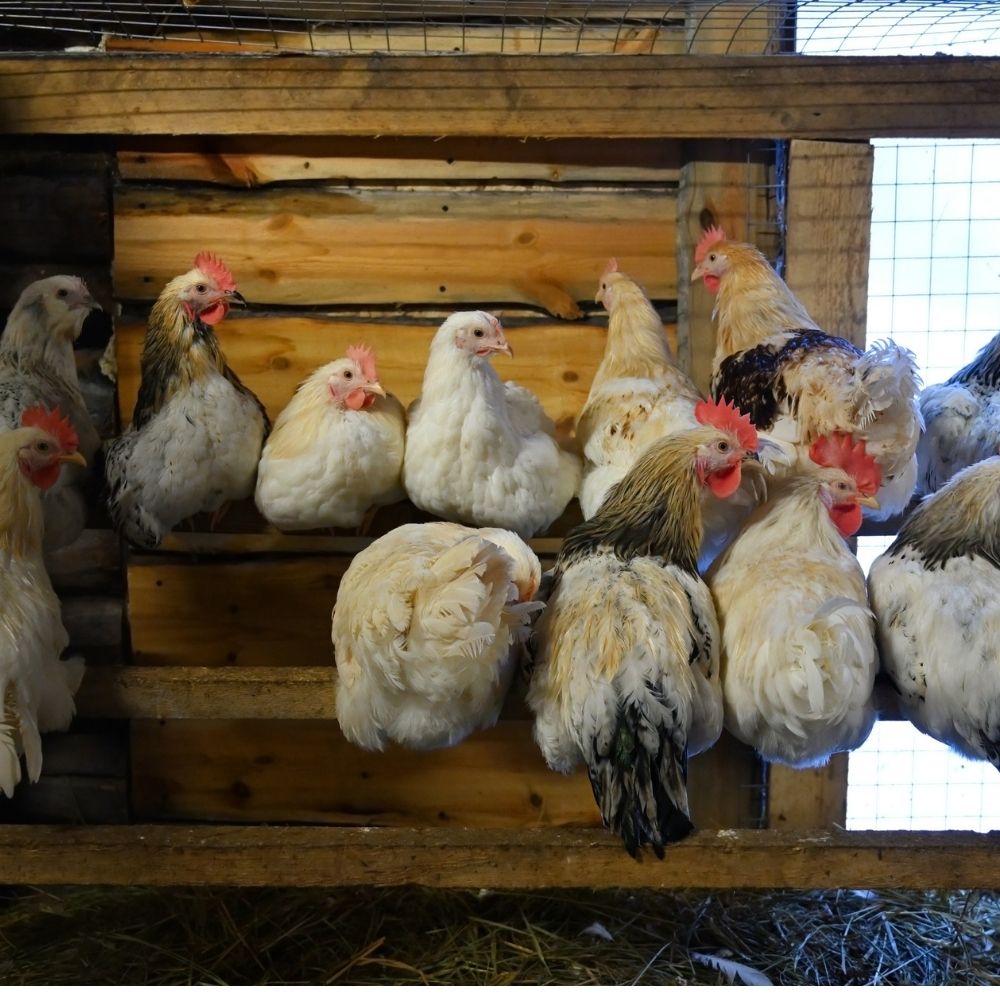
Roosting
The last thing you should think about for your coop is a chicken roost area. Chickens like to roost. It’s how they sleep and get away from predators. It also lets them stay warm in cool weather because they can group together.
If your chicken coop doesn’t have a place for them to roost, you can make one for them out of pretty much anything. Just make sure it is wide enough for them. We’ve used branches, old broom handles, 2×4 studs, wooden dowels, or pretty much anything else you find around your property as long as it’s safe.
If you do use an old broom or mop handle, be sure to screw it down so it can’t move, otherwise your chickens will have a hard time balancing. Similarly, branches make great, natural roosts, but make sure they’re solid so your chickens won’t fall off.
Roosts should be between two and four inches wide but the bottom line here is to not make them so wide that your chicken can’t drop their poop below them since chickens and all birds poop whenever their bodies need to since they don’t have bladders.
Another good idea is to place a removable tray under your chicken roosts to make removing manure easier and cleaner. This might not logistically work for you, but making sure you can easily remove manure from the coop means a cleaner, more sanitary coop. It’s also an easy way to gather manure for your compost bin.
Whether you decide to purchase a pre-made chicken coop or build one yourself, it is important to ensure that the structure meets the basic needs and essentials of your chickens. In our farm, we house one of our flocks in a 100-year-old shed which provides ample roofing and ventilation, as well as designated areas for them to roost.
For another flock, we built a traditional chicken coop that looks quite different. It still keeps them warm and has great ventilation. Our chickens seem quite happy in it.
When it comes to coops, you can invest as much or as little as you like, as long as it meets the basic requirements we outlined above.
If you’re interested in building your own chicken coop, I have free instructions on my blog, click here for some DIY Chicken Tractor Plans that you can make even if you are broke. The plans are detailed, and you’ll learn how to make a chicken coop in my step-by-step system with photos. I’ve also got this list of 55 DIY Chicken Coop Plans for you to check out.
Thanks for listening to this episode of What The Cluck?! about chicken coops, and I’ll see you next time!
Hey y’all! Here’s this week’s sneaky peek photos of life on our farm!
These images also appear on my Instagram account where I share MANY more photos and stories from the farm!
If you aren’t yet following me there, you can right here.
Enjoy the photos & be sure to share some of yours with me!
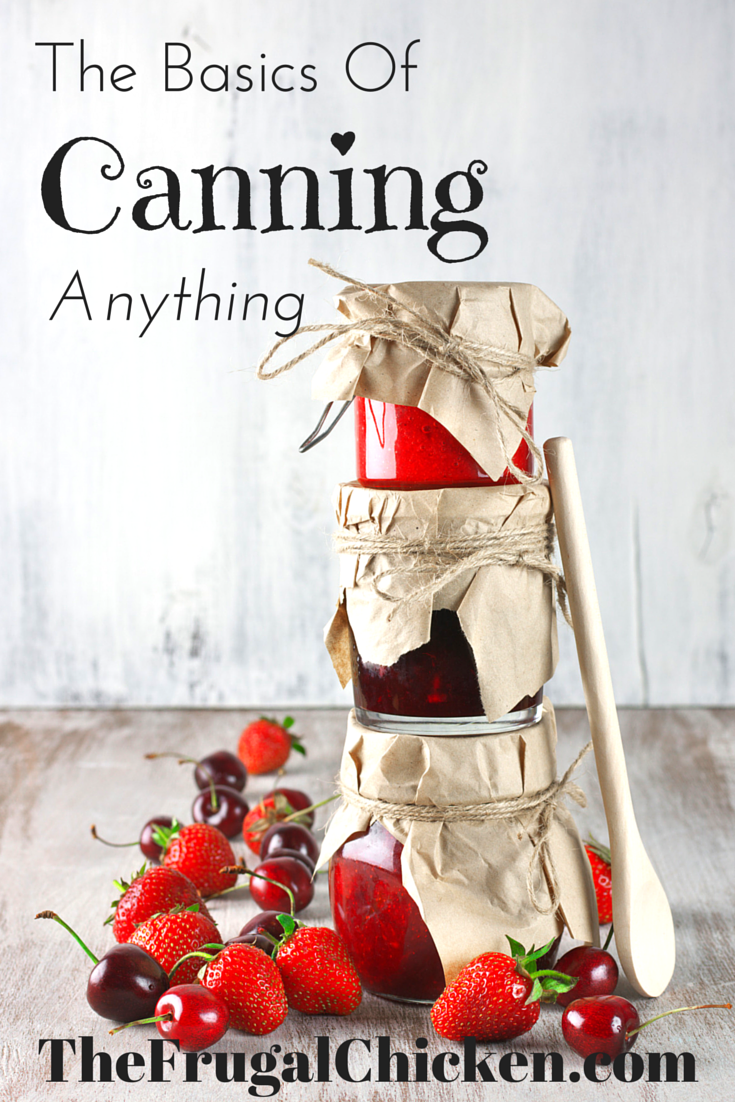
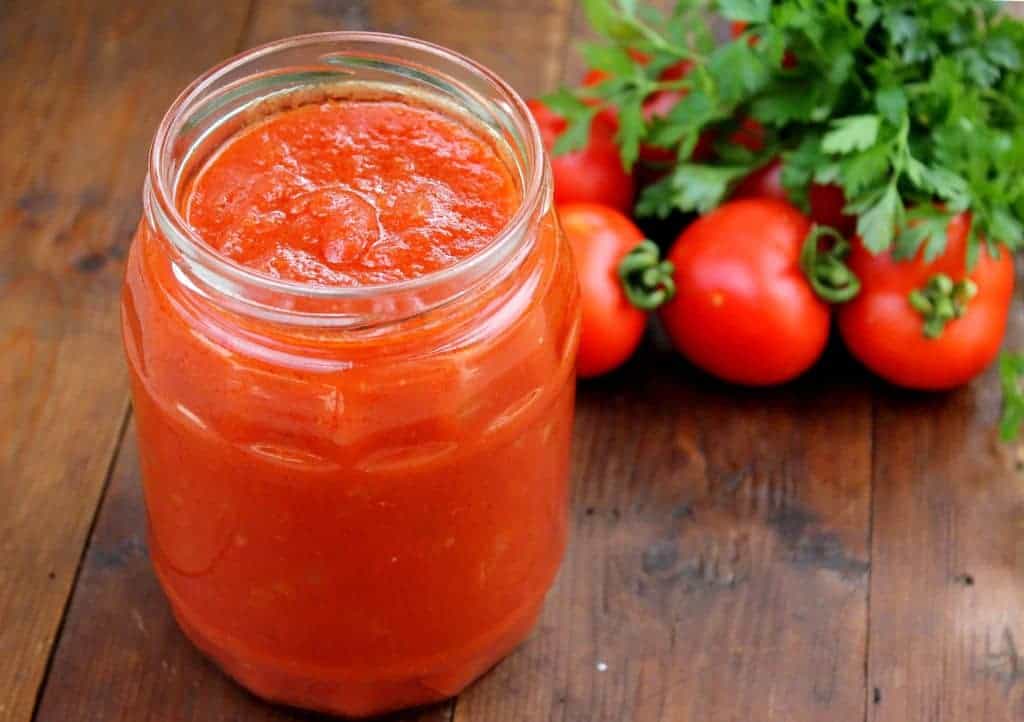
This year we’ve been lucky enough to have bumper tomato and squash crops – which means it’s time to get canning vegetables!
I’m a huge salsa fan. Like yogurt and mozzarella, salsa is one of those things I can always eat. So I make sure to can a TON of it to keep me going throughout the winter.
When you can anything, salsa included, you need to make sure you do it right. The last thing you want is to ruin the harvest you worked so hard to preserve or worse – get sick.
How to get started canning vegetables:
Step 1: Observe safety rules such as making sure you process your canned vegetables according to standard safety practices.
Step 2: Have necessary tools such as mason jars, lids, rings, and a water bath or pressure canner on hand.
Step 3: Decide whether you’ll use a water bath canner or pressure canner, and familiarize yourself with your unit’s instructions for use.
Step 4: Clean and sterilize your jars by washing them in warm, soapy water.
Step 5: Pack your jars according to the recipe you’re using.
Step 6: Process your jars of vegetables.
Step 7: Store your jars in a cool location away from sunlight.
But here’s the deal:
Canning is one of those things you can learn in an apartment or on a 100 acre homestead – which means you can start building your homestead anywhere.
If you live in an apartment or your HOA won’t let you grow food, just head down to a farmers market and buy as much of the freshest in-season produce you can afford.
You can also can most meats and fish – so if you buy your meat in bulk, have a lot of luck fishing, or just find a great deal at a store you don’t wan’t to pass up, you can preserve it for later.
What do I really love about canning?
During the coldest days of winter, you can still have a taste of summer.
Canning basics
Why bother?
While this is fairly intuitive, the point of canning anything, salsa included, is to preserve the freshest foods for times when they might not be so abundant.
That being said, the first step to learning to can salsa is to choose only use the freshest food, and make sure your ingredients are free of mold, soft spots, or any discoloration. In this case, the quality of your salsa ingredients counts!
Safety first
The number one rule of thumb is to not make certain canning mistakes, which means you want to make sure you remove oxygen, destroy enzymes and prevent the growth of undesirable bacteria, yeasts, and molds that threaten to destroy your harvest and render the food unsafe.
You want to use a method to can your salsa so that the glass jars and lids form a goodvacuum over your harvest so that liquid stays in, while air and microorganisms stay out of the jar so they don’t destroy it.
Necessary tools for canning vegetables
Luckily, to can your harvest, you’ll only need a few inexpensive tools.
First, you’ll need mason jars, lids, and rings, which can be purchased online or at any grocery store.
The mason jars really are a great investment because they can be used for many, many years.
When we first moved to our homestead, the previous family had a huge collection of old mason jars they passed down to us – score!
Even though they were decades old, they were still very usable.
You’ll also need a few specialized tools, such as:
A plastic or stainless steel funnel
A stainless steel ladle
A canning jar lifter with rubber grips
A good pair of kitchen tongs
Magnetic lid lifter and bubble remover
Pressure canner
You can purchase these items individually, but your best bet is to buy a kit (you will have to purchase the pressure canner separately) – that way you’re getting everything at once, and when you start to can, you won’t have missed anything.
Using a pressure canner
Pressure canners used to get a bad rap because old, old models had a possibility of exploding. (pressure and all…)
But today’s models are more advanced and a perfectly safe. If you can find a used one, go for it.
Buying new works as well (full disclosure: I purchased mine new because I wanted to make sure it would work.)
Follow the directions that come with your pressure canner to use it properly.
Clean and Sterilize Your Jars
Be sure to have all your tools on hand before starting, and decide what size mason jars you will use. They are available in ½ pint, pint, 1½ pint, quart, and ½ gallon sizes.
Before you use your mason jars, wash them in hot, soapy water or run them through thedishwasher. Just be sure they’re free of soap when they’re clean so the flavor of your food doesn’t get ruined.
You can also soak mason jars for several hours in a solution containing 1 cup of vinegar per gallon of water.
Sterilizing your jars
You will need to sterilize your jars for anything you want to preserve that will be processed less than 10 minutes.
Before sterilizing your jars, prepare the food you want to can. You will place your food into the jars immediately after they’re sterilized.
To sterilize your jars, place them right side up on the rack in pot of boiling water. The rule of thumb is to fill the pot and jars with hot water to 1 inch above the tops of the jars.
Boil 10 minutes at altitudes of less than 1,000 ft.( At higher elevations, you should boil for 1 additional minute for each additional 1,000 ft.)
Using your canning jar lifter, remove your sterilized jars and fill them with the food you want to preserve.
Remove your lids and rings from the water using the magnetic jar lifter
For jams and jellies, or anything with liquid, it’s a good idea to use your funnel.
Top with the lids, making sure to tighten the screw bands.
Processing your jars
The best book on the market for processing times is the Ball Blue Book.
Every homestead that wants to can their harvest should have a copy on hand. For the value, the price is negligible.
Once you’re done processing your jars, don’t retighten the lids. You’ll know they’re properly sealed when you hear a “ping” after you process the jars and the tops are indented.
Store your jars in a cool location away from sunlight.
It’s necessary to store them below 95°F, and it’s optimal to keep the temperature between 50° to 70°F to maintain the quality of your canned produce.
I’d love to hear from you!
What will you try canning first? Leave a comment below, or email me!