Traditional English egg custard is super simple to make, but gives you an AMAZING dessert to make with all those eggs your flock lays. With this recipe, we’ve turned tradition a bit on its side with our sugar-free English egg custard – and it’s just as tasty!
We’ve replaced sugar with sucralose (you can also use regular sugar or monkfruit) – a carb free option that’s just as sweet as sugar (don’t worry – we have resources where you can buy sucralose below).
Our hens have been laying a TON of eggs, and let’s face it – there’s only so many quiches and scrambled eggs you can make before getting a bit bored. And who doesn’t love dessert?
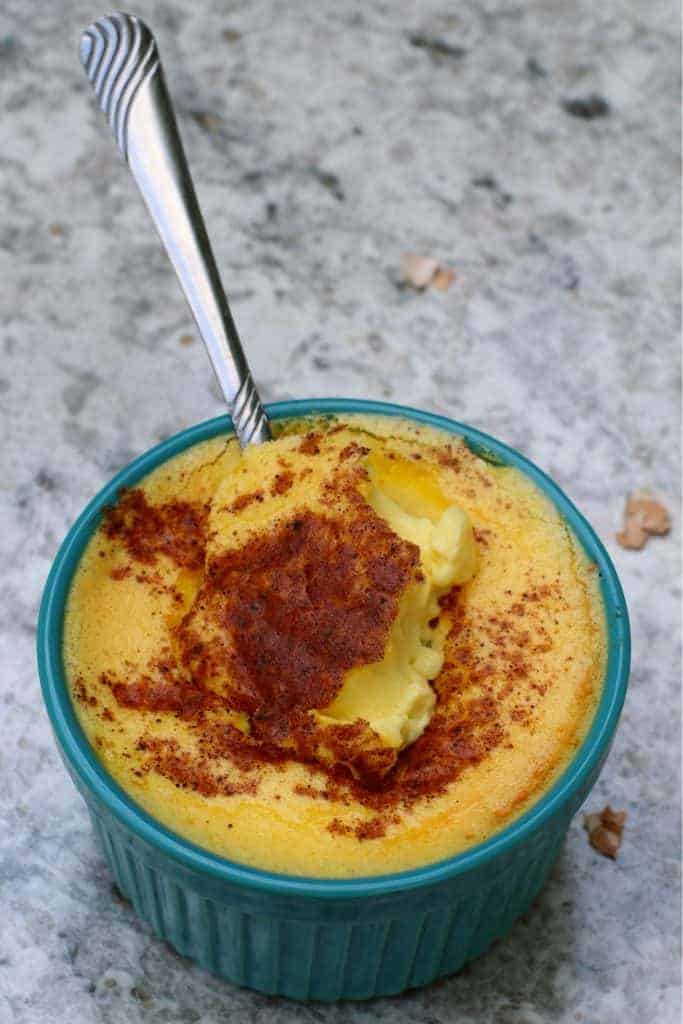
I love egg custard because the combination of nutmeg and whole cream makes it taste much more decadent than other desserts, and this combination makes it SEEM like a complicated recipe. It’s a way to pamper yourself with a bit of luxury without all the hassle of effort. It’s also great to take to any summer BBQ potlucks because kids love it too!
If you’ve been looking for the perfect summer recipe to use up all your eggs, then here’s how to make Sugar Free English Egg Custard!
Ingredients
Makes 3 servings
- 1 ½ cups heavy cream
- 1 ½ cups whole milk
- 1 cup sucralose (buy here)
- 3 eggs
- 3 egg yolks
- Vanilla bean pod
- Nutmeg to taste
Directions
- Heat milk, cream, and the vanilla beans together in a pot until just starting to boil. Do not overheat and allow to scorch.
- In a second bowl, whisk together eggs, egg yolks, and sucralose.
- Pre-heat oven to 375 degrees.
- When the cream mixture starts to boil, remove from heat and combine with the egg mixture, whisking the entire time. Add the cream mixture slowly so the eggs do not cook.
- Once combined, run the mixture through a fine mesh sieve to remove any lumps of egg.
- Pour mixture into ramekins, and top with nutmeg to taste. Place into the oven, and cook until set, typically 30 minutes.
- Once set, remove from the oven and allow to cool before serving.
Notes: While this is a sugar-free recipe, you can replace the sucralose with sugar if you want. You can also substitute sugar with honey with my conversion chart here.
Sugar-Free English Egg Custard

- 1.5 cups heavy cream
- 1.5 cups whole milk
- 1 cup sucralose
- 3 eggs
- 3 egg yolks
- 1 Vanilla bean pod
- Nutmeg to taste
- Heat milk, cream, and the vanilla beans together in a pot until just starting to boil. Do not overheat and allow to scorch.
- In a second bowl, whisk together eggs, egg yolks, and sucralose.
- Pre-heat oven to 375 degrees.
- When the cream mixture starts to boil, remove from heat and combine with the egg mixture, whisking the entire time. Add the cream mixture slowly so the eggs do not cook.
- Once combined, run the mixture through a fine mesh sieve to remove any lumps of egg.
- Pour mixture into ramekins, and top with nutmeg to taste. Place into the oven, and cook until set, typically 30 minutes.
- Once set, remove from the oven and allow to cool before serving.
- Notes: While this is a sugar-free recipe, you can replace the sucralose with sugar. You can also use honey with my conversion chart here.
We all know herbs are healthy to feed your hens, so making a holiday herb wreath with berries is the perfect way to give your flock herbal goodness while making a cute & stylish coop decoration!
Making an herb wreath is really easy – in fact, the hardest thing you’ll do is decide WHICH herbs to use!
And yes, it’s meant to be beautiful AND your hens should eat it. Once it’s spent and doesn’t look great anymore, you can compost it.
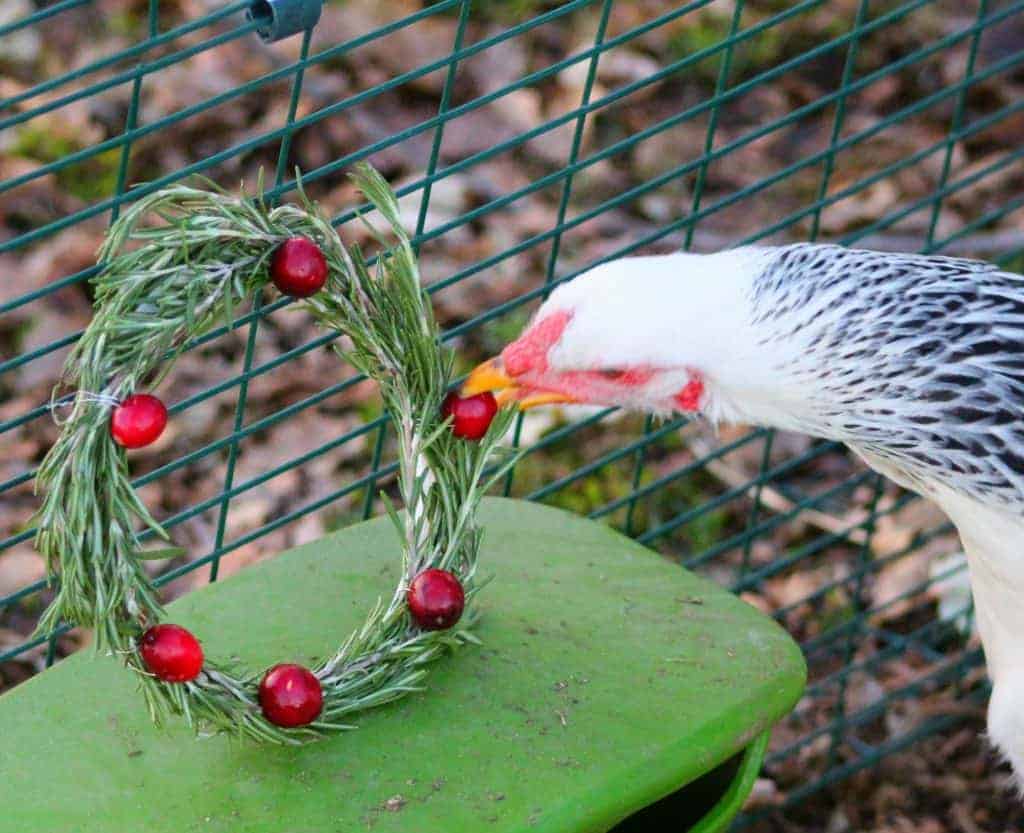
For this wreath, we used rosemary (because it’s healthy AND looks visually similar to pine) and cranberries.
And I’ll tell you, hens LOVE the red berries. Cranberries are perfectly fine to feed your hens (especially fresh cranberries), but you can also use any other red berry – strawberries are another good option.
(In fact, if you doubt whether chickens will actually go for this wreath, here’s an image from our photo shoot where I turned my back for a moment and Mario, our Blue Copper Marans rooster, decided to try to steal the wreath):

What herbs should you use?
For herbs, you can stick to the rosemary I used in this article, or you can add other herbs. Oregano, sage, and thyme are good options – each is great for overall health.
If you’re feeling extra crafty, you can also use flowers such as calendula or lavender, or add pinecones (your hens might try to sample the pinecones but quickly desert them in favor of the herbs and berries).
So why a wreath? Well, it’s fun, seasonal, and looks great in your coop. As far as the health benefits go, its an easy way to give your hens a healthy in a way that they can easy access the herbs without mashing them into the ground (it’s all about the benefits, right?)
Want to know how to make your own? Well, here’s directions you can repeat at home.

Making Your Own Herbal Holiday Wreath for Your Chicken Coop
What you’ll need:
A wood or plastic ring
Beading wire or string (more on this in a minute)
About several bunches of long stemmed rosemary
4 – 7 cranberries or other berries
How to put your wreath together:
Make or buy a wreath ring
The ring is necessary to give your wreath some structure. It’ll look better and last longer in the coop, and make the rest of this project easier.
You can buy these here on Amazon or make one yourself with an old container top. We used an old container top we had laying around because, well, recycling is a good idea.
If you do use a plastic top, use an Exacto type knife (like this one here) to transform it into a ring. This is probably the easiest and most budget-friendly way to make this wreath.
You can also use it again and again, instead of replacing it every time you want to make a coop wreath.
Add the Herbs
Once you’ve made or purchased the ring, it’s time to add your herbs. Again, you can use any herbs you like, and for this project I used rosemary.
Try your best to use only long stems of the herb – it’ll look better and be easier to tie to the ring. I was able to find fresh rosemary in the vegetable section of the supermarket.
If you can’t find any, don’t worry – you can still do this project. If you can find long stemmed herbs that AREN’T rosemary, then those herbs might be a better choice.
Tie bunches of the herbs (for the pictured wreath, the bunches were 2 – 3 stems of the rosemary) to the wreath. I tied them every inch or so, leaving the last 2-3 inches of the rosemary free.
The ends of the herbs will hide the wire or string, and complete the overall look.
Continue to do this, layering the bunches as you work your way around the wreath. This will also hide the tie points and add bulk to the wreath, making it look fuller.
Now, before we continue….
A note about the wire or string
For this project, I used beading wire (not chicken wire). It’s sturdy and also flexible, and easy to twist.
You CAN use string, but there’s a couple caveats. Your hens are more likely to pick and eat at the string and it’s also harder to thread the berries with string.
You’ll hear a song and dance about how your hens will eat the wire and it could puncture or injure their digestive system.
Well, there’s also a chance aliens will puncture your hen’s digestive systems, but the chance of either happening is fairly small.
Obviously, you should proceed at your own risk and only do what you feel is best for your flock.
But understand if you do use either wire or string, your hens will likely be fine, and the health benefits of the herbs and fun you’ll have watching your hens go wild over the berries FAR outweighs any potential risks.
Chickens aren’t dumb, and will go for the herbs and berries long before they taste test wire.
If you use string, try to use a thicker string like baling twine. Your hens might be able to slurp up thread, but they’ll have to be pretty determined to swallow baling twine.
Adding the Berries
Finally, add your berries. Its easiest and most visually attractive to place them where you’ve wired the herbs to the ring. The berries will completely cover the wire.
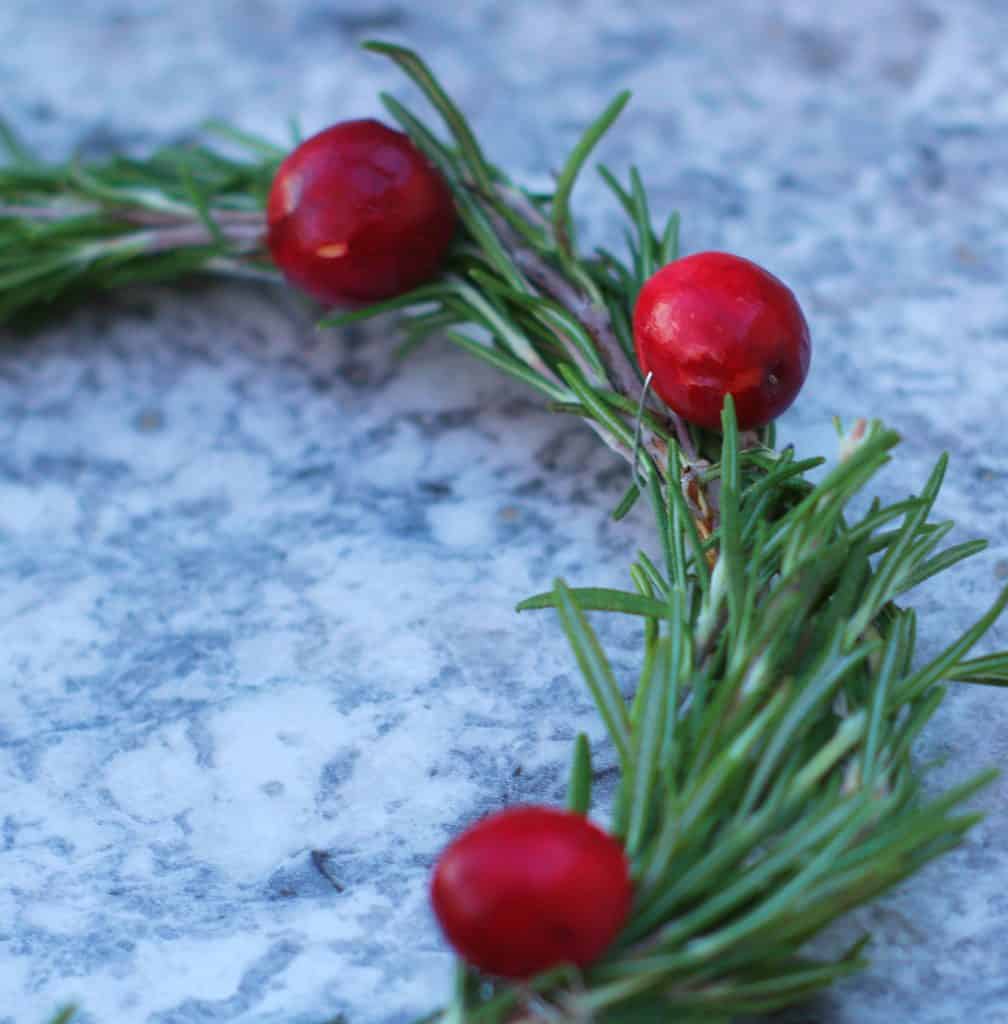
I found it was easiest to pierce the cranberries with a toothpick and then push the beading wire through. If you plan to use string, then use a needle to thread the string through.
Wire them on tight so your hens can pick at the berries. This also makes it more difficult for your hens to accidentally swallow the wire or string.
And that’s it!
You’ve now created a cute holiday herbal wreath for your coop! You can either place it high and enjoy it as a decoration or you can place it low and allow your hens to eat it. When it’s past it’s prime, and they’re no longer interested, take it down and compost the remaining herbs and berries. Because it’s easy to make, you can spend a couple minutes a week creating a new wreath and letting your flock enjoy it again and again!

Wondering how to keep a greenhouse warm in winter without investing in electric or fuel-supplied heating systems?
Yes, it can be done. And without adding any more costs to your household budget. I mean, who needs another bill right? Right.
Now, you might be wondering why bother keeping your greenhouse warm during the frostier months anyway – why not just enjoy the season? Well, this girl likes her greens.
Ok, you caught me. I DO like greens, but I’m not a superfan. I like them…but more like sprouts on a sammich. NOT full blown salads. Unless they’re Southwestern salads. Then, bring on the arugula. ANYWAY, I like to keep growing over the winter because, well, I like to grow vegetables. Like any normal, sane person.
The other reason to keep a greenhouse warm in winter is because if you ARE growing anything, you’ll want to provide a healthier living environment for your vegetables, prevent cold spots, and reduce the risk of fungal diseases.
I have more readers growing crops in the winter, and naturally, a common question is how to heat a greenhouse in winter for free (which mean you can grow a wider variety of vegetables, too).
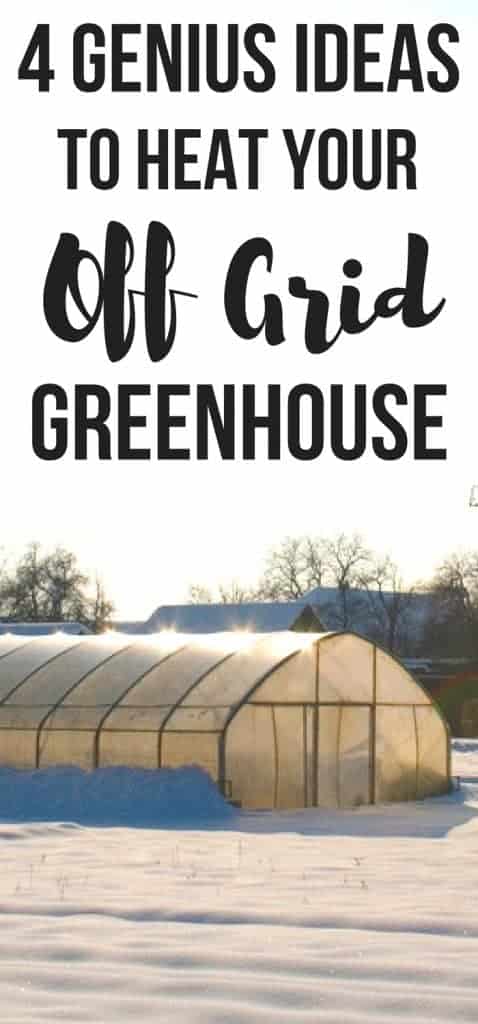
Understand the Basics of How to Keep a Greenhouse Warm in Winter
Before we delve into our ideas, let’s first establish some basics. In this season where temperatures can go unpredictably low, you can only do so much. In other words, don’t try to grow oranges in sub-zero weather. You won’t be successful, right?
So, let’s talk about some basics to help you run your greenhouse in winter.
- Choose the right crops to grow for the season. Go for low-lying greens like kale, spinach, and mustard greens that can stand below-freezing temperatures
- Invest in a good quality thermometer like this one that can read max and min temperatures throughout the day.
- Only heat the areas necessary. Grouping plants together will help you save energy and cost.
- Install proper ventilation to prevent the spread of fungal diseases and maintain a healthy growing greenhouse.
Here are 3 more effective strategies in controlling the temperature inside your structure without having to waste fuel or energy.
Store Thermal Energy Using Thermal Mass
Thermal mass heaters are the bee’s knees, and easy to incorporate into your greenhouse. If you’re not sure what I’m talking about, thermal mass, sometimes called a heat sink, absorbs and stores solar heat energy.
This involves putting materials around your greenhouse that absorb heat from the sunlight during the day. These heat sinks are then capable of slowly releasing thermal energy at night time when the mercury drops like crazy.
Here are some effective methods to collect thermal mass:
Idea 1: Build a cobbled pathway across the floor of your greenhouse using dark gravel or small stones (you can reach out to a local nursery or a dealer that sells rocks for driveways). These rocks naturally absorb heat – and the release of this heat keeps your plants warmer during the dark, cold hours of winter.
Idea 2: Since water has higher heat capacity than land or soil, try putting water or rain barrels around the interior of your greenhouse. Place dark barrels at a Southern-facing location, where they can easily absorb sunlight in the day. Make sure they’re also near tender plants that need more warmth at night
Idea 3: Use cinder blocks or earthenware ceramic pots to further absorb solar heat. They can be used to support planters on table-tops and benches, and they can release their heat around the plants (this is also a good idea to keep your chicken flock’s water from freezing over the winter).
Note: Painting these materials dark (i.e. black) helps absorb more thermal mass and one additional tip on how to keep a greenhouse warm in winter.

Build an Indoor Compost Pile
This is a genius idea that’s also one of the most sustainable techniques to keep your greenhouse warm this winter. (Psst…it’s also cost-effective since you can build it nearly for free AND you won’t have to use power or fuel to heat your greenhouse. This is what we call Win-Win-Win.)
As the material in your pile composts, bacteria that break down organic material generate a considerable amount of heat to the environment. We cover compost piles in depth in Organic By Choice: The (Secret) Rebel’s Guide To Backyard Farming. Save 10% with coupon code GREENHOUSE right here.)
Insulate!
Insulation is another option to keep a greenhouse warm in the winter. So what do I mean by insulate?
Well, you can insulate the entire greenhouse using plastic sheeting, OR you can add row covers (yes, row covers over crops inside your greenhouse) for added protection.
Plastic helps absorb more heat without keeping the sunlight away from your crops. Combined with the other ideas in this article, you have quite a few ways to keep a greenhouse warm in winter.
There are many other natural techniques for keeping your greenhouse thermally controlled throughout the year. In the most challenging seasons, let these suggestions guide you on how to heat a greenhouse in winter for free. You don’t have to do everything. You just need to find the right combination that will work best for your set-up.
While there are a lot of herbs that are great for your backyard chickens, there are a few that are very important.
Their tiny bodies have to work hard, and while a good layer feed is ALWAYS the basis of any healthy diet, you don’t need to stop there.
There’s herbs you can provide your chickens that’ll support healthy immune system functions – which is especially important when the mercury dips!
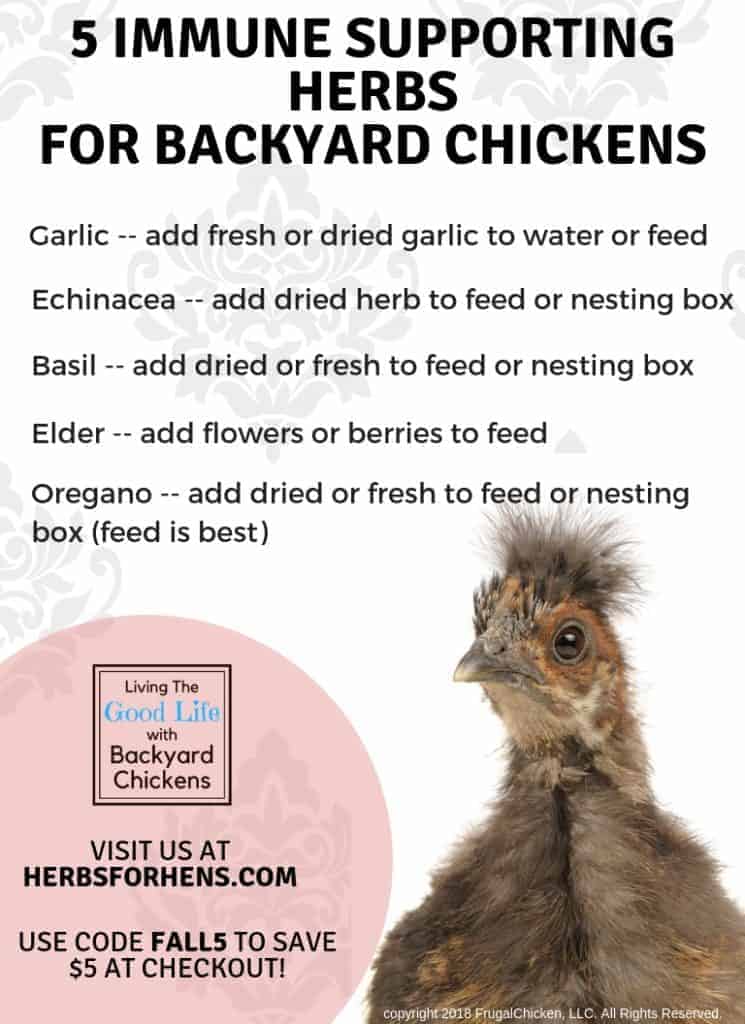
Here’s the top 5 herbs you should keep handy!
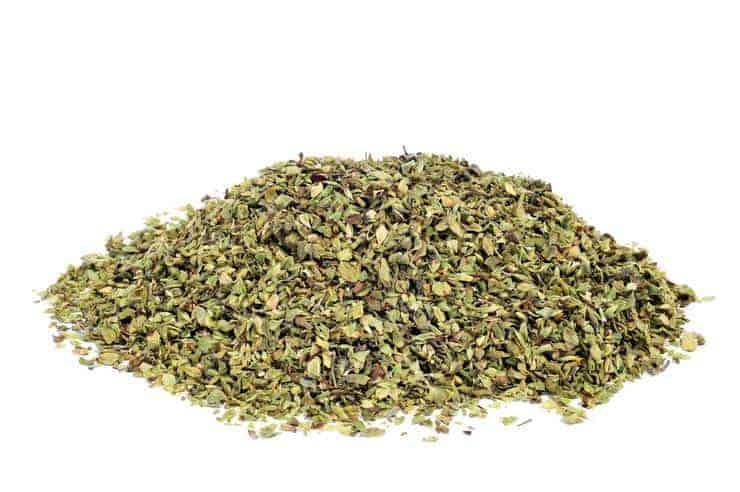
Oregano
Oregano is one of my favorite herbs for backyard chickens. It supports healthy immune systems, and hens love to GOBBLE down the little green flecks.
You can offer fresh or dried oregano – both are great – and you’ll want to use the leaves of the oregano plant. Mix with their feed, offer separately, OR make a “tea” by immersing them in water.
Whenever we have a chicken or duck that needs some extra TLC, I turn first to oregano!
Echinacea
Without a doubt, you’ve heard of echinacea! Echinacea has been used traditionally to support healthy immune system functions for centuries, and it’s a great herb for your chickens, too!
You can use the leaves or the roots of the echinacea plant – while the roots are more powerful, they’re also more expensive. Chickens love picking at the leaves!
It’s easiest to mix echinacea with their feed or use it as a top dress. If your chickens aren’t sure what to do, add an extra treat such as mealworms or dried river shrimp to the mix – your flock will quickly figure it out!
To make it easier for chicken owners to get echinacea, we’ve included it in my herbal blend StrongHen (TM). Wherever you buy echinacea, be sure it’s 100% pure!
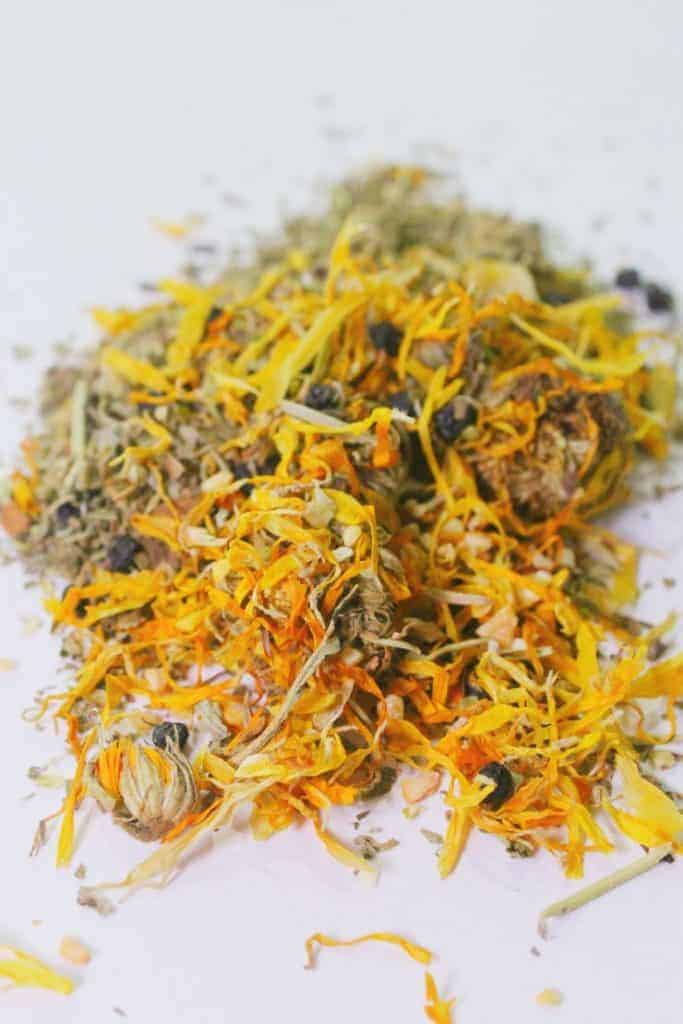
Calendula
Calendula is not only good for giving your eggs the perfect golden yolk, but it’s also great to offer your hens during the winter months. In fact, it’s a bit of a “superherb” that’s used in traditional herbalism for many things: to support skin, immune system functions, healthy digestion, and more!
As a bonus, it smells DIVINE.
The beta carotenes that gives these flowers their pretty yellow petals are also super healthy nutrients for your hens. Calendula has some antimicrobial properties, and is packed with many other vitamins that will help your flock be healthier during the cold winter months.
Plus your hens will love picking at these pretty yellow flowers, so it’s a great winter boredom buster.
You’ll want to use the dried flowers and/or petals. You can add to feed, create a tea (it makes a pretty sweet tea), or add to nesting boxes.
Elder
Elder is packed full of immune support power for your chickens. Elderberry has been used as a traditional herbal remedy for centuries and researchers are discovering that it’s a powerful herb for keeping chickens healthy!
In a 2014 study, researchers found that elderberry helped prevent Infections Bronchitis Virus in chickens (source). For humans, elderberries and elder flower are used to support healthy immune functions. With chickens, you can use the berries and the flowers – hens love both!
While humans can use elder in a tincture, you’ll want to stick with dried or fresh berries and/or dried flowers. Particularly if you offer dried berries, add it to their feed – your hens will love to pick at their tiny dark treats!
In our herbal blend StrongHen (TM), you’ll find elderberries (along with most of the other herbs I mention in this list). It’s an easy and economical way to get all these herbs in one product.
Garlic
Not only is garlic perfect for adding flavor to your meals, but it’s also great for supporting the immune system of your backyard chickens!
Garlic has been traditionally used for generations to support healthy immune functions, and it’s no different for chickens! The allicin in garlic gives the herb it’s characteristic smell AND it’s where the power of the herb originates.
It’s easiest to offer garlic steeped in your flock’s water. You can use fresh or dried garlic – both are great!
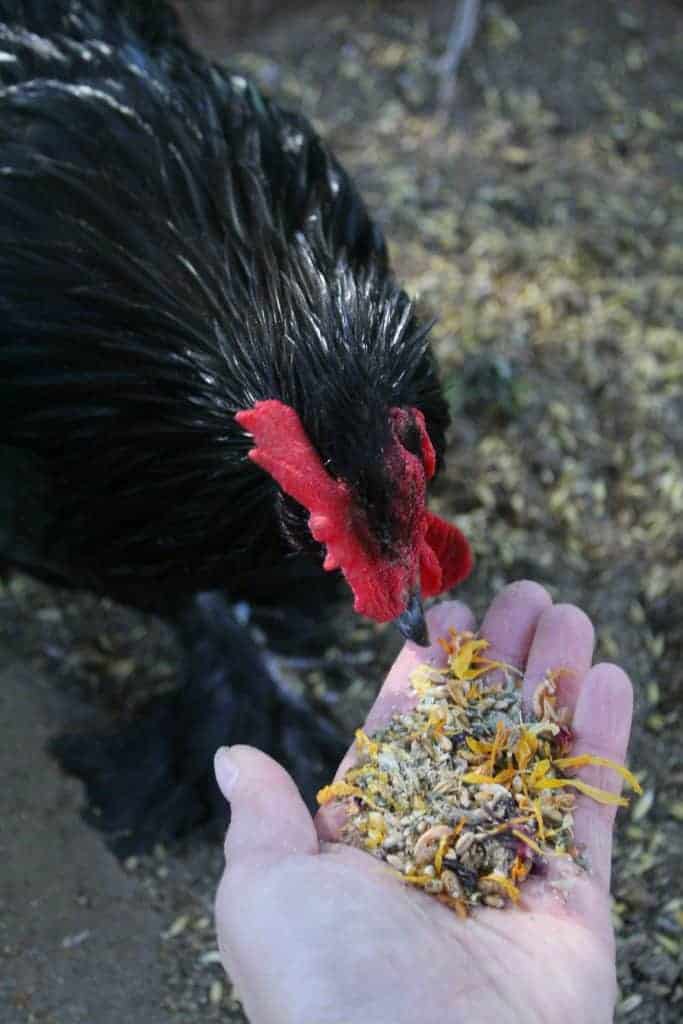
PCM StrongHen (TM)
My StrongHen herbal mix combines the powers of oregano, echinacea, garlic, elder, calendula, and other great herbs to keep your chicken’s immune system strong. This mix is perfect for fall and winter because it gives your chickens the immune boost they need to stay healthy!
You can find PCM StrongHen here: StrongHen
-
- 5 Backyard Chicken Friendly High Protein Treats
- How to Keep Your Hens Laying Through The Winter
- How to Keep a Chicken Coop Warm in Winter
- The Big Chill: How to Keep Your Hens Hydrated Over Winter
- Use This Insanely Foolproof Hack to Keep Your Chicken’s Water From Freezing This Winter
- Keep Your Chicken Coop Mice-Free This Winter
- 7 Tips to Keep Your Hens Safe This Winter
If you’re raising backyard chickens, then you’ve likely also come across the pesky problem of raising mice and rats. A good quality feeder solves unwanted food freeloaders and keeps your feed fresh and bacteria free. In this article, you’ll find DIY chicken feeder ideas that’ll keep your coop a clean and happy place for your flock.
Rats and mice are a problem because not only do they eat your chickens’ food, they leave droppings, attack young chicks, and spread disease.
So, keeping them out and away from your flock is critical.
Let’s go over what you need to know, and how you can make your own DIY no waste chicken feeder.
(If you don’t want to make one, here’s the no waste chicken feeders I recommend. There’s links to different ones on Amazon and they’re all high quality and affordable).
What Can I Make A Chicken Feeder Out Of?
Anything can be a chicken feeder as long as it can be removed from the coop for cleaning and it holds food.
But if you’re here, you likely want something more sophisticated AND that’ll keep pests away from your chicken feed.
A bowl is great, but it won’t keep mice and rats out during winter, when they’re more likely to try to build nests in the nooks and crannies of your coop.
It’ll also attract ants, and give your flock a way to throw their feed everywhere – making clean up a nightmare.
So, let’s look at different DIY chicken feeder ideas that you can try at home!
List Of Possible Materials For A DIY Chicken Feeder:
- Wood
- PVC
- Tupperware bins
- Repurposed food-grade barrels
- Metal
- Rubber
The possibilities are really endless – this is just a brief list of possible materials. You might even have them on hand if you build your own chicken coop!
We’ve found it easiest to make a no waste feeder from PVC, from parts sourced at any hardware store. Another easy option are the repurposed food-grade barrels. (See our DIY horse feeder tutorial here – it can easily be adapted for poultry).
In my experience, these are the two simplest chicken feeder ideas to implement.
While wood seems like a good idea, and it’s readily available, it’s not very easy to clean, and it can harbor bacteria in the grain.
If you have access to welder (a simple one is around $100 at hardware stores), a metal chicken feeder is great also.
5 Gallon Bucket DIY Automatic Chicken Feeders
Making a DIY chicken water feeder out of a 5 gallon bucket takes just minutes. This one is my favorite!
While this video is about how to make an automatic chicken water feeder out of a 5 gallon bucket, this idea can very easily be adapted for feed.
It costs about $12, and will take 5 minutes of your time.
Easy access to feed and water will improve egg production and lower the chances of your chickens developing bad habits like feather picking (which can easily be confused with chicken mites, so make sure they’re truly bored).
Click here for the tutorial for 5 gallon bucket automatic chicken feeder waterer
Here’s a second idea, using an an extra PVC component
Wood DIY Zero Waste Chicken Feeder
Wondering how to make a chicken feeder out of wood? This idea is good – but just note that it’s made out of wood. So, you’ll need to take extra care to clean it.
If you have wood hanging around, though, it’s very easy to make!
If I were to improve on it, I would add a second door at the bottom, so it can be shut at night to keep rodents out. (While chicken wire will keep most rodents out, keeping the feed closed at night will reduce the temptation to raid your coop, and reduce your mouse population.)
Here’s a second idea that looks easy to execute
PVC Pipe Feeder
We recently built one of these for our chicken coop, and it’s an easy chicken feeder idea to execute.
You’ll need to decide whether you want to drill holes into a PVC pipe for individual feeding holes, or remove the top portion of the pipe for easy group access.
You’ll also need to make sure there’s enough holes for each chicken – so if you have a large flock, like I do, then making access as easy as possible will also make your life simpler.
PVC Feeder Idea #1 (group automatic feeder)
PVC Feeder Idea #2 here (multiple individual feeder holes)
PVC feeder idea #3 (single feeder hole)
DIY Rain Proof Chicken Feeder
If you want to locate your feeder outside the coop, then you’ll need to make sure it keeps the grain dry. Sometimes chickens can be picky about the texture of their feed, and might turn their beaks up at mushy mash.
Muddy feed also molds fast (and can shorten your backyard chickens’ lifespan) – so, it should always be a priority to ensure your chicken feeder keeps your flock’s food safe from the elements that could cause it to spoil.
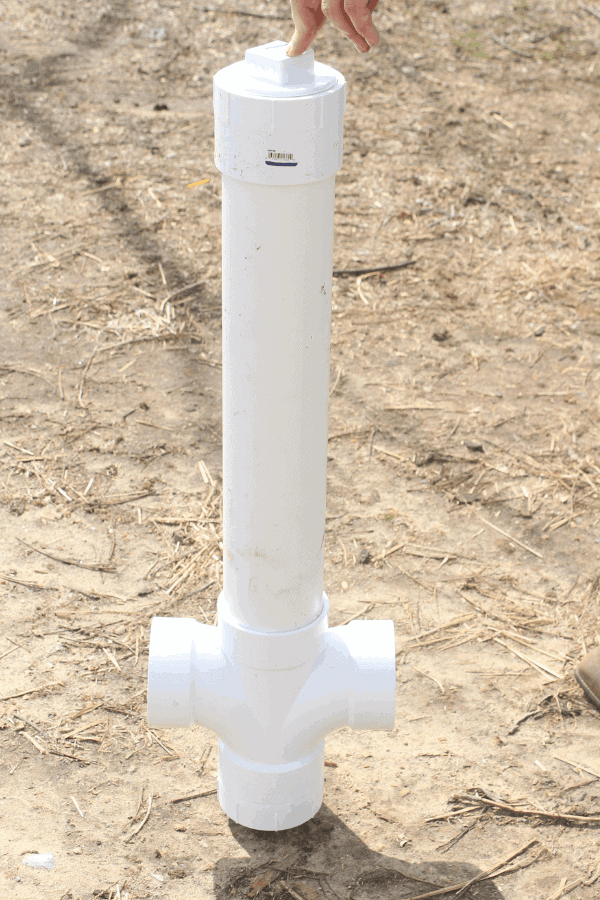
The easiest way to execute this chicken feeder idea is to add a rain hood or cap onto a PVC feeder.
This idea is made from an old kitty litter bin. Just be sure to clean the bucket before using it (and clean the bucket more often than this author has)
You can also try to make the PVC feeder below – this one has a rain hood you can find at any hardware store. The only caveat is that because of the rain hood, it can’t be closed – so rats can still get in.
However, it IS a no waste feeder. You will need to make multiple ones, however, if you have a larger flock.
DIY No Waste Chicken Feeder Bin From A Tote
If you have a plastic tote (aka Tupperware bin) hanging around, you can make an easy no waste feeder from it. You’ll need to drill holes into it (2-3 inch holes) and add PVC pipes. You can use glue to hold the PVC in place.
It’s easy to clean, reduces food spoilage, and keeps your feed dry!
DIY Hanging Automatic Feeder
DIY YouTube chicken feeders are easy to execute because you usually get step by step instructions. If you have a lot of time, and are handy, then this chicken feeder idea might be for you. Looking at the video, it feeds chickens a few grains at a time when they poke at a hanging element.
It’s clever, but I think it also can be improved upon. I personally would opt for one of the feeders above (but it might work well for your situation!), especially if you feed a mash (it looks like this will only work with pellets or a textured feed)
It’ll also certainly keep rats out of your food. For more intelligent and mischief-loving breeds, like Speckled Sussex, a feeder like this will entertain them for hours.
DIY Baby Chick Feeder
For chicken feeder ideas for your chicks, here are some incredibly creative and simple chicken feeder ideas for you to try.
It’s always a good idea to keep plastic out of landfills! These look like they can me made in just a few minutes
I love how this one re-uses a yogurt container
DIY Chicken Feed Recipe
If you’re interested in feeding your chickens with organic and non-GMO feed that will keep them healthy and happy without costing you a lot of money then you’ll find this recipe helpful:
Get my best organic non-GMO chicken feed recipe here
Don’t want to make it yourself? You can buy my favorite 100% NON-GMO layer feed here
What Do You Feed Organic Chickens?
A high-quality layer feed with 16% protein and supplemented with nutrients is the best thing to feed backyard chickens. You can make your own feed using my layer feed recipe here, or find a high-quality non-GMO chicken feed here. You can also supplement their diet with table scraps, alternative chicken feeds like dried insects, and high quality chicken treats. It’s also critical to know what chickens can’t eat, like avocado and dried beans.
Here’s a brief table of what chickens can eat (not comprehensive):
| Fruit | Legumes | Vegetables | Seeds | Proteins | Dairy | Grains |
| Berries | Peanuts | Spinach | Sunflower | Mealworms | Milk | Wheat |
| Cantaloupe | Alfalfa Hay | Tomatoes | Flax | Black Soldier Fly Larvae | Greek Yogurt
(Plain) | Oats |
| Watermelon | Peas | Squash & Pumpkin | Pumpkin | Dried River Shrimp | Cheese | Rye |
| Bananas | Clover | Kale | Hemp | Eggs | Whey | Millet |
You can also find a list of what chickens eat here.
Here’s a list of what chickens SHOULD NOT eat:
| Vegetables | Fruit | Legumes | Grains | Other |
| Potato skins | Avocado skins & pits | Dried beans | Dry rice | Salt |
| Onions | Apple seeds | Uncooked beans | Chocolate | |
| Chards | Peach pits | Lots of sugar | ||
| Rhubarb leaves | Coffee |
Should I Hang My Chicken Feeder?
Yes, hang the chicken feeder to keep vermin out of it and so your chickens don’t poop in their grain. Be sure to at an appropriate height – 8 to 12 inches off the ground is best. You can also hang it about the middle of your bird’s back, if you think 12 inches is too high. In addition, by hanging your chicken feeders, you prevent vermin and predators from getting to the food.
How High Should I Hang My Chicken Feeder?
8 to 12 inches off the ground is best. You can also hang it about the middle of your bird’s back, if you think 12 inches is too high. Remember that some chicken breeds like Silkies can’t fly, and Cochin bantams and Sebrights are very short, so make sure your feeder is at the right height for everyone to get a meal.
How Do I Keep Rats Out Of My Chicken Feeder?
To keep rats out of your feeder, you’ll need to use a feeder that closes. Also store food away, and make sure to clean up any spills as they are likely to attract unwanted guests. You can check out my automatic chicken feeder ideas here.