Get rid of flies in your chicken coop this summer before life gets too buggy.

To say we have a LOT of manure is somewhat of an understatement. With the amount of animal poo we have on our farm (with horses, pigs, goats, and rabbits in addition to our chickens), we are set for life. And a lot of manure equals a lot of flies.

The key to getting rid of flies, I’ve found, is to try to stop them from breeding. While you’re never going to get rid of ALL of them, you can do a good job decreasing the population, especially if you have just a few chickens.

Luckily, keeping flies away from your chicken coop is easier than it seems as long as you follow a few critical steps. 

Beware of flies sign on a wooden fence

You also might need to use more than one idea on this list—I’ve found preventing flies from returning takes a couple of different plans of attack.

That being said, here are ideas to get you started. Go get rid of flies in your chicken coop!

Keep your chicken coop clean

While there are a lot of ideas in this article, I think the basis of any program to control flies is to start with a clean chicken coopWithout this critical first step, you’re just managing a situation that will eventually overwhelm you. 

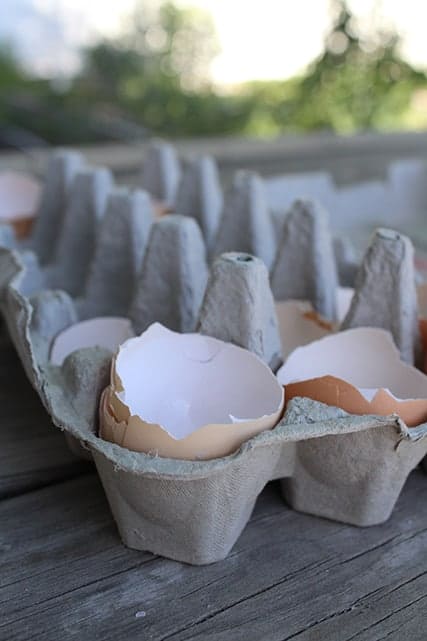
Flies like poop, muck, food, broken eggs, and whatever else they can find in chicken coops. If you make sure your hens’ home is relatively manure and crud-free, less flies will be attracted to it.

To clean your chicken coop, you can use a rake to remove soiled bedding, old hay from nesting boxes, etc. Sweep out whatever debris is left. Put all of the chicken litter in a compost pile that is set apart from your chicken coop. If you have the ability to have a covered composting system, that will also help reduce flies.

Next, use plain water or water and citrus vinegar mixture with a scrub brush to get rid of any manure that might be hanging around your chicken coop. Do not the area really wet as moisture breeds bacteria.

Finally, top everything off with a mint essential oil spray to kill bacteria and repel flies.

When cleaning your chicken coop, do not use bleach at all. Bleach combined with the ammonia from their manure can create poisonous fumes. All natural is best to get rid of flies in your chicken coop.

All-natural fly repellent

Repellent is a no-brainer way to get rid of flies in your chicken coop, but going all-natural is, again, your best option.

You’ve already taken all these steps to limit your flock’s chemical exposure. Don’t drop the ball at the last minute and go with something laden with them.

Making your own natural fly repellents is easy. Consider using mint or calendula essential oils, which are said to repel insects.

After formulating your repellent, spray in your chicken coop daily or as needed. Many of the recipes call for oil, such as essential oils and mineral oil, and I will warn you that oil can clog up the average spray bottle. You will need to invest in a high-quality spray bottle that can handle the oil.

Fly strips

Strips are a non-invasive method that works well to get rid of flies in your chicken coop.

We use them in our house, and as soon as we put them up, within minutes, flies have found their way to them.

The problem with strips is if you have a lot of chickens, they probably won’t be able to keep up with the number of flies. If you only have 4 or 5 chickens, however, and your coop is otherwise clean, then you can give them a try.

Just remember that fly strips can’t really take the place of a clean chicken coop. So, they’re best used as part of an overall pest control plan, rather than as a sole strategy.

Herbs

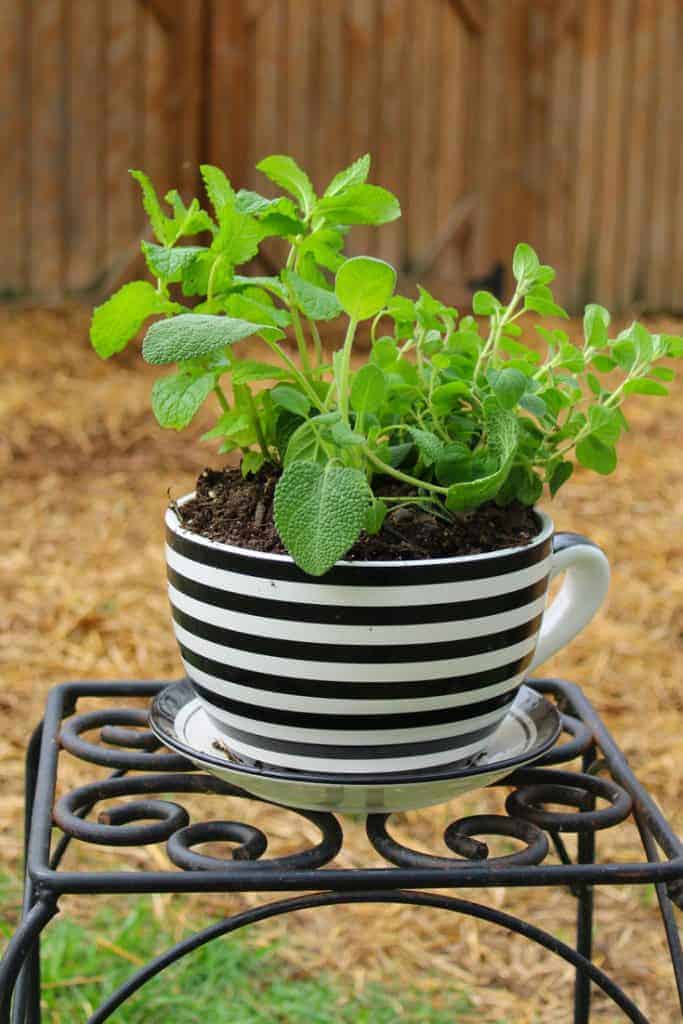
Certain herbs are known to be pest repellents, and might help get rid of flies in your chicken coop. Mint and calendula (marigold) are two of many herbs known to fight off the mighty fly.

They also have an added benefit: they’re very good for your hens, so if your flock decides to snack on them, so much the better.

You can hang dried or fresh herbs in your coop as part of an overall pest control plan. You can also incorporate live marigold and mint plants around your chicken coop.

There are many recipes online that incorporate a whole host of other herbs – everything from basil to lavender, thyme, and rosemary, plus citronella and lemongrass.

It’s a nice way to upgrade your chicken coop area AND reduce the fly population.

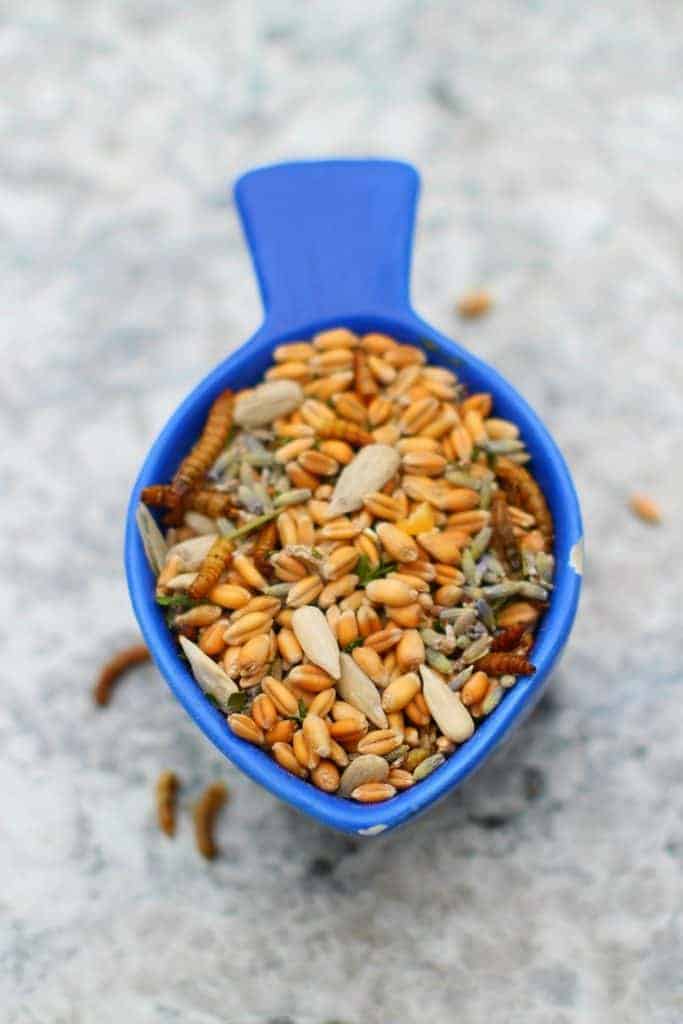
We believe in herbs for pest control so much that we started making our own blends, and then people started asking for them. You can find them at our store here if you aren’t in the mood for hunting all the herbs down and figuring out the best recipes.

You might also want to give Cleanest Coop Ever a try. It’s full of all the fly-repelling goodies!

Fly predators

Fly predators are gaining popularity, and we’ve used them around our horses in the past. These are live insects that feed on larvae to interrupt the breeding cycle of flies. 

You do need to use them monthly, but you can find 5,000 predators for about $20.

While they’re effective, if you live near other farms that don’t use them (such as large dairy farms or farms that don’t exercise any fly control), they’re less effective.

They’re more expensive than other options to get rid of flies in your chicken coop, but not outrageously expensive.

Click here to see an example.

Ventilation

Consistent airflow is one way to reduce the fly population in your chicken coop, and although it’s simple, it’s quite effective.

If there are open windows on either side of your coop, then a strong cross breeze will keep flies away.

Another option, if your chicken coop has electricity, is to use a fan.

Make sure you use a gentle circulating fan rather than a large industrial one to ensure your chickens don’t accidentally get injured.

While any fan can obviously hurt them if they try hard enough, a fan with a safety grate with ¼” openings or smaller will work fine.

Diatomaceous earth

Diatomaceous earth works by cutting through the exoskeletons on insects, so it can help reduce the flies in your coop.

When your hens are out of the chicken coop for a while, sprinkle the DE around lightly. Remember that it can be caustic if inhaled, so wear a safety mask.

It won’t work immediately—DE takes a while to get into the flies’ bodies, but it works against larvae as well.

You can also provide an inviting place for your hens to take dust baths. But not just ANY dust baths – you can use herbal blends specifically formulated to repel pests. Here is one of my favorites.

Chickens

Your chickens themselves are a good way to control flies.

On our farm, we have 8 horses, and few flies comparatively because the chickens hunt the larvae and keep the population under control.

In fact, we have several chickens whose entire existence is about keeping the flies down.

A word about traps

A fly trap works relatively well killing adult flies. But there are a couple of caveats that I should mention.

The first is that you’re only killing adults—not getting rid of the larvae. So you’re reacting to all the bugs in the coop, and not hitting them where it matters.

The other thing about traps is after a while, they smell disgusting.

To this day, I cannot walk by one without wanting to vomit. Particularly if you’re pregnant, avoid using traps, and opt for a different solution. You’ll thank me.

So, if traps work for you, then go for it, but there are other options I prefer to try first.

Summary

Flies are gross and can carry disease and bacteria, true. But they, and their larvae, can actually be good for chickens to eat. So it’s best to try and get rid of flies in your chicken coop – first by having a really clean coop, and then by using some of the other preventative measures. Any little annoying flies (or their larvae) that remain, might just be a good snack for your flock.

It’s Tuesday treat time! Who doesn’t love lavender? I do, you do, and your hens sure do!

This week’s treat is bursting with herbs and protein (which is the best combination, don’t you think?) and you can make it for only a few dollars.

I thought I would change things up a bit this week with mealworms. My hens LOOOVEEE them – in fact, I timed them the other day, and it took them less than 60 seconds to devour a full cup of mealworms!

Spring can be a taxing time on your hens bodies because if they haven’t been laying, they’ll need more protein to get their little bodies into gear!

The lavender also helps to relax them so they’ll feel safe and comfy sitting for a while to get ‘er done and lay you some eggs!

If they laid all winter, supporting their bodies in the spring is still a good idea since they’ll likely be ramping up production naturally.

I love making these trail mix types of treats because it allows you to offer different types of nutrients, and hens love them because there’s a lot of different “flavors” to explore.

Particularly if your hens live in a coop and run full time, mixes like Lavender Springtime Treat Mix give them something new to cluck about AND environmental enrichment to keep their brains going!

And my flock loves picking at it while they poke around, exploring their new treat!

In a similar vein, the parsley is full of hidden vitamins. Although for human food, we tend to relegate parsley to a garnish, it’s a great source of necessary nutrients for your hens.

If you have a spare corner in your garden, you can grow parsley for your flock in a grazing box as well, which makes it easy to ensure they always have access to this “chicken superfood.”

The lavender, naturally, smells heavenly, and it wouldn’t surprise me if you made your own treat with it! (Have you checked out my recipe for lavender syrup?)

If you have any lavender leftovers, you can make yourself a relaxing herbal tea with it and add a bit of chamomile!

We have lavender for sale in the shop, but wherever you source it for your flock, please be sure it’s naturally grown and not been sprayed with chemicals or pesticides.

Here’s how to make Lavender Springtime Treat Mix for your hens!

Lavender Springtime Treat Mix

Ingredients (per backyard chicken):

1 tablespoon lavender flowers (dried or fresh)(buy naturally grown lavender here)

3 tablespoons unsalted, raw sunflower seeds (shelled is best, but with the shell on is ok)

3 tablespoons wheat berries (buy Non-GMO naturally grown wheat here)

2 tablespoons dried mealworms (buy USA raised & harvested mealworms here)

1 tablespoon parsley (dried or fresh) (buy naturally grown parsley here)

Directions:

Combine all ingredients in a bowl and feed as part of a complete diet.

Summer has officially started! And so has what I like to call “mom has to find activities to keep her kids entertained season.”

It can be SOOO hard to come up with activities to keep kids entertained and avoid the dreaded “I’m bored, mom”

So today I’m going to tell you about some of my favorite outdoor farm-themed activities that are SO fun to do with your kids. And most of these activities you can do for FREE, or for pretty cheap. Bonus!

Making Butter

This is the classic, trick your kids into doing work for you when they actually think it’s a game. Which is quite possibly my favorite thing;) Homemade butter is AMAZING! In my opinion, there’s nothing better than homemade butter spread on bread. And making your own butter isn’t as difficult as it seems, especially when you have some extra little hands to help you!

It can be a super fun experiment for your kids and they will love seeing the cream turn into butter!

All you need for this activity is some heavy whipping cream and a jar with a lid.

Fill the jar about halfway full with the heavy whipping cream. Make sure you get the lid on tight! Otherwise you’ll have a huge mess. If you have younger kids and you’re worried about them dropping a glass jar, use a plastic container with a lid instead. You can also add a little bit of salt if you like salted butter (I personally don’t add salt, but it’s up to you!)

You can also put a marble in your jar to speed up the process (don’t use a marble in a mason jar though!!! I learned the hard way that the marble will break the mason jar. Let’s just say I had a lot of glass and whipped cream all over my living room the first time I tried doing this)

Now start shaking! Your kids can take turns shaking the mason jar and as you shake the cream will start to thicken up! Typically it takes about 15 minutes of shaking for it to be done (but it all depends on how hard your kiddos shake!)

After you’ve been shaking for about 8-10 minutes open it up and you’ll see the cream is starting to solidify! As you go on you’ll see the butter separate from the buttermilk!

Once the butter has solidified, separate it from the buttermilk (you can keep that for cooking a yummy treat later on!)

I recommend rinsing the butter with cold water to make sure you get off all of the buttermilk! Then you’re ready to go! Your kids will love making their own butter and getting to eat it on some yummy bread after!

Painting With Vegetables

Ok, fair warning. This activity will be messy, but it’s also REALLY fun! But definitely do this one outside to simplify the clean up. All you need is some butcher paper, or poster board, paint (non toxic like this kind!), and some leftover vegetables from your garden!

Pour some of the paint into a disposable pan (like these) or into a bucket. After that you can dip the vegetables in the paint and roll them out on the paper. Different types of vegetables make different patterns and it’s fun to experiment and see what type of patterns you can make with all of the different veggies!

Bean Bag Toss

Creating a bean bag toss is classic, and super fun!

I found this amazing DIY Bean Bag Toss that looks like a barn! It’s so cute and it’s super simple to make!

If you don’t have the time to make an actual bean bag toss, you could just set up buckets that your kids can throw the bean bags in!

You can also easily make some DIY bean bags as well! Cut our two rectangles to your desired bean bag size and sew the two pieces together around the edge, leaving a small space open. Fill the bean bag with pinto beans (or uncooked rice) and then sew it closed! Easy as that!

If you aren’t into sewing (like me!) you can hot glue the fabric together instead of sewing it. It likely won’t last as long, but your kids will still be able to get tons of use out of it! For children on the spectrum, this is a great sensory exercise.

I love using bean bag toss as an activity for kids because they get to throw things, but not at each other (hopefully)

Paint Filled Egg Art

Ok so this one is CRAZY messy, but your kids will LOVE it. You basically just fill egg shells with paint and throw them at a big piece of butcher paper or canvas. I know it’s messy, but I think it’s worth it!

We have tons of eggs around here, so finding spare egg shells is too difficult;) When you crack the eggs you’re planning on using for this project try to just crack it at the top and keep the egg shell mostly intact (more detailed instructions here).

You then fill the egg shell with paint and use a glue stick to attach tissue paper over the hole to keep the paint in! (This step is optional, if you have older kids who won’t spill the paint out of the egg before they throw it, you can just fill the eggs with paint and skip the tissue paper step)

Then you and your kids can throw the eggs at a canvas and see the amazing art it makes! I definitely recommend doing this on the grass! I learned the hard way and now I’ve got pink paint streaks on my side walk:) But I love the fun paint splattered look of this project!

Homemade Ice cream

This was my FAVORITE thing to do as a kid! This ice cream is SOOO fun to make and it is super simple too! You mix the ingredients together and then toss a bag around for 20 minutes. It’s great for a game of hot potato or catch and you get ice cream out of it too!

Here’s the recipe:

Ingredients

    • 1 heaping T of instant pudding (in the flavor of your choice)
    • 1 t vanilla
    • 1/4 c of sugar
    • 3/4 c. cream
    • 1 cup milk
    • 2 c rock salt
    • 4 cups ice

Instructions

You’ll need 2 qt sized Ziploc bags, 2 gallon sized Ziploc bags, duct tape, newspaper, and some plastic grocery bags.

In one of your qt sized Ziploc bags mix together pudding mix, vanilla, and sugar. You can choose the pudding mix of your choice! You can even experiment and mix flavors together. I’m dying to try caramel and chocolate mixed together. If you’re doing two different flavors just do a 1 ½ teaspoons of each flavor.

Close the bag (make sure it is closed tight!) and squish the ingredients together.

Next add cream and milk into the same ziploc bag and then squish all of the ingredients together again.

Place bag your qt sized bag into another qt sized bag (the extra bags are to stop the ingredients for leaking all over. If your kids are rough with this kind of stuff, add extra bags and newspaper for more protection)

Place bags inside of a gallon sized Ziploc bag. Place 2 cups of rock salt and 4 cups of ice in the gallon sized bag, spread equally on either side of your qt sized bags.

Place this bag into another gallon sized bag and begin to wrap with newspaper. I wrap it with at least 5 layers of newspaper and then tape it all together with duct tape. Then I wrap a couple grocery bags around the outside for extra protection and tape them down with duct tape.

Then comes the fun part! Toss the bag for about 15-20 minutes. Then your ice cream will be ready! If you unwrap it and it isn’t quite done, just wrap it up again and keep tossing it!

Before I open the last bag that has the ice cream in it, I recommend that you wash off the bag with cold water. This gets off any of the rocks salt that might have been on the bag and prevents you from having salty ice cream!

Old-Fashioned Games

Last, but not least we have old-fashioned games. I love old-time games, they’re classic and really entertaining. Here are my favorites:

Three-Legged Race: Have two people stand right next to each other and tie their inside legs together with a bandana. See which team can run to the finish line the fastest.

Potato Sack Race: Each person puts both feet inside of a potato sack (or pillow case) and holds the edges of the sack up with their hands. See who can hop to the finish line first.

Marbles: There are so many games you can play with marbles. This website shows some of the games you can play. You can buy marbles here 

What activities are you planning to do with your kids this summer? Help this momma out and share your ideas in the comments below!

Hey y’all! Here’s this week’s sneaky peek photos of life on our farm!

These images also appear on my Instagram account where I share MANY more photos and stories from the farm!

If you aren’t yet following me there, you can right here.

Enjoy the photos & be sure to share some of yours with me!

So one of the most important aspects of your chicken coop is proper ventilation.

Chickens have a very delicate upper respiratory system and so it’s very important that your coop has proper ventilation to avoid respiratory diseases in your chickens.

Chickens also poop A LOT. And trust me if you don’t have windows in your coop, it’s not going to be pleasant for you or your chickens.

One of the easiest ways to ensure that you have proper ventilation in your coop is to add windows. Windows allow air to flow in and out of coop and it can carry some of the smell out (thank goodness!)

I wrote an entire article about how you can add windows to your coop  to help keep your chickens cool this summer. Adding windows is a great way to keep your chickens cool and make sure your coop has the ventilation it needs.

I also love having windows and doors in my coop because it allows sun into your coop which can help your flock get the Vitamin D that they need.

Vitamin D is important because it helps with calcium absorption which ensures your chickens have strong bones and healthy eggs!

In addition to making sure my chickens get enough Vitamin D I also give them my chickens nesting herbs (I sell nesting herbs here in my store), so that they stay healthy and produce healthy eggs!

There are so many different ways that you can add windows to your chicken coop and there are TONS of different window styles that you can use.

So today I decided to collect some of my favorite chicken coop window ideas, so you can see how many different options there really are for windows for your coop!

First off if you’re building a new coop check out my article about chicken coop plans! I’ve gather more than 50 chicken coop plans that are all free for you to use! I love all of these plans and they all have great ideas for windows for your coop!

If you’re just starting out raising chickens, I highly recommend that you read my book about how to raise naturally raise chickens.

I give tons of detailed information in that book on how you can raise a healthy flock, that’s difficult to fully explain in a short blog post! So check it out!

 One of the most important things for you to do when adding windows to your coop is to make sure you have some way to protect your flock from the elements.

There’s nothing worse than a wet coop (and wet chickens) because you don’t have any way to cover your windows on your coop!

In my coops, the roof overhangs over the side of the coop, so that when it rains water can’t get into the coop. But if you’re adding windows later on and your roof doesn’t overhang then I recommend you find some way to cover your windows. You could add a door or a shutter to your window that can easily be closed during a rainstorm.

One of my favorite window ideas is adding shutters to your windows. I love how cute shutters are on windows, especially on chicken coops! Not only are shutters really cute, but they also are functional and can protect your coop from the elements during a storm!

These shutters are some of my absolute favorite! I love the idea of adding a colorful shutter to the window of your coop!

I think it’s a super cute way to protect your coop from the elements. I’m also a huge fan of window boxes. Check out my article here all about my favorite window box ideas for your chicken coop!

I also really love these cute shutters on this coop! While these shutters don’t look like they are actually meant to be used, they do look so cute and would be so easy to add to your coop as a fun decoration!

I also love that these windows have a screen on them! One of the biggest concerns I hear from readers during the summer is how to keep flies and bugs away from your chickens during the summer.

I love the idea of using screens on the windows of your chicken coop to prevent insects from getting inside your coop.

While this won’t prevent all bugs from getting into your coop, it will help so I think adding screens over your coop windows is a great idea to help keep some bugs away from your chickens.

Because a screen won’t keep all of the bugs out of your coop I also recommend that you use herbs, such as citronella lemon balm, and peppermint. I also have an amazing recipe for peppermint coop spray that does a great job of keeping bugs away during the summer.

This window is so cute too! I love how simple this window would be to make and how versatile the smaller, narrower window is for a smaller coop.

Don’t be afraid to use a window that isn’t the conventional shape. I think this window is great because with smaller coops it can be harder to add a full sized window.

Especially since my chickens will try to fit through anything! This longer narrower window style prevents your chickens from getting out and predator from getting in!

Although you should always add chicken wire over your window (especially when it’s as close to the ground as this one to prevent predators from getting into your coop!)

Square windows.

Traditional, but so classic for any chicken coop. I love the wood trim around the outside of the windows. I think it adds a really nice touch and is an easy way to quickly make a normal window look much nicer! Note the chicken wire on the window – that’s a great way to keep out predators!

What have you done to dress up the windows on your chicken coop? Tell me about it in the comments below!

With summer comes one of my favorite things….outdoor parties!

Whether it’s a simple family barbecue or a massive neighborhood shindig, I LOVE outdoor parties! The combination of food, friends, and family is perfect! I absolutely love being able to spend time with friends and family, especially in the outdoors.

Personally I LOVE outdoor decorations, and since I love parties so much I’m kind of obsessed with DIY outdoor decorations for parties (I have a whole Pinterest board for it)

So obviously the décor at your outdoor party isn’t the most important part, but it sure can make a huge difference! I LOVE outdoor decorations and I use them for all kinds of activities. I’ve even written an entire post about how you can use DIY outdoor decorations for sensory activities for your kids!

So here is some of my favorite DIY décor that that you can make for your next outdoor party

Tissue Paper Pom-Poms

Tissue paper pom poms are my go to for outdoor decorations. They’re so easy to make (literally they only take like 2 minutes). Plus they’re SO CHEAP! These look great hanging from trees or underneath a pergola, and they’re a super fun project to make with your kids! Check out this tutorial on how to make simple tissue paper pom poms.

https://www.instagram.com/p/BY-pUSzHVO0/?utm_source=ig_embed

Herb Pot

So I recently made a DIY herb pot for my chickens. It’s super cute and they absolutely love it! I just planted herbs in a simple coffee mug! Not only is this idea great for chickens, but it’s also a super cute decoration idea for your backyard! It’s so simple to make and it looks so cute!

 Tin Can Herb Garden

So one big thing for me is that my decorations are also functional. I love that this tin can herb garden is practically free and it is also a functional (and cute) decoration. Herbs are so useful and they smell AMAZING so they’re the perfect addition for a backyard decoration.

https://www.instagram.com/p/BjqHsLhBECJ/?tagged=herbgarden

Sometimes though herbs can be tricky which is why I wrote an entire book about the best ways you can grow herbs in your backyard! You can learn how to grow 30 different types of herbs in your own backyard! It’s a handy reference book to have around. If you’re looking for more tin can herb gardens ideas check out this article! There are tons of different tin can herb garden ideas that you can use to decorate at your next party!

Planter ladder

I’m a huge fan of using planters for an outdoor decoration. They look so cute, but they’re also so functional! Check out this awesome ladder planter that you can make for only $10! And the plans are free!

https://www.instagram.com/p/oLzRSDy5KF/?taken-by=shanty2chic

One of my favorite things about planters is they’re great for gardening in small spaces! Check out my article about how I gardened when I lived in a small apartment! Also check out my book all about backyard gardening!

Outdoor games 

So I’m a huge fan of outdoor games! I think they’re so fun and they look great! They provide a fun activity for your guests, but they can also be really cute decorations as well!

Garden Checkers

I love this giant sized garden checkers. This version just evenly spaced tiles across the grass.

https://www.instagram.com/p/Zgpp2XsLb1/?tagged=gardencheckers

You could even just use bucket lids (like these ones) for the checker pieces (I always have a million lids hanging around). All you would need to do is spray paint half of the lids black and leave the other half white and you have a giant checkers game! It looks cute in your yard, but it also provides an awesome activity for people at your party!

If you aren’t into redoing your yard for a checkers game (I don’t blame you) you can also check out these checker board mats! They’re super cute, but they’re also easy to put away quickly.

DIY Cornhole

Cornhole is definitely a classic outdoor game. I love how beautiful these homemade cornhole boards are! I think they add a super cute decoration to any yard and they’re a fun game for everyone to play!

https://www.instagram.com/p/BjiXHeeHzg1/?tagged=backyardgames

Check out this awesome tutorial on how to make your own cornhole board! It’s free and it’s a great tutorial!

If you’re not into making your own you can also buy one here!

Giant Jenga

So I keep seeing giant jenga all over the internet and I keep meaning to try it out! I love that in this version they painted the wood different colors to make it a gorgeous backyard decoration!

https://www.instagram.com/p/BjmtawbAEEL/?tagged=backyardgames

DIY Backyard Pergola

I am a huge pergola fan. Building a pergola for my backyard has been on my list for a LONG time. I just haven’t gotten around to it yet. These plans for a DIY Pergola are some of the most comprehensive pergola plans that I’ve seen. I love how thorough the plans are and how simple it is to build. Plus they’re FREE!


Paper Triangle Garland

Paper garlands are some of my favorite outdoor decorations. They are a simple and easy decoration that are so easy to customize! You can choose any color or pattern that you want! You could even experiment with different shapes too! I found these chicken shape templates, and I’m thinking I might make a garland from paper chicken cut outs for my next outdoor party;)

Check out this tutorial on how you can make your own paper triangle garland.

DIY Tree Stump Coasters

So I love coasters!!! These tree stump coasters are a super simple project and will look great on any outdoor picnic table! Check out the great tutorial for this project right here!

https://www.instagram.com/p/0kNCW2o1nt/?tagged=treestumpcoaster

DIY Backyard Table

And if you have coasters, then you have to have an outdoor coffee table right? I love this super simple tutorial for an outdoor coffee table. It would look amazing at your next outdoor party and it only costs about $15 to make this project! Bargain! Check out the full tutorial here!

DIY Outdoor Seating

One of the most important parts of an outdoor party is ensuring that their is enough seating for everyone! Plus all of these outdoor seating ideas look amazing and are perfect decorations for your backyard.

DIY Backyard Porch Swing

I LOVE porch swings. Some of my favorite childhood memories are sitting on my grandparents porch swing with my family. I’ll admit though I’ve always been kind of intimidated by the thought of building my own porch swing. These DIY plans make the whole process so much easier. I love that this tutorial takes you through each step one by one (because my woodworking skills are definitely subpar).

https://www.instagram.com/p/pw5t1sy5N3/?utm_source=ig_embed

DIY Pallet Chairs

I’m a huge fan of using pallets because I always have a ton around the homestead. I absolutely love this tutorial for a DIY Pallet chair. It looks great and it’s practically free! Using pallets to make furniture is the perfect way to maximize your seating space (and your funds!) Remember to check your pallets to make sure they haven’t been treated with chemicals! Learn how to check in this article right here.

DIY Hammock

There’s nothing better than relaxing in a hammock on a warm summer evening. I think hammocks are a great way to add additional seating to your backyard and the hammock chair in this tutorial looks AMAZING!

Hanging out in the shade in a hammock is a great way to stay cool during the summer. Check out my article about how you can stay cool this summer without power!

Hanging Vases

I’ll admit it. I’m a sucker for flowers. I love ANYTHING with flowers. These cute hanging flower vases are so easy to make and they look so cute! These would be the perfect decoration for a party or even a wedding! All you need is some twine and some small vases like these ones (I highly recommend you get plastic ones!) and you can create your own hanging vases for your backyard.

Ribbon Garland

Ok, so I might be a little bit obsessed with ribbon garlands. They’re the perfect outdoor party decoration because they’re so easy to make! This tutorial is awesome and I love that it breaks down exactly how you can make the perfect ribbon garland.

https://www.instagram.com/p/BimzbJ9llA5/?tagged=ribbongarland

Ribbon Tassel Garland

So this ribbon tassel garland is for those of you who want a ribbon garland that’s simple and classic (or if you don’t have a whole lot of ribbon). It’s simple to make and it would look great for any outdoor party!

DIY fire pit

I love backyard fire pits. They bring an added charm to any backyard which makes them perfect for outdoor parties. Plus it simplifies the cooking for you if you just give everyone a roasting stick and have them cook their own hot dogs;) See what I’m saying? It’s a win-win all around. So I’ll admit this DIY project isn’t for the faint hearted. It looks AMAZING! But it’s pretty time intensive. Make sure you follow the directions for this tutorial because you don’t want to make a careless mistake (especially when there’s fire involved!) Check out the full tutorial here!

Not into building your own fire pit? You can buy one here.

Simple Backyard Teepee

Need somewhere for all of the kiddos to hang out during the party? Check out this awesome tutorial for a five minute backyard teepee. Your kids will love having this fun space to hang out in and it makes a super cute decoration.

https://www.instagram.com/p/BjXUGtfndlH/?tagged=diyteepee


Balloons on String

This might be the easiest decoration every. You just need to blow up some balloons and poke a need with thread through the bottom (the tied part, not the part filled with air;) of the balloons. This connects all of balloons together on the string! It looks great and it’s one of the easiest decorations out there.

https://www.instagram.com/p/bumSKlv2Nu/?tagged=balloonsonastring

DIY Address Numbers Display

I love this cute front porch address display. This is a great way for your guests to be able to easily find your address! Check out the full tutorial here!

https://www.instagram.com/p/oQ3B9mS5B4/?taken-by=shanty2chic

https://www.instagram.com/p/qwREE3y5GN/?taken-by=shanty2chic

Need an extra hand with cleanup after your backyard party? Don’t worry, I’ve got you. Head over to my store and check out my soap. It’s organic and it’s great for anyone with sensitive skin! Need something that’s a little bit tougher? Check out my garden soap made with calendula! It smells amazing and it’s great for your skin!

Are you having an outdoor party this summer? I’d love to hear about your decorations! Share them with me in the comments below!