Microgreens for chickens? You bet! They are easy peasy to grow and packed full of nutrients. Learn the scoop on microgreens here!

Sunflower microgreens are a delicious addition to your recipe collection, and they’re so easy to grow in your kitchen. You can grow them for yourself (because they are full of nutrition for humans and chickens) and then share them with your flock.

Once “mature,” you can harvest your sunflower microgreens, and their rich, nutty flavor and crunchy texture fit into every meal of the day. They pair particularly nicely with eggs at breakfast, soups, sandwiches, and wraps at lunch, and meats and grains at dinner.

Chock full of vitamins, protein, minerals, calcium, and lecithin to break down fatty acids, sunflower microgreens are not only delicious, but they also pack quite a nutritional punch. Growing them yourself is economical, satisfying, and fun. It’s an easy crop for children to plant and grow and makes a great addition to their favorite meals, including pizza, tacos, and alphabet soup.

As an added bonus, your chickens, ducks, other poultry, and rabbits will also jump at the chance to down some sunflower microgreens as part of their diet (and you might even save some money at the same time!)

Are you ready to exercise your green thumb by growing your own sunflower microgreens this planting season? Follow these super easy steps!

Step 1: Purchase Quality Seeds

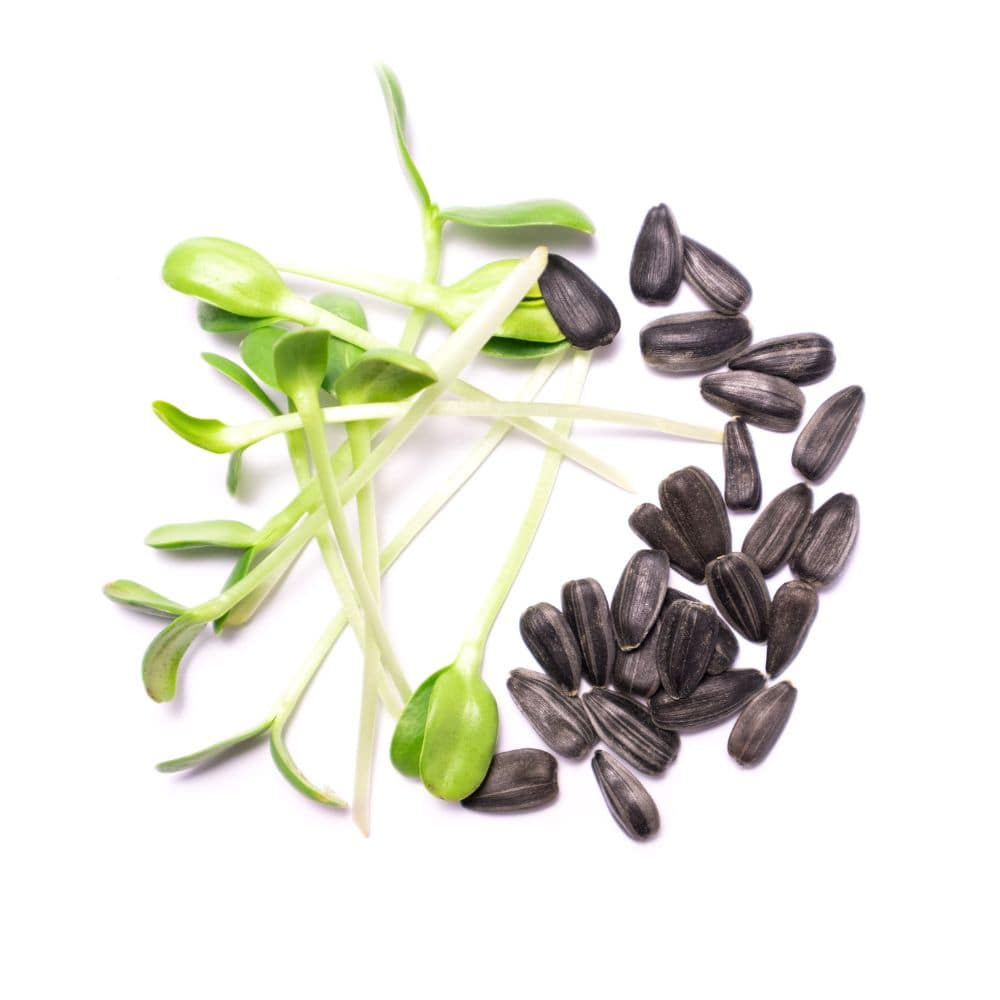
Start by purchasing quality sunflower sprouting seeds. You don’t need to purchase the most expensive seeds, but you do want the black oil sunflower seed variety.

Make sure the seeds you purchase are for sprouting – organic seeds are best so you can be sure they haven’t been sprayed with harmful chemicals.

Click here to buy organic sunflower sprouting seeds on Amazon

Then purchase a growing pad, organic soilseedling tray, and plastic cover, and set them aside for later use. (You can make your own organic soil as well).

Step 2: Soak Seeds

Grab a mason jar and pour in enough seeds to cover your grow tray. Because we’re growing microgreens, space isn’t as big of an issue so be generous. You want a large enough harvest to make the effort worth it.

Be sure to keep the seeds covered as they soak to keep dust and bugs out of the jar.  This will speed up germination, and let you harvest the sunflower microgreens faster. You’ll also waste fewer seeds.

Soak seeds in clean, cool water for at least 12 hours.

If you don’t want to go through the soaking process, then you can just plant the seeds directly in the grow tray. It’s a faster process if you soak the seeds.

If you want to soak your seeds, then…

Step 3: Drain and Rinse

Drain and rinse the seeds thoroughly with cool water, then repeat the soaking process.

Again, use cool water and soak for an additional 12 hours. It’s very important to rinse the seeds thoroughly so they don’t get moldy.

At this point, you should start to see the seeds begin to sprout. It will look like they’re growing tiny tails.

Step 4: Plant Seeds

Pour potting soil into your grow tray and spread the seeds very thickly. You can cover the seeds very lightly with additional soil, but it’s not strictly necessary.

Cover the tray with the plastic top so moisture is retained – make sure there is some ventilation, and remove the top if the seeds begin to mold.

Up close of sunflower microgreens with all white background

Step 5: Water Sunflower Microgreens

Water your sunflower microgreens by placing the tray inside a larger tray or tub.

This allows the seeds to receive water from the bottom without disturbing them from the top. You don’t want to displace any of the dirt or disturb the teeny tiny little seedlings’ root structure.

Step 6: Give Them Light

As the seeds grow and start to push up, move them to a sunny spot (like a bright window) and continue to water them regularly.

You CAN use a grow light if you want, but it’s not absolutely necessary, since your sunflower microgreens will be harvested in a few days.

In a week to a week and a half, the sunflower shoots should be about 4” tall.

Step 7: Harvest

It’s time to harvest your sunflower microgreens!

Once they’re about 4″ tall, it’s time to harvest the fruits of your labor. Cut your sunflower microgreens right above soil level and store them in a sealable plastic bag.  They should last 4-5 days in your refrigerator.

To use them, pull out the amount you need for each recipe, and rinse them carefully under cool, running water.

Microgreens for chickens on all white background

Use this easy method to grow these tasty greens whenever you want them. Because they’re ready to harvest so quickly, they don’t require a ton of planning ahead, and because they last for 4-5 days when refrigerated, they can also be ready to use when you’re ready for them.

Feed your flock

Now you are ready to toss some microgreens to your hens to supplement their diet. You will enjoy watching them eat these sweet little greens with delight. You can rest assured that your backyard buddies are getting a treat PLUS excellent nutrition.

Feeding microgreens to your feathered friends is fast and easy but with great rewards. Plus if you start your own microgreens you will save a lot of money (in comparison to buying them from a health food store). These power packed snacks are great for your overall health (as well as your critters overall health).

Sunflower Microgreens Salad Recipe

Try your first harvest in a simple summer salad:

Mix sunflower microgreens with peeled and cubed blood oranges and avocados, peeled and shredded carrots, and chopped walnuts or pecans. Dress with a light vinaigrette dressing and add slices of crusty, homemade bread for a delicious summer meal.

Note: You can use any microgreens in this, and other, recipes.

What About Other Types of Microgreens?

Can you and your chickens eat (and benefit) from other types of microgreens? Yes indeed! Here is a short list of some things you can easily grow as described in this article.

  • Mung beans
  • Barley
  • Lentils
  • Kale
  • Alfalfa
  • Radish
  • Millet

Summary

Growing your own sunflower microgreens (or other types of microgreens) is a fun and useful project. It provides the joy of watching something grown, nutrition for your family and critters, plus they are tasty. If you have never tried growing microgreens, why not give it a shot and see what you (and your chickens) think!

Other Chicken Nutrition Articles

September is here…..which means it’s time to think about what to do in your chicken coop to prepare!

I can smell the pumpkin from here! Fall is on its way (or in progress) and there is a lot you can do in your coop this month! Help your flock stay healthy and keep your coop in top shape with these tips!

What to do in your chicken coop in September

The Top 10 List of Things To Do in September

#1 If it gets cold early in your area do a final deep clean before cool weather sets in

You won’t want to do it when the ground is frozen and you need 3 sets of gloves to stay warm. If you live in a temperate area, now is still the time to deep clean your coop before the days get shorter and you run out of time.

You’ll want to clean the coop itself, plus all the roosting bars, perches, feeders, and waterers.

Cleaning your coop means getting rid of dangerous bacteria and parasites, and that equals better health for your flock. It’s a great time to freshen up the coop with some good-smelling (and health-promoting) herbal nesting blends too. Check out a variety of nesting herbs here. fee

You can also decide if the deep litter method is for you.

#2 Double-check windows and doors for tight seals during chilly fall nights

When the wind is howling and there’s freezing rain, those tight seals can mean the difference between life and death. Just double check all your windows and doors seal well, and if not, fix it.

At the same time, we can have some pretty toasty temps in the early days of Fall, so be prepared to have proper ventilation during those times (while keeping an eye on cooler weather sneaking in).

The breed of chickens you have plays a role too, some are more hardy than others. But either way, you need to be prepared.

#3 Offer your flock pumpkin and pumpkin seeds every week. They’ll love the treat, and it’s super healthy for them!

If your chickens are cooped up, they always need extra treats. If they free-range, the fall and winter months can be scarce in the insect arena. Your poultry pals may need a boost.

Pumpkin is full of vitamins and minerals, and chickens LOVE to peck at it. The pumpkin seeds might (repeat, might) help your flock rid themselves of worms (studies are inconclusive, but it can’t hurt), or at the very least, provide a yummy distraction since bugs and leaves are dying off.

You can also make a pumpkin planter like this one, and offer it to your flock when you’re done with it. Just be sure not to paint it!

#4 If you have chicks, double check your coop stays the right temperature at night.

This will depend on the age of your chicks – if they only have down or are partially feathered, they will need your help to stay warm.

If not, either fix it or come up with a plan to keep chicks warm enough until they’re fully feathered. Remember that heat lamps get very hot and can cause a fire, so avoid them.

#5 Hang some fall wreaths or add fall flowers to window boxes

Fall is all about color – and adding a wreath or flowers to your window boxes can brighten up your surroundings and help your flock feel pampered (okay, okay…maybe it makes you feel pampered and happy…but a happy chicken mama counts for a lot).

Closely related are your chicken’s nest boxes. Making them cozy and inviting (with specialty nesting herbs) is the real treat for your hens.

Backyard chicken coop window

#6 If your coop is painted, do a fresh coat before cool weather sets in so your coop looks bright and colorful when the leaves are gone.

Ditto above. When fall’s colors fade, you’ll be glad you made the extra effort to repaint your coop so it looks cheerful even when it’s grey outside.

Even more importantly, it will help preserve your coop for many years to come. In the long run, this will save you money (less repairs and replacements).

#7 Start adding even more protein to your flock’s diet with mealworms, black soldier fly larvae, or Fluffiest Feathers Ever!

This is often the time of year when chickens start molting. If your flock is molting, a high-protein chicken layer feed will help their feathers regrow. The type of chicken feed you choose is important.

High protein diets also make sure flocks are in great shape to battle the cooler weather. You can feed a high protein diet or treats full time, or just during the molting season.

You might also want to try Fluffiest Feathers Ever! Your flock will look, and feel, great.

#8 Make a plan for how you’ll keep their water from freezing

It’s bound to happen if you live in a cool area – so now is the time to decide how you’ll prevent freezing or at least keep fresh water consistently available.

There are a lot of ideas out there and it doesn’t necessarily matter which method you use…as long as you make sure it happens. Here are my best ideas for keeping your chickens’ water from freezing.

#9 Spend more time with your flock – soon, the weather will be cold and you won’t want to be outside as much.

Your chickens love you and love them. Winter can be hard on your relationship. Nuff said. Here’s a great treat you can make to show them you care – it includes pumpkin seeds, sage, and more! They will be happier to roost at night with their bellies (and hearts) full.

#10 Add a light to your coop if you want eggs all winter

As the days get shorter, egg-laying might stop. This drop (or stop) in egg production is natural for backyard chickens, but it’s okay to still want fresh eggs all winter. If you do, then add a light to the inside of their coop.

If you don’t have power in your coop, you can use a solar or battery-powered light. The bulb should stay cool and be a daylight simulator. You can also use a timer to turn it automatically on and off. There are some pretty nice choices online these days.

Be sure your coop or shelter is predator proof too. Predators get especially hungry in cold months. You need to be prepared to keep your pen or enclosure free of raccoons, hawks, and the like.

Summary

There you have it! You now have at least ten things you can do to prepare your hens and roos (and you) for success in the month of September. We hope you find this list to be helpful in many ways. Now go get yourself a pumpkin latte and read a book to your flock while waiting for Fall to call! 🍁🍂

Although the gardening season is winding down, you might be wondering “what can I plant in September?”

As long as you have a south-facing cold frame set up (or a hot bed would be better), you have options for crops you can grow through the winter.

(For directions to build a cold frame and a hot bed, check out my bestselling book, Organic By Choice: The (Secret) Rebel’s Guide To Backyard Gardening)

Without a cold frame, unless you live in a warm area (zones 8-11), you’ll not have much success. Even in our area, we can over winter spinach without a cold frame, but not much else.

In this article, I’m going to show you 11 crops you can still grow in September, even though the days are getting shorter and cooler!

Lettuce

Direct sow your lettuce when temperatures inside your cold frame are between 45 F and 65 F. You can sow either individual seeds in rows or broadcast. After sowing, cover the seeds lightly with ¼ inch of soil.

When seedlings are 4” tall, thin to 4 – 16 inches apart depending on the lettuce you’re planting. It’s best to avoid firm headed lettuces and shoot for leaf types.

Radishes

We love growing radishes because they’re as close as you can get to instant gratification in a garden. They’re ready to harvest in about 30 days.

Direct sow radishes by planting seeds ½ inch deep and 1 inch apart. Rows should be 12 inches apart and in full sun.

A week after seedlings emerge, thin radishes to about an inch apart. When crowded, radishes will sprawl and not form round roots. They will be woody and bitter.

Plant consecutively every two weeks for a continuous harvest of radishes.

Beets

Beets are perfect to grow in a cold frame because they can survive frost and temperatures down to 32 degrees (although soil temp needs to be at least 50 degrees for the seeds to germinate).

Before planting, select a sunny site, and incorporate compost into the soil. Test the soil because a pH higher than 6 and lower than 5 makes it difficult for the seeds to sprout.

Soak the seeds for 24 hours before direct sowing them to speed up germination.

Plant seeds ½ inch deep and thin to 2 inches apart when the seedlings are 4 inches tall. Snip the seedlings you’re removing (instead of pulling them out of the soil) so you don’t disturb the soil.

Cabbages

Cabbage prefers to only grow in cold temperatures, and as soon as heat hits our farm, cabbage season is as good as over.

Kale

Kale is an incredibly resilient plant and thrives in colder temperatures, and the funny thing about kale, is it tastes better if it’s been through a frost!  

We broadcast kale seeds because they’re so tiny, and the plants thrive well in close quarters as long as you fertilize and water regularly. Cover lightly with dirt and mist regularly. In 3-4 weeks, you should see seedlings.

Be sure to harvest the outer leaves of kale before they get too big to ensure they’re still tender and not bitter.

Leeks

These green treats resemble giant scallions, and are excellent for sub-freezing temperatures – they have proven to be cold-hardy down to approximately 5° Fahrenheit!

Spinach

Spinach needs 6 weeks of cool weather to grow to harvest size properly, so as soon as the soil is workable, sow spinach in a cold frame. Soil temperature should not exceed 70 degrees to ensure your spinach germinates.

Sow spinach ½ inch deep. We broadcast our spinach seeds since they’re so small. To ensure a consistent harvest, plant spinach successively every 2-3 weeks.

Onions

This robust crop can easily withstand freezes and frosts, making them perfect for a cold frame. You can grow onions from seeds or sets; starting with sets is a bit easier.

When planting onions, it’s important to remember that they need full sun in order to grow healthy, so make sure your cold frame is in a sunny location.  

Plant in rows 12 inches apart, and about 1 inch deep for sets

Swiss Chard

This crop is quite cold-hardy. Plant seeds ½ inch deep. It’s simplest to broadcast the seeds, then cover lightly with dirt. Succession plant seeds every 2 weeks for a continued harvest.

Cover crops

Cover crops such as clover. This time of year is a good time to think about direct sowing cover crops – they’ll prevent your topsoil from getting blown away and lower the amount of weeds come spring. They’ll also fix nitrogen so your spring crops will get a kickstart thanks to all the nutrients in the soil.

Garlic

Don’t forget to plant your garlic bulbs! You’ll want to plant them now for a summer harvest next June. Start before it gets too cold, and be sure to cover with straw if frost threatens.

How to clean fresh eggs was something that didn’t concern me for years.

We were the only ones eating them, so if there was a spot on them or a bit of dirt, it didn’t bother me. Besides egg cleaning wasn’t on my to-do list.

Eggshells automatically have something called a “bloom” which is a natural coating on the shell that helps keep out bacteria. Washing them for your own use isn’t really necessary (unless they’re super dirty).

Egg shells are naturally porous to allow for an exchange of oxygen as the chick grows. The purpose of the bloom is to keep bacteria out of the egg. In nature, this is so the chick embryo can have a safe environment to grow. Learn more about the insides of chicken eggs.

Because of this, washing fresh chicken eggs isn’t always advised.

In fact, it can actually be harmful. This is because when you wash chicken eggs, you simultaneously remove that protective barrier. In doing so you also push some bacteria in through the pores of the shell, potentially contaminating your eggs.

However…

Once we decided to buffer our homestead income by selling farm-fresh eggs we started worrying about unwashed eggs and contamination. And that’s how washing fresh eggs became quite the priority.

Our state allows us to sell fresh eggs from our homestead to other families. Since not everyone appreciates feathers and dirt, we had to figure out how to clean fresh eggs.

Chicken eggs with funny faces drawn on them

How to clean fresh eggs

If your chicken eggs are not really dirty (there’s no poop or other gross stuff on them) then just wipe them with a dry cloth. This method leaves the protective coating (or bloom) intact.

If there’s manure on your eggs and you want to make them happy, then you need to make sure you wash them at a temperature that is similar to their temperature.

If they are at room temperature, then use room temperature water. This prevents cracking.

If the eggs are cold, use cold water. Use warm water if it’s hot out (or they were just laid), and the eggs are warm.

If it’s winter and you only want to use warm water to cut down on potential bacteria, then put your eggs on your kitchen counter until they’re at room temperature.

To wash the fresh eggs, simply dampen a rag and wipe the egg until it’s clean. It will then need to be refrigerated because the bloom (the protective layer) is gone, and bacteria can easily get inside it.

If you would like to go with something more involved, you can use a commercial egg washing solution.

If you don’t want to actually wash your eggs but still want to remove manure, you can try using a very fine grain sandpaper.

Gently scrub the manure off, but don’t do it for too long or you might remove part of the egg shell accidentally.

The bloom will still be removed in those spots, so you will have to store them in the fridge.

READ NEXT: HOW TO TELL IF YOUR HENS ARE LAYING

But…

When it comes to eggs, the best thing to do is make sure they don’t get dirty in the first place.

Make sure you keep your nesting boxes clean, using shavings and/or straw to keep them fresh, and change the bedding frequently. This will also cut down on diseases and potential pathogens. Learn more about nesting herbs here.

Another way to prevent dirty eggs is to put your nesting boxes lower in the coop than your roosting bars and to keep the nesting boxes away from your roosting bars.

Chickens like to rest on the highest point in a coop, so if your nesting boxes are the highest spot, guess where they’ll roost?

Also, if your nesting boxes are kept under the roosting bar in the chicken coop, then your chickens will likely poop all over them.

Chickens don’t have bladders like mammals, so they poop whenever and wherever they get the urge – avoid gnarly eggs by encouraging your hens to only lay eggs in their nesting boxes and to not use them as a bathroom.

Check your nesting boxes at least daily, if possible, and remove any eggs. The more frequently you check them, the less likely they will be pooped on. In extreme weather, this is especially important.

Embryo development starts to happen when the internal egg temperature is 99.5 degrees, making leaving eggs out in summer heat a cause for concern.

In very cold weather, your eggs can freeze and crack.

Storing your fresh eggs

To properly store eggs, after you’ve washed them, place them in egg cartons with the pointy side down.

I store my eggs in a carton and not in the egg holders built into the refrigerator. Since opening and closing the door means the temperature fluctuates frequently, this can cause bacterial growth in your eggs. Just store them in a carton on a main shelf in your fridge.

READ NEXT: 5 CHICKEN BREEDS TO RAISE FOR COLORED EGGS

If you don’t plan to use the eggs soon, write the date you stored them on the carton so you don’t forget how old the eggs are. Then make sure to use the oldest eggs first.

If you’re not sure how old the eggs are, or if they’re good to eat, you can do the egg float test.

Dangers of Dirty Eggs

If bacteria contaminate your eggs, that will lead to contamination of your meal. This can be dangerous so it’s important to know the risks. As stated earlier in this article, if you keep your nesting boxes clean then your eggs will also have a better chance of staying clean. That’s the most important thing to remember.

However, if your eggs do get dirty – it can be dangerous if you don’t wash them.

  • Compromised eggs can cause foodborne illness
  • Feces can enter the shell when you crack them open and, in turn, be in your food
  • Salmonella is a common risk if eggs are not cleaned and bacteria gets inside the egg
  • If you sell eggs you should be extra cautious and clean dirty eggs so as to ensure the safety of your customers

Summary

If you keep your nesting boxes clean and, in turn, your eggs are clean – then you have no worries. Your eggs will last a long time unrefrigerated. However, if you have dirty eggs OR you are selling eggs – then it’s best to wash and refrigerate your eggs. It’s better to be safe than sorry. Right?

Additional Articles About Eggs

Not sure if some of your eggs are good or bad? Try the egg float test!

Why do you need to know about the egg float test? Chickens are masters at hiding their eggs if they want to. In other words, they don’t always lay their eggs in the coop like good little chickens should.

Every so often, I come across a nest of eggs on the homestead – and I have no idea how long they’ve been there, and if they’re good or bad.

Chickens like to hide their eggs in dark, tight places. Why? Eggs that are hidden are less likely to be snagged by a predator. Chickens are smart, and they know this.

At the same time, if a chicken is broody (wants to hatch eggs), which requires sitting for long periods of time, a dark place is best – she’s more likely to be left alone.

Let’s say you come across a nest, and aren’t sure how old the eggs are, and whether you should just toss them. This is where the egg float test comes in!

Also, if you have store-bought eggs in your refrigerator that are past the expiration date, it’s worth getting those eggs out of the egg carton and trying the egg float test to determine if they’re okay to use.

If you’ve never tried the egg float test, it’s a great and visually easy way to tell if eggs are fresh.

Egg in glass of water to perform egg float test

How do you perform the egg float test?

So now you know you can do an egg float test, but how? The egg float test is easy.

First, grab a cup of cool (not ice cold and definitely not hot) water.

If you want to try the egg float test using a mason jar, make it easy on yourself, and use a wide-mouthed jar so you can get the egg out easier. A cup of water or a bowl of water works well, too.

To complete the egg float test, just gently insert your egg into the water.

According to the egg float test, if your eggs rise to the top of the water, they’re too old to use (you’ve got yourself a bad egg). But if the egg sinks, they’re still fresh eggs and still perfectly good eggs to eat. Of course with anything, there’s a catch.

What does the egg float test mean if your egg sort of floats, but sort of sinks? If your egg suspends on one end, it’s technically still okay to eat, but you need to use it soon. 

Personally, I usually toss these eggs to my pigs, since there are typically fresher eggs available. I know the pigs appreciate them. But if you NEED an egg in a pinch, these are still fresh enough to use.

And remember…

Once you’ve put the egg in water, you’ve stripped off the bloom, which means air can get into the egg quicker (and so can bacteria). At this point, you need to put the eggs in the fridge to prevent bacterial growth.

So, if the eggs sink, you’ll probably want to use them sooner rather than later. Learn more about how long eggs stay fresh.

Be sure you test eggs that do not have any cracks, it’s best not to use those due to the possibility of bacteria entering the egg.

Below is a video showing the egg float test in action! The egg float test works!

What’s the science behind the egg float test?

Good question.

Eggshells, as you might know, are porous, meaning they let air into them. Learn more about the anatomy of an egg here)

So…

The fresher an egg is, the less air it has inside it, so it sinks.

Old eggs, however, have more air in them because oxygen has had time to permeate the shell. So, they float. The air acts as a sort of floatation device (so to speak).

Because of this, the egg float test is considered an accurate way to test whether those eggs you found are okay to eat, or if you should just toss them.

It’s important to know that your eggs are fresh before eating them to prevent things like salmonella poisoning or other contamination.

Other Egg Freshness Tests

There are a couple of other ways besides the egg float test to tell if the eggs you found are fresh.

One option is to candle the eggs, just as you would if you were to hatch them. In this test, you’re looking to see how intact the yolk is (the more intact the more likely it’s fresh).

And, similar to the egg float test, you’re looking to see how much air is inside the egg. The more air space, the older the egg is. Of course, you would need to be familiar with how much air is in a fresh egg first.

Another test is to hold the egg up to your ear. If you hear a lot of movement, the egg is said to be old, but if you don’t hear anything, then the egg is fresh. Is this an old wives’ tale? Your guess is as good as mine.

These other methods are very subjective – they aren’t as absolute as the egg float test. It’s my opinion that the egg float test is the most reliable way to determine whether your eggs are still fresh. (or follow your chickens around all day and snatch up all the eggs immediately…which isn’t going to happen)

And let’s not forget the good ole sniff test. This works best once you crack the egg. It’s pretty clear if the egg has an unpleasant odor that you shouldn’t use it but it doesn’t really indicate an egg on its way out. It’s only a rotten egg test.

Personally, I prefer the egg float test, and I have more experience with it.

Summary

See, it’s not hard at all. It’s a quick and easy way to determine how fresh, or not fresh, your beloved chicken eggs are. Here’s to finding fresh eggs! 🎉

Now that you’ve determined which eggs are fresh using the egg float test, how about some egg recipes to help you use them up?


More Chicken Egg Articles:


Chickens: Naturally Raising A Sustainable Flock is my best selling book about raising healthy hens! You’ll learn how to handle sticky first aid situations, raise baby chicks with the week-by-week checklist, how to give the best care even in the worst weather, and more!

What is diatomaceous earth? And what are the benefits of diatomaceous earth to chickens?

No worries. I had no clue either.

We started using DE (diatomaceous earth) on our farm a while ago, and haven’t looked back since. We had a number of Cornish Cross chickens that had gotten so large they couldn’t clean themselves very well anymore

But they liked to roll!

diatomaceous earth for chickens

To help them keep bug free, we started offering boxes of diatomaceous earth with regular sand dirt for them to use. And it was a hit!

The other chickens LOVED it, and the number of mites and lice on them began to reduce. So we were sold.

What is diatomaceous earth?

Diatomaceous earth is the crushed shells of diatoms (aquatic algae) that have fossilized into substrates in aquatic sites.

Those sites are mined, and boom! Powdered diatomaceous earth is born (okay, that’s a very quick boom, but I’m not going to bore you with details of how the powder is made.)

A cool fact is that diatom skeletons are made of mostly silica! Who knew?

This cool fact brings me to one of the best points: the upshot is that diatomaceous earth is mostly silica, clay minerals, and iron oxide – all good, natural stuff.

It’s also great to use in your soil since it kills soft-body insects by eliminating necessary oils and moisture from their body, causing the bugs to dry out.

Yup, kind of gross, but good for your chickens.

Ever since we started offering diatomaceous earth to our chickens, they've been so much healthier. Here's what it is and how to use it in the coop! From FrugalChicken
Image from Wikipedia

Food grade vs. non-food grade diatomaceous earth

First things first. If you want to offer diatomaceous earth to your chickens, you need to make sure it’s FOOD GRADE diatomaceous earth.

That little food-grade label means it’s safe for anyone, even people, to eat. Without that stamp, you’re taking a chance.

Chickens that bathe in diatomaceous earth will likely try tasting it too. As long as you offer food-grade diatomaceous earth to your chickens, it’s okay if they eat it.

It’s unclear whether chickens derive any health benefits from eating it, but at worst, it’ll do nothing.

Ever since we started offering diatomaceous earth to our chickens, they've been so much healthier. Here's what it is and how to use it in the coop! From FrugalChicken

Ok, so what good is diatomaceous earth?

Great question. There are a couple of answers.   Diatomaceous earth is proven to be effective in controlling external parasites on your poultry, such as mites, fleas, lice, and other external pests that might infest near feather follicles or your hen’s vent.

In a study performed by the University of California Riverside, chickens that rolled in a dust bath of sand and diatomaceous earth showed a huge reduction in the number of external parasites after just a week – pretty powerful stuff. If you have chickens that aren’t laying as well, it might possibly be caused by mites. If your chickens have to fight off an infestation, they have less energy for egg production.

Ever since we started offering diatomaceous earth to our chickens, they've been so much healthier. Here's what it is and how to use it in the coop! From FrugalChicken
A good place to look for mites is around your chicken’s vent.

So what’s the bad news?

As great as it is for external parasites like mites, diatomaceous earth has spotty results when it comes to internal parasites.

One study performed in Vancouver showed that diatomaceous earth is effective in controlling internal parasites, and the chickens were heavier and laid more eggs when fed diatomaceous earth.

However, studies in the US have been largely unsuccessful.

That doesn’t mean it doesn’t work, just that some studies show it works while other studies show diatomaceous earth does nothing to reduce internal parasites (like worms) in chickens.

It’s inconclusive.

The bottom line?

I would venture to say we really don’t know how effective diatomaceous earth is when it comes to internal parasites.

But here’s the thing:

We know it isn’t likely to do anything bad, and the bottom line is that if your chickens are bathing in it, chances are they’ll sample it too. They’re curious creatures like that.

So, whether it’s effective or not, they’re likely getting it anyway. And IF it is effective – then it’s worth it!

How to use diatomaceous earth

Make a diatomaceous earth box

The easiest way to incorporate DE into your coop is by offering a dust box loaded with a diatomaceous earth/sand or dirt mix. There’s really no formula for how much of either to offer, so I go with a 1:1 ratio. 

I found when I offered a box with diatomaceous earth alone, the chickens looked at me like I’d grown a second head, and they didn’t use it. So, I recommend mixing it with dirt so your chickens get the idea.

First I line the box with dirt, then add the diatomaceous earth and mix slightly so the chickens get the idea that it’s not just this weird grey stuff.

If you plan to offer your DE box in a run, you will need to remove it when it rains, otherwise, you’ll be left with a gloppy mess. If you offer it in the coop, then you’re golden. 

Sprinkle it in the dirt

Another option, if you don’t want to make a DE box is to simply sprinkle the diatomaceous earth in an area where your chickens already habitually roll. 

This is a good option for chickens who aren’t quite getting the idea of using a DE box or who just prefer a good roll in the dirt.

Simply sprinkle DE in their favorite roll area and let them use it at will. The diatomaceous earth will still be effective.

Add it to their nesting boxes

Some people add DE to their chicken’s nesting boxes. I don’t think it’s harmful to do so, but it may not be the best use of it. I personally use nesting herbs that naturally repel pests and my flock adores them. Check them out here.

I leave the diatomaceous earth for the dust bathing area where I think I get the most bang for my buck overall.

Offer diatomaceous earth in food

While the effects of diatomaceous earth in controlling internal parasites are inconclusive, you can still offer it to your chickens in their feed. As mentioned above, IF it does help then it’s definitely worth it.

An added benefit is that DE is proven to control insects in livestock feed since it dries the little buggers out. There are chicken farmers out there who mix DE with their chicken feed, especially if they buy a lot of it and store it. 

Nothing is worse than feed that’s gotten infested (ask me how I know.)

There’s no proven formula for mixing DE in their food. One good option is to simply sprinkle a dusting on their dinner and mix it before offering it to your chickens. 

The advantage to mixing the DE into the feed is the diatomaceous earth will cling to the feed (whether you feed grain, scraps, corn, etc.) and your chickens are more likely to get it into their system than if you simply sprinkle it on top.

You can also offer it separately. Remember your chickens will likely sample it as they roll in it, but if you want more control over the amount of diatomaceous earth they consume, mixing it into their feed is a great option.

If you use my homemade organic chicken feed recipe, another option is to sprinkle it on the fodder. It will stick to the wheat (or barley) sprouts and your chickens can eat it that way. 

Where do you buy DE?

You can find diatomaceous earth in any feed store. If you want to purchase it over Amazon, here’s a great option:

Summary

If you want to help your flock reduce parasites by enhancing their normal dust-bathing activities, then diatomaceous earth is just what the doctor ordered. It’s easy and safe to use and produces great results. Your chicken coop will be better off for it and you can have a little more peace of mind.

Backyard chickens are often more than just pets, they are also a source of food and entertainment. Why not give them the best chance at being comfortable, happy, and healthy?

References:

Housing and dustbathing effects on northern fowl mites (Ornithonyssus sylviarum) and chicken body lice (Menacanthus stramineus) on hens.” Department of Entomology, University of California Riverside. PubMed.

Effect of diatomaceous earth on parasite load, egg production, and egg quality of free-range organic laying hens.” Avian Research Centre, Faculty of Land and Food Systems, University of British Columbia. PubMed.