Candling chicken eggs is an incredible experience that every chicken owner should experience. It’s truly a miracle in a shell! Beyond the experience, you may NEED to candle eggs if you are incubating them.
Egg candling is done to determine the quality of an egg, be it regarding the white, yolk, air cell, fertility, and more. Most importantly, egg candling can help you see whether or not a chick is developing inside an egg!
Ready to learn why it’s called candling, how to candle your own eggs, and why you should? Plus tips for incubating. Grab a bright light and read on!

Table of Contents (Quickly Jump To Information)
What is Egg Candling?
If you’re new to incubating eggs, you might be wondering what an egg candler is and whether egg candling is something you should do.
Egg candling is a method that can be used to observe the development of embryos inside fertile eggs. It uses a bright light, shining through the egg, to show details of what is going on inside. This process can be done with all kinds of poultry, not just chickens.
It is named as such because early egg candling efforts were done using – you guessed it! – candles. Of course, that’s no longer the case. After candling my own eggs, I can’t even begin to imagine how challenging this way for those that only had the light of a candle! Yikes.
There are several reasons why people might choose to candle eggs. More often than not, this is something that someone might do if they are incubating eggs.
Candling eggs that are to be incubated is a good way of determining whether they are fertile. Plus you check on the development and growth of an embryo.
When Should You Candle Eggs?
When it comes to the timeline for candling eggs, there are several situations in which this might be appropriate.
To Ensure Fertility
For instance, you might candle to determine whether an embryo is developing inside an egg. If so, you should do this on the third day of incubating for a white egg. For a brown egg (or any egg that isn’t white), the best time to candle will be on the fifth or sixth day. This is due to the darker color of the shell as it will make it harder to get a good view inside.
To Watch the Development of the Chick
You can candle later on in the incubation timeline, of course, too. However, it’s most important that you candle early on, as this will help you determine whether an egg is fertile. Wait to candle until later, and the embryos that die early on (before that three to five day window) will be hard to distinguish from live ones. Dead, decomposing embryos are surprisingly hard to identify and no fun to find on hatching day.
In addition to early candling, you should also try to candle once every few days. This will help you observe the development and growth of your embryos. It’s an incredible experience to watch the development process.
It will also help you know if any die during the process so you can remove the rotting egg. It does happen, and sometimes there is no obvious rhyme or reason.
During the early and mid process, you can see the chick move around. It’s absolutely amazing!
In the late stages of egg development, you won’t see much – in fact, the lack of movement or visible features may lead you to believe that your chick has died. Fortunately, that’s rarely the case – it instead just means that the chick has grown so large that it is taking up all of the available space inside the egg. Hatching time is near!
How to Candle an Egg
Light Source
There are several ways you can candle an egg. One of the easiest ways is to make a DIY candler by placing a light bulb (a low energy bulb is best, since it will be extremely bright without generating quite as much heat as a typical bulb) and a desk lamp inside a cardboard box.
Cut a tiny, round hole in the top of the box, just large enough to place your egg into – the light should shine on the larger end of the egg where the air sac is located. Put your egg into the hole, then turn the light on. You should be able to see what’s inside of the egg with ease.
You can also purchase special devices and high-tech store-bought egg candlers or just use a flashlight. While an egg candler that is made specifically for this job will give you the best view, a bright flashlight (even a small flashlight) can often work just as well in a pinch. Either way you need a light source in order to see the development of the embryo.
There are even modern, high-power LED torches that you can use to candle an egg. Use one that doesn’t give off a lot of heat. Beyond that, some incubators have a built in light for this purpose. My personal incubator is wonderful and has a built in light. Although I love the incubator, I don’t care for the light. I prefer to use a high powered flashlight.
Dark Eggs
If you plan on candling the egg from a bird that lays extremely dark-colored eggs, like Marans or Welsummers, you may need to use the brightest source of light you can find. Candle your eggs in a dark room so you can see the development – this is a good rule of thumb to follow at all times, but especially when you are candling dark-shelled eggs.
Plan
Consider your goals for candling early on in the process. By going in with a “plan,” you’ll be able to identify which eggs are “yolkers” and which are “quitters” – the former of which are good to go and can be kept, and the latter of which need to be discarded.
Write on the calendar the days you plan on candling so you don’t overdo it. The best time to candle will be when you put the eggs into the incubator, and then again about a week after you have done so.
You can then candle as often as you feel you need to, but do not candle during the last three days before hatching (these are the days you should not be turning the eggs as well). Remember, the less you handle the eggs inside the incubator, the better, too.
How Can You Tell if a Candling Egg is Fertile?
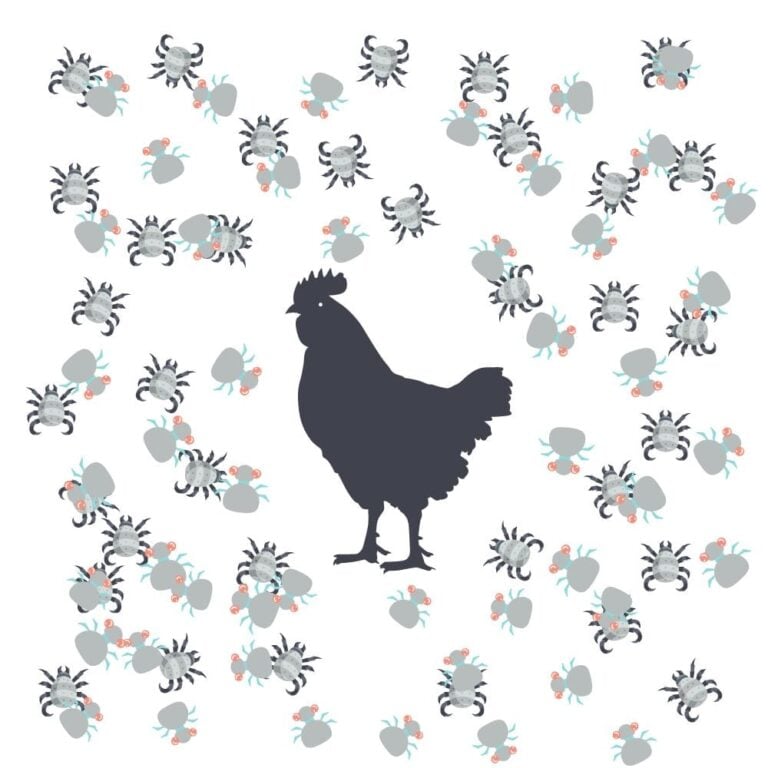
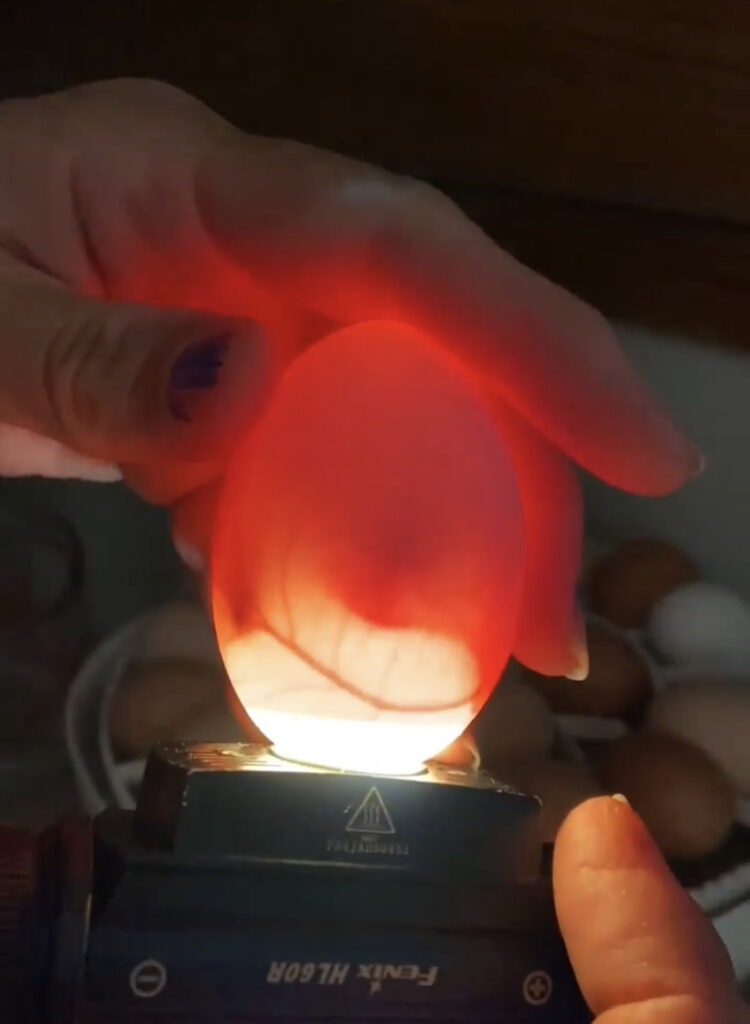
If an egg is fertile, you’ll notice that it has a small red area with blood vessels that extend out and away from this red area. This is the embryo floating inside the egg. Some people report that this looks a lot like a large red spider. Veins like that, or a network of blood vessels, are signs of development.
Unfortunately, an embryo’s development can be interrupted and do sometimes die – when this happens, the blood will draw back away from the embryo and create what is known as a blood ring (can also look like streaks of blood) inside of the shell. Blood rings make sense once you see one, it’s clearly a ring.
Both clear eggs (those without the initial signs of fertility) and eggs without any blood rings should be moved from the incubator.
The most critical period when it comes to candling eggs is early. However, beyond determining the fertility of an egg, you might not see much prior to one week. After seven or eight days, you should be able to see more inside the egg and get a more positive confirmation that the egg is fertile.
When you see the chick actually moving inside the egg, it’s almost like seeing an ultrasound of a baby’s heartbeat. A sweet little miracle. It usually shows in the form of a dark outline, but moving around. Sometimes you can even make out the head and body!
What Should You See When Candling an Egg?
Candle before the first full week of incubation, and you should at least be able to get an idea of an egg’s fertility. After that, you should still be able to get an idea of what’s going on – and as time goes by you’ll be privy to an even better view of what’s happening inside your egg.
After day eight of incubation, you’ll notice that the embryo is much larger. You can usually see the eye of the chick, which appears as a dark blob or dark spot inside the egg. Although you won’t be able to see it, there are also digits on the feet and a completely enclosed heart. ❤️Even feathers start to appear on day eight, though of course, you probably won’t be able to see these!
Around this time, an allantois, or the sack attached to the embryo to hold the waste, will also develop.
Eventually, the chick will grow to accommodate just about all of the space inside the egg. The air sac will enlarge, and once it hatches, will push through the inner membrane to take its first breath of air.
One thing to keep an eye out for when candling your eggs is the air sack size. This should increase as moisture leaves the egg – an egg will lose about 13% of its original weight during the incubation process. Humidity can be adjusted to help this, but I personally follow the recommended humidity levels and don’t mess with it beyond that. I find the more I try to figure things out on my own, the more trouble I run into.
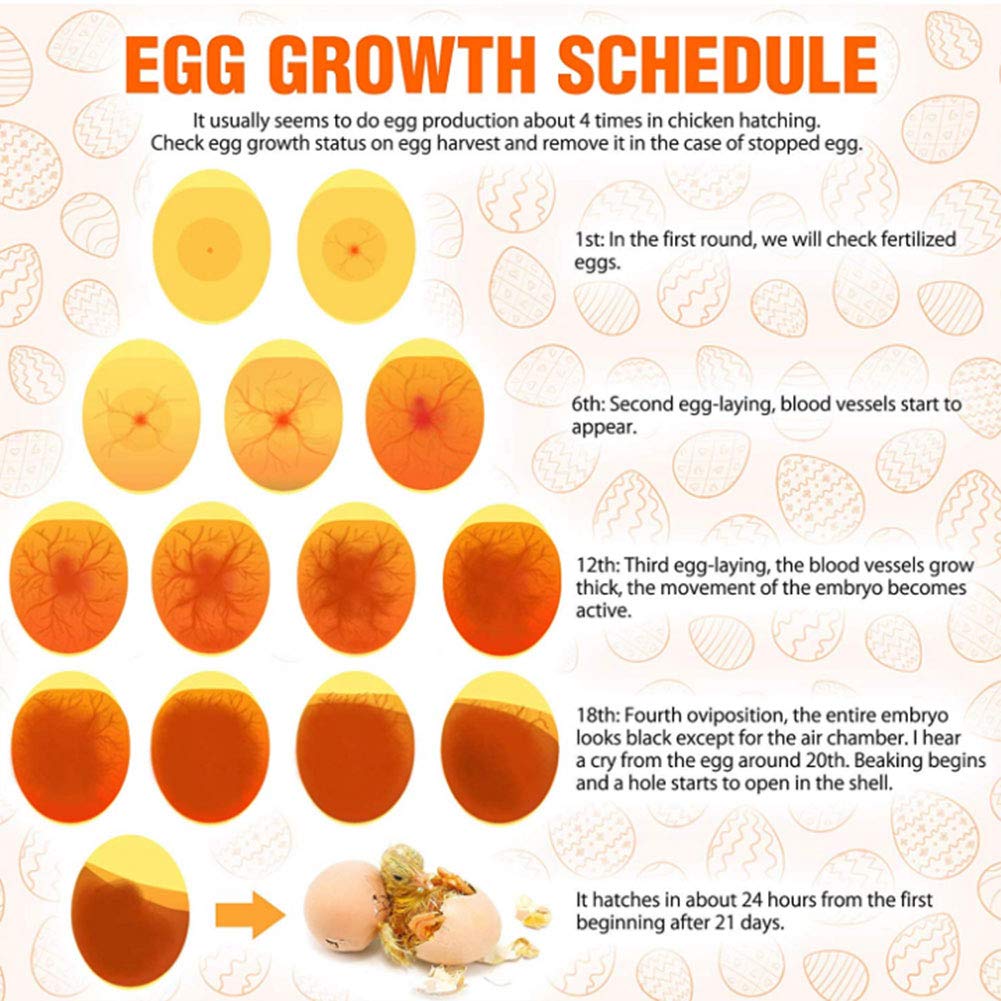
Check out the nifty chart below to see how a healthy embryo progresses throughout the growth process.
What Do Bad Eggs Look Like When Candling?
You can sometimes identify bad eggs early on in the candling process.
While a fertile, well-developed egg will have healthy blood vessels, an air sack, spreading vein growth, and a visible dark mass, an infertile egg will not possess any of these features. It’s pretty neat to be able to see the contents of the egg from the outside.
Later on in incubation, eggs that have died will have a dark mass with poorly defined details and no blood vessels radiating. You may also notice a dark ring or eggs that are totally clear.
It can be hard to tell whether an egg is fertile, especially if you are new to candling. Therefore, you should avoid discarding any eggs if you aren’t sure about their fertility. Take another look and have someone else who might be a bit more experienced evaluate the fertility of your eggs for you to help you decide.
After experiencing the process a few times yourself, you will learn when to discard and when not to.
Tips For Incubating Eggs
- Do not use eggs with cracks
- Remove any eggs that are mishaped or extra large (possible double yolk)
- Use clean eggs, if you don’t have any then clean the eggs with a damp (but nearly dry) soft cloth to avoid bacteria
- Number your eggs with a pen or pencil (you can be sure they are getting turned this way, you can also keep track of eggs you are concerned about as you go through the process of candling every few days)
- Buy an incubator that auto turns and has a humidity gauge (you’ll be glad you did as it will likely increase your hatch rate)
- Feed your hens a high quality, high protein layer feed to better ensure healthy eggs for hatching
Summary
There are plenty of excellent reasons to candle your eggs. It will help you see whether an egg is fertile and how (or if) the embryo is developing. By being able to identify eggs that are infertile, inviable, or that died early on in the process, you can avoid the unpleasantries (and inherent risks!) of having a rotten egg exploding all over your incubator, disseminating germs with it.
Candling doesn’t harm your eggs in any way. Just as a mother might leave her eggs in the nest for a few moments to eat and drink, you can safely take your eggs from the incubator to candle them – just don’t keep them out for too long.
Consider the tips above for candling eggs and you’ll find that this is the thing you most look forward to while incubating and hatching your own eggs!

A happy wife, mother, teacher, writer, hobby farmer, lover of chickens, and contributor to Pampered Chicken Mama!