Table of Contents (Quickly Jump To Information)
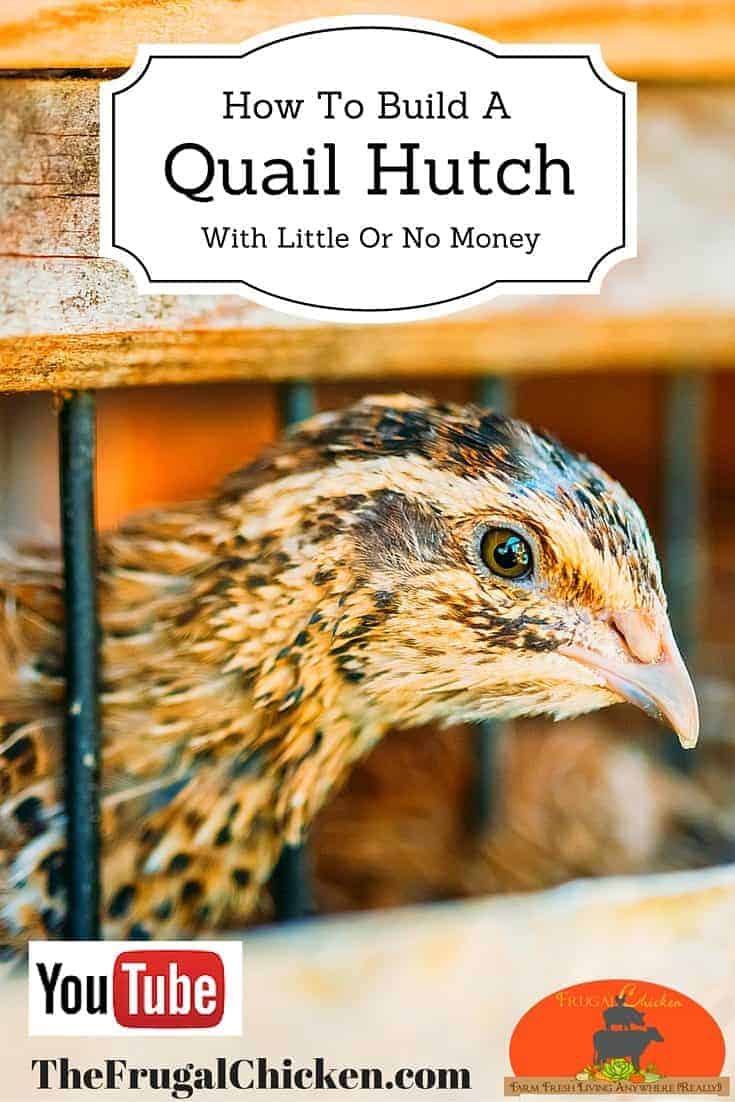
As soon as I brought quail home, I had to figure out how to build a quail hutch for them to live in.
At the time, our quail were too young to go outside, so they lived in our bathroom in plastic containers while they grew out their feathers.
Which gave us a few weeks to sort out how to build a quail hutch.
(If you’re interested in raising quail, I can help! Grab my 10 tip cheat sheet here.)
We could have bought one on Amazon, I’m sure, but I like to use materials on the homestead, and thanks to a large barn fire on our property, we have plenty of materials to scavenge.
READ NEXT: RAISING QUAIL IS PERFECT FOR EVERY HOMESTEAD
When it came to our quail hutch design, we knew a couple of things: the quail would live outside and we did not want it to be too tall.
Quail are easily frightened, and they can shoot straight up when scared, which means if they gain enough momentum, they can easily snap their necks.
So, I wasn’t looking to build a large coop, especially since quail don’t roost (they rest on the ground).
Since the quail would live outside, we knew the hutch had to be sturdy and have wind breaks to protect the birds from the wind and rain.
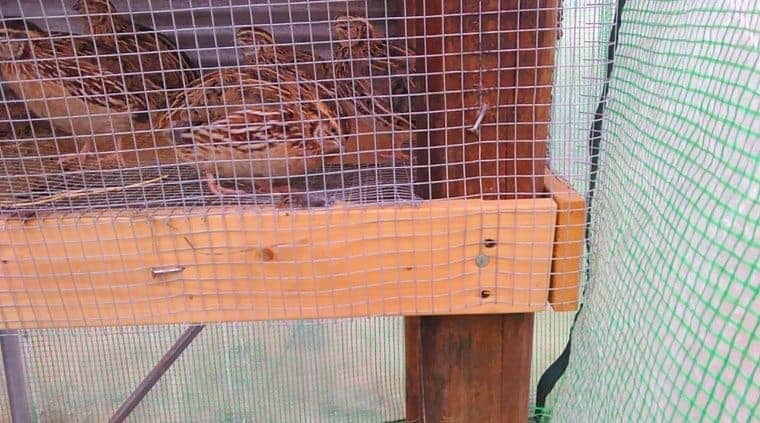
For this quail hutch, we used tin for the roof and the back, since we had plenty of it. You can buy roofing tin, or substitute another material.
When it comes to how to build a quail hutch, I recommend using 1/4-inch or 1/2-inch hardware cloth for at least the bottom of the coop.
Since quail don’t roost, they lay on the ground to rest or lay their quail eggs. The wire floor lets their manure pass right through to the ground; otherwise, you will have to clean their cage frequently.
Quail are about as clean as chickens, and their manure can easily lead to dirty eggs.
You can place a container below the quail hutch to grab their droppings, which you can then compost into a rich fertilizer.
In the winter, I do add straw to their coop near the door so they have some place warm to sit and to reduce drafts. Our quail also live in a greenhouse during the winter so they aren’t too cold.
Quail and chickens shouldn’t be kept together, and actually have different housing needs.
So, if you plan to keep quail, you’ll need to figure out how to build a quail coop.
To build our quail hutch, we used:
(2) 4x4x8 heat-treated wood posts, each cut in half
(1) 9-foot corrugated tin roofing (top)
(1) 8-foot corrugated tin roofing (back)
(6) 1x4x8 heat treated wood planks
25 feet ½”-inch hardware cloth
Roofing nails (for the tin)
2” wood screws (for the wood)
Heavy-duty staples (to affix the hardware cloth to the wood)
This hutch can house up to 16 quail.
You can use wood pallets, but make sure they’re safe for you to turn into a quail hutch.
READ NEXT: HOW TO KNOW IF YOUR PALLETS ARE SAFE FOR DIY PROJECTS
Designing Your Quail Hutch
When designing your quail coop, there’s some rules of thumb to keep in mind.
First, plan on 1 square foot of space for each quail, so keep this in mind as you build your quail hutch. Ours is able to house 12 quail, and we currently have 9 in there.
You will also need a roof and some sort of wind break or way for your birds to get out of the elements.
Your hutch will also need a door to insert food and water or to remove a quail in need of care, and some way to clean it out if it becomes dirty enough inside (this is less of an issue with a hardware cloth floor).
The frame was created by first cutting the 8-foot 4×4 posts in half to create the legs. That way 4 legs that were 4 feet tall.
Here’s the deal:
When it come to wood, I’ve learned that it’s sometimes cheaper to buy a longer piece and cut it myself.
If you’re concerned your poultry might try to eat the wood (chickens might, quail typically don’t), then make sure you’re buying untreated or heat treated wood.
We then sawed two of the 1×4 planks into 7 pieces, so each piece measured 2 feet long.
Three pieces were meant to support the bottom of the quail hutch, and the remaining 4 became part of the short sides of the hutch.
The left over 1×4 planks that we had not cut yet became the long sides of the frame (where we attached hardware cloth).
To build the frame, we screwed each 1×4 plank to their proper place with 2-inch wood screw, then stapled the hardware cloth over the frame on the bottom and sides of the quail hutch.
In some areas, to give the hardware cloth even more strength, we secured it with nails, then bent the nails into the wood so they formed an even more secure staple (you can buy large staples, but we knew the nails would work and we already had them on hand.)
We also made sure to staple the hardware cloth to the three support beams as well to provide a firm resting place for our quail.
We then created the roof and windbreak using 9-foot pieces of corrugated tin roofing. Again, we used tin because it’s durable and we already had it on hand.
We made sure to let the tin overhand a couple of inches to prevent too much rain water from getting into the coop.
When it come to the top of the quail hutch, we found that the roofing nails went through the tin easier and were less expensive than other nails.
Corrugated PVC roofing works for the roof as well, and you can find it fairly cheap at any big box store.
If your quail will be kept in a garage or shed, or perhaps in your basement, you might choose to use hardware cloth on the top of your quail hutch.
READ NEXT: HOW TO GET STARTED HOMESTEADING WITH THESE HACKS
Our door was simple, and we simply cut a square hole in the hardware cloth in the middle of the coop, and secured the opening with a roofing nail latch.
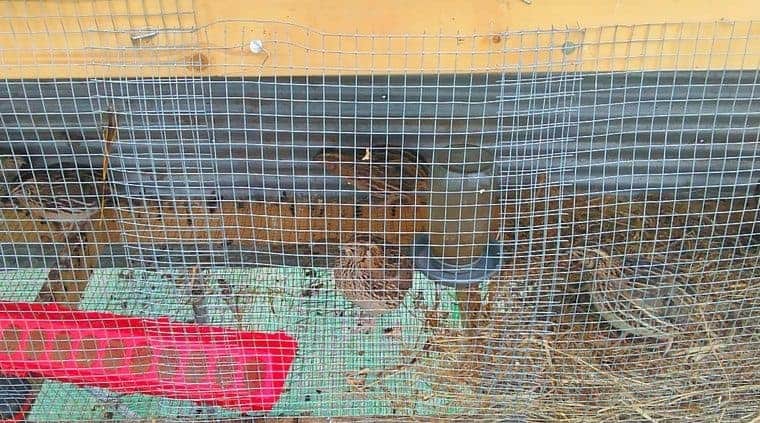
It was simple to do and is effective. This door works for us, although you might choose to do something more formal.
All of our quail are kept in the same hutch because we have a good male to female ratio. If you plan to breed quails, and want to keep the males and females in smaller flocks, you can easily create separate compartments in this hutch by adding hardware cloth between the floor and roof.
You will have to add more doors as well so you can add in the extra feeders and waterers.
All told, we only spent about $50 learning how to build a quail hutch and about 2 hours of our time assembling a nice, serviceable home for our quail.
I’d like to hear from you!
Do you think you’d like to learn how to build a quail hutch? How would you design it? Email me at [email protected] or comment below!
Maat van Uitert is a backyard chicken and sustainable living expert. She is also the author of Chickens: Naturally Raising A Sustainable Flock, which was a best seller in it’s Amazon category. Maat has been featured on NBC, CBS, AOL Finance, Community Chickens, the Huffington Post, Chickens magazine, Backyard Poultry, and Countryside Magazine. She lives on her farm in Southeast Missouri with her husband, two children, and about a million chickens and ducks. You can follow Maat on Facebook here and Instagram here.


How about winter how much protection do they need? Im in Minnesota?
They need the same amount of protection as chickens. Mine did fine in freezing weather (teens), but I also leave them in a greenhouse over winter. They’ll need protection from the elements, and I gave them hay to nest in to keep them warmer.
I’m looking at hutch designs before I build one for our quails. I love the simplicity of yours! One question – how do you find collecting eggs? I picked up that the door is in the middle – are you able to easily reach all the eggs from there?
Hi Tim – that’s the one design flaw – it’s hard to reach eggs sometimes. I would put another door or 2 in there, depending on where they decide to lay. 🙂
Thanks Maat, that’s good to know – I’m sure I can come up with a solution to that 🙂