It’a gardening season, y’all. And these gorgeous cedar DIY garden markers are so easy to make! They’re also functional, and should last you years!
I invited my friend Amy from 1905 Farmhouse to show us how she made these beautiful diy garden markers using cedar stakes and a wood burning kit!
Her tutorial is really easy, and even I can do it! (If Larry would let me touch his circular saw, that is!) And I NEED to to do this year – last year, I couldn’t remember half of what I planted nor WHERE I planted it – has that ever happened to you?
Well, this year, I can keep it straight thanks to Amy’s easy to follow DIY garden marker plans!
If you’re looking for a beautiful but functional way to keep your own garden straight, you’ll love the directions below. Enjoy!
How To Make Your Own DIY Garden Markers With Cedar Stakes
Hi Everyone! I am Amy, it is so nice to “virtually” meet you! I’m here today to share a fun DIY for your garden or raised bed.
But first I wanted to share a little bit about myself. I am a life-long Oregonian, currently residing near where I grew up about 30 miles west of Portland.
My husband and I recently moved into a 1905 farmhouse on two acres and on my blog www.1905farmhouse.com you can find DIY home renovations on a budget, gardening ideas, and simple and easy DIY projects.
For as long as I can remember my parents always had a garden where we would grow beans, corn, tomatoes, onions and much more. When we moved in there was already a big open spot near our orchard that would be perfect for our garden area.
I enjoy growing the normal staple vegetables I mentioned earlier but unlike my parents, I like to branch out with my growing options and try new plants and seeds each year.
Last year I used small flimsy wooden plant markers that I found in the Target dollar spot. They came with a white chalk marker to write the names on.
They looked cute at first but after all the watering and sun exposure those markers soon became lost and broken as all the plants grew taller.
This year I decided I wanted to create something that would withstand the elements and be easily seen. I am so excited to share this easy and fun project with you!
If you don’t have a large garden space you and definitely make these custom to a size that would work for a raised bed or even a large pot.
Materials Needed to Make Your DIY Garden Markers
- Wooden stakes (preferably cedar)
- Screws and drill or a hammer and nails
- Wood Burning Kit
- Table saw or hand saw
- Pencil
- Tracing paper
Step 1:
You can buy a pack of grade stakes at your local hardware store, or you can make your own. We had a pile of 3-foot cedar trim pieces that we had from another home improvement store that came in a bundle that was already the perfect size and only needed a little tweaking.
I first cut a 1-foot section off of each piece for the plant name to go on to. The other 2 feet would be used for the stake that will be going into the ground.
Step 2:
If your stakes don’t have a pointed end like mine did already that will be your next step to create. The pointed end will help them go into the ground more easily.
I used our table saw to cut a 45-degree angle to create the point. If you don’t have a table saw you could definitely use a hand saw or even a skil-saw.
Step 3:
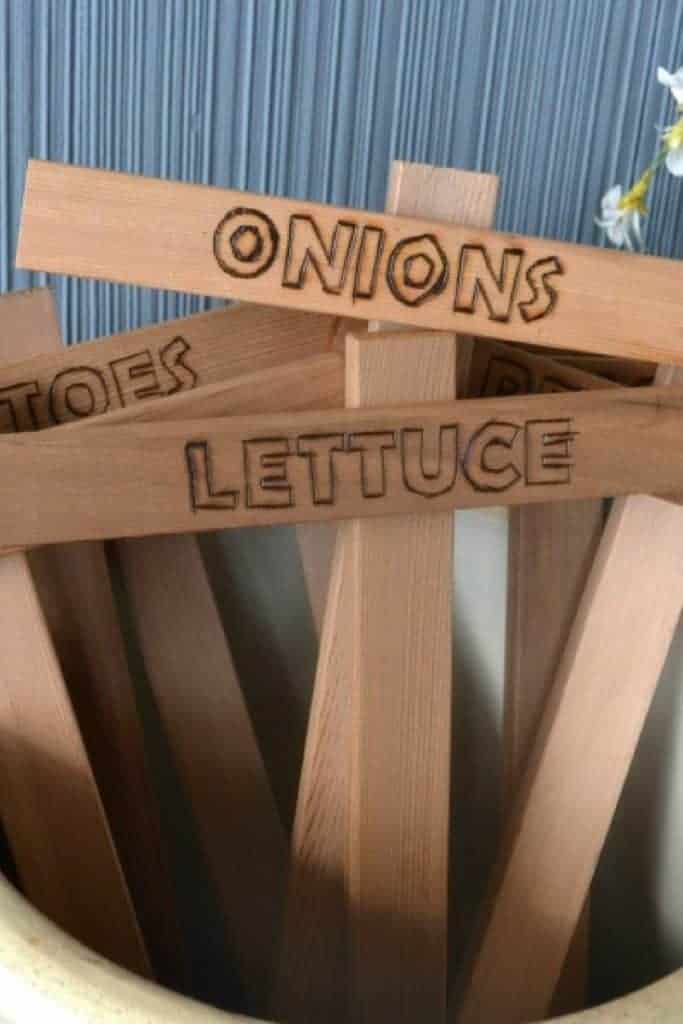
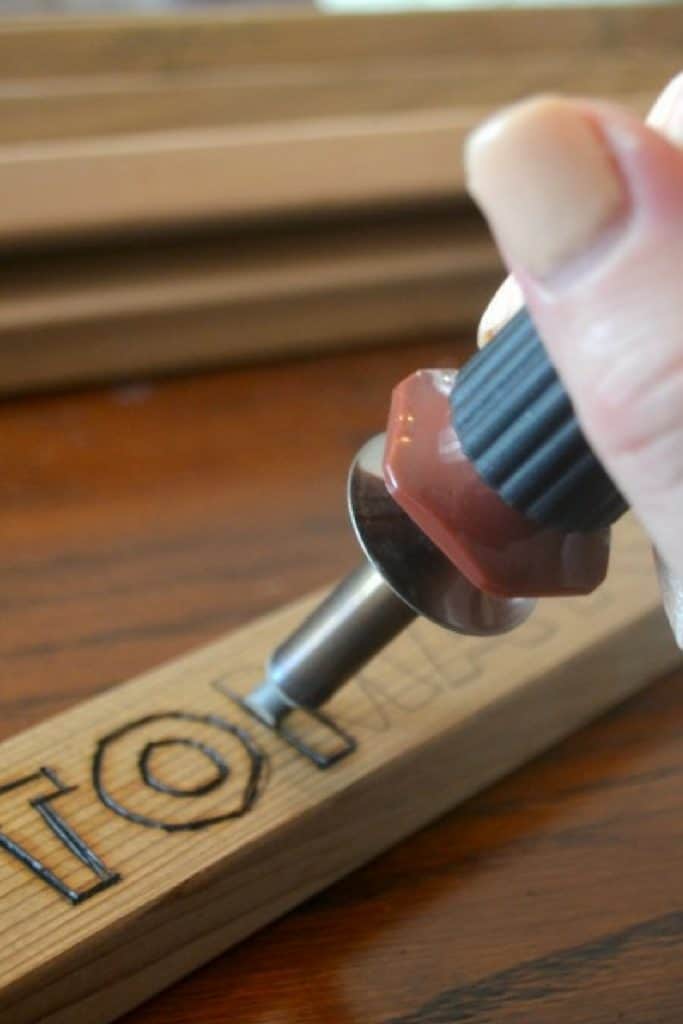
This step is where you can become creative. I wanted to make sure the name was permanent and didn’t want it to wash off or fade from the sun.
I’ve had a wood burning kit for years now and thought this would be a great project to bring it out of storage. Instead of free-handing the name on, which was my original thought, I hopped on my computer and pulled up a Word document and typed each name that I wanted on stakes.
I used a font called “Berlin Sans FB Demi.” After printing out the names I used tracing paper to transfer the names to the stakes to be my guide when burning.
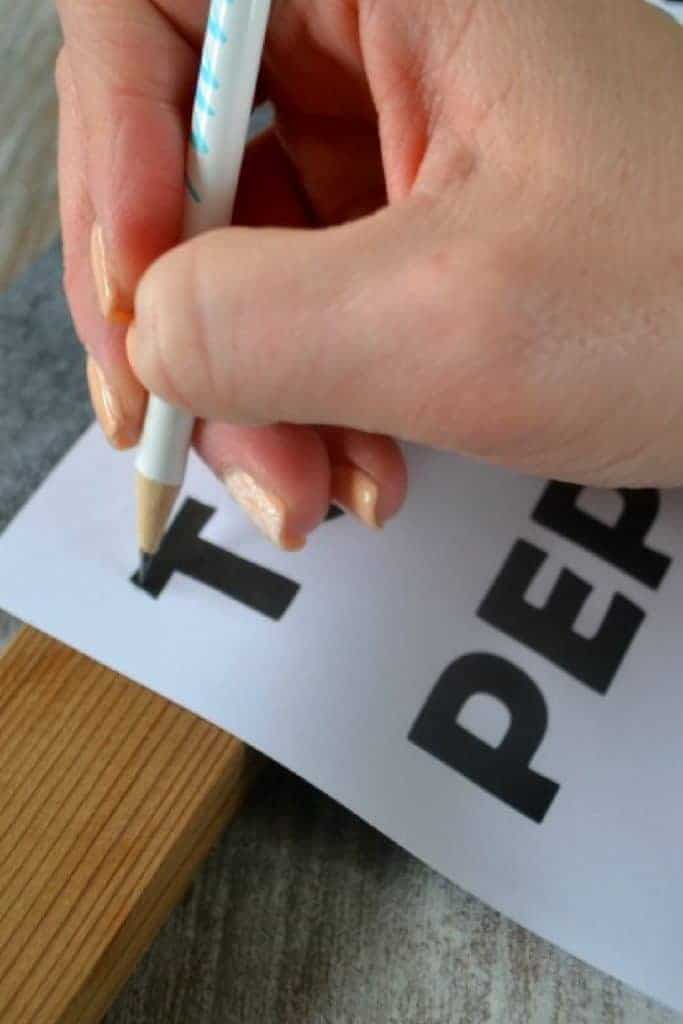
If you have never used tracing paper just lay the tracing paper down on your project and then put your pattern over top.
Then trace over your letters with a pencil or pen. The tracing paper will leave a mark anywhere that you trace and press down on.
Step 4:
Most wood burning kits will come with several types of tip options. Choose the one that is most comfortable for you.
I would suggest practicing on a scrap piece of wood first. I chose the slanted tip, also known as the universal tip, as I liked the way it wrote the best over my tracings.
These tools can get very hot so make sure to do this out of reach of children or pets.
Then just let the tool heat up and then slowly burn your outlines until you get the desired look you want. I noticed that if I was trying to rush the wood didn’t burn as well and I had to go back over it.
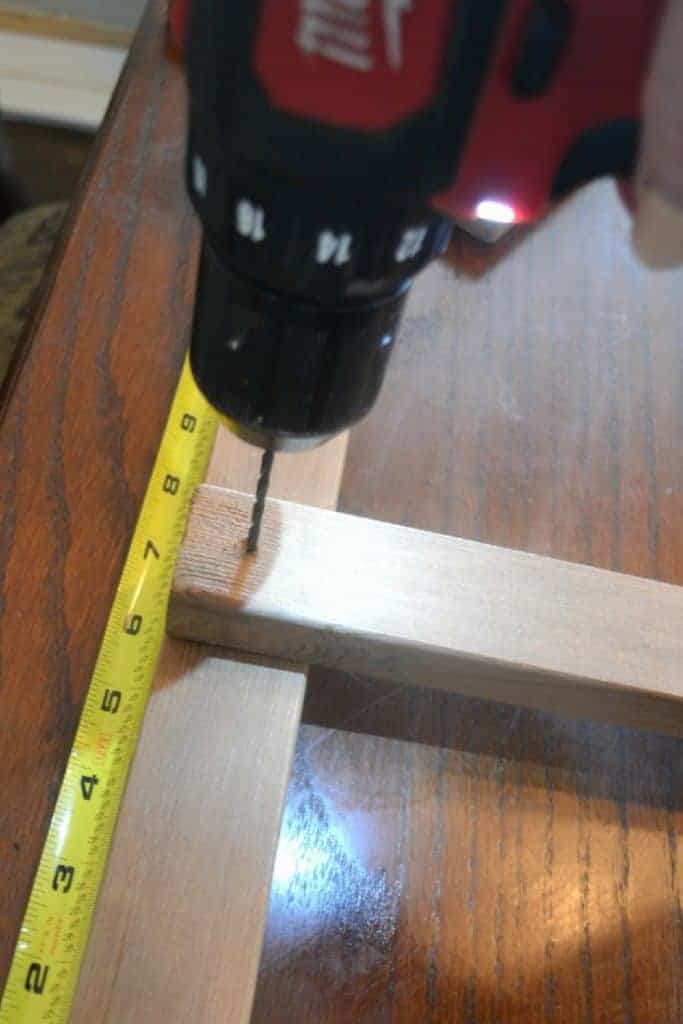
Step 5:
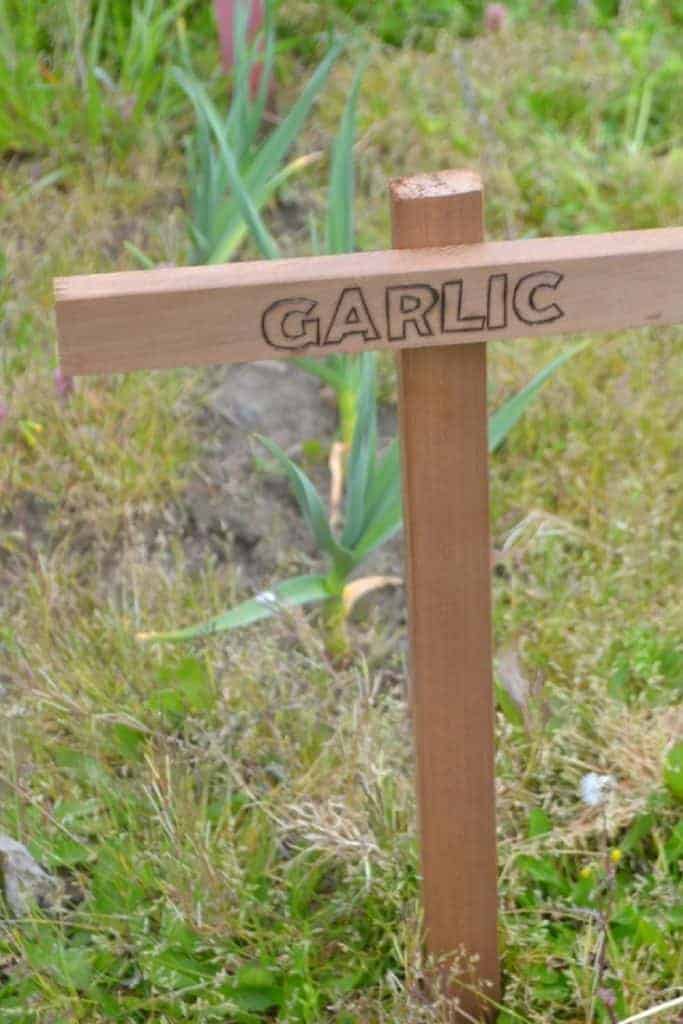
Now to put the stakes together! I used screws to attach the names to the stakes but you could definitely also just use nails.
I pre-drilled a hole through both being sure not to go all the way through into my nicely burned label. Then just screw the two together and you are done!
I can’t wait now for our weather to be better to get our garden tilled and ready to plant for the summer! And these stakes are going to make a great addition for years to come!
Maat van Uitert is a backyard chicken and sustainable living expert. She is also the author of Chickens: Naturally Raising A Sustainable Flock, which was a best seller in it’s Amazon category. Maat has been featured on NBC, CBS, AOL Finance, Community Chickens, the Huffington Post, Chickens magazine, Backyard Poultry, and Countryside Magazine. She lives on her farm in Southeast Missouri with her husband, two children, and about a million chickens and ducks. You can follow Maat on Facebook here and Instagram here.