Wondering how to infuse oil with herbs? It’s really simple – and incredibly useful.

For millennia, humans have used herbs for all kinds of things – health, cooking, for religious purposes, keeping livestock healthy, and more. So, it’s nothing new to infuse oil with herbs for your own purposes.

And there’s a reason for our species dependency on our plant friends – herbs have natural properties in their essential oils that are useful for seasoning dinner and medicinal uses, such as calming an upset stomach.

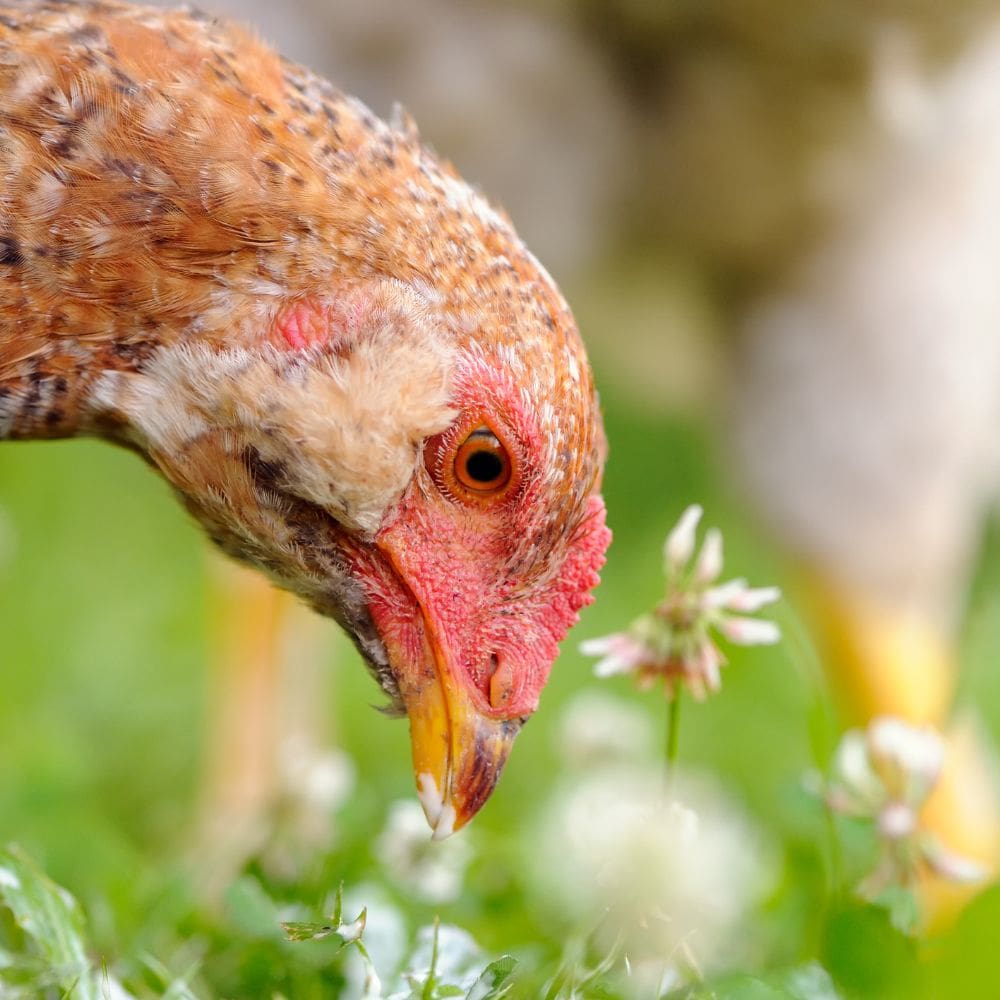
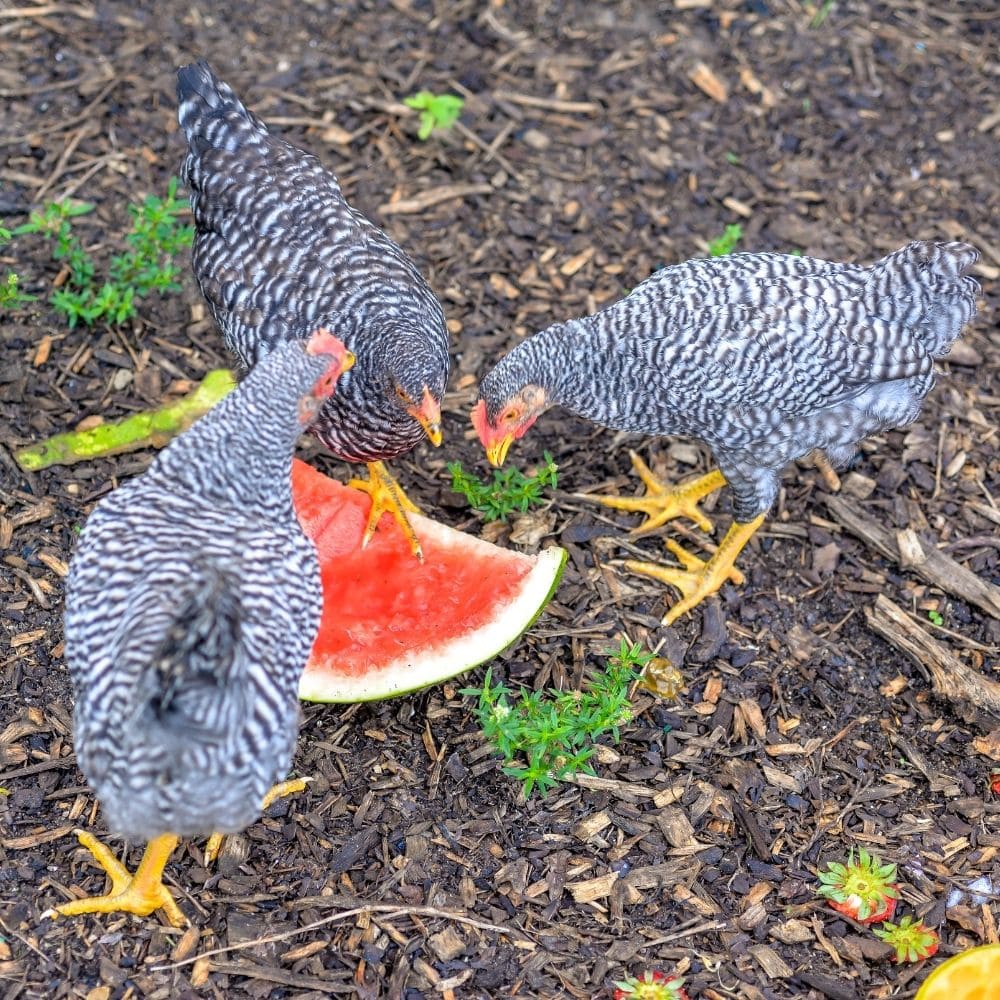
When it comes to herbs, there’s various ways to use them such as eating or drinking them or applying topically – on yourself or your animals, including your backyard chickens.

To use herbs for things like cuts and scrapes, to promote healthy skin, as an anti-inflammatory, or more, you can apply the plants by themselves (there’s lot of traditional and historic records of humans using plants alone.)

OR you can infuse them in an oil, which makes the plants easier to spread over a large area and concentrates the natural chemical constituents of the plants.

How to infuse oil with herbs

You can also do other things with the infused oils, such as make lotions, salves, and more.

For your backyard chickens, using infused oils can be better than using the plants themselves. Chickens are less likely to pick at the oil and eat the plants, and it’s easier to keep oils on an animal that likes to run around and forage.

For complicated applications, such as open wounds, oil can make it easier to apply and “stick” the herbs, and get around folds of skin that might otherwise harbor bacteria.

Imagine trying to keep a bandage full of herbs on a hen! It CAN be done, but it’s just easier and better peace of mind with infused oils.

Infused oils also mean the essential oils of the plant – the part that helps the most – is more concentrated and bioavailable to your chickens.

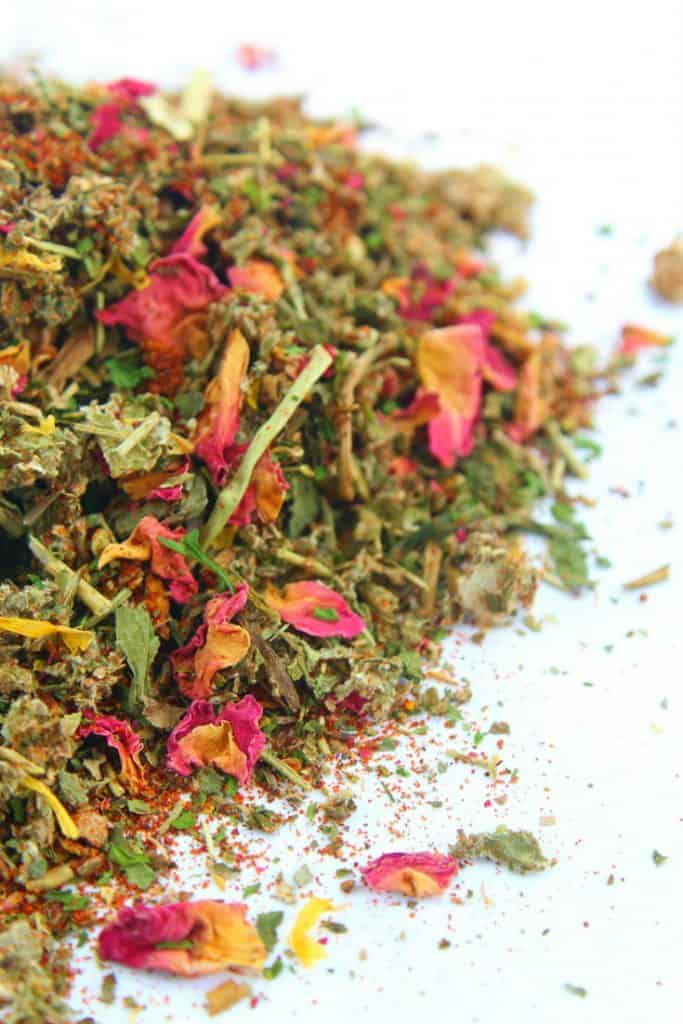
In this article, I’m going to show you how to infuse oils with herbs…and we’ll use two GREAT medicinal herbs – comfrey (botanical name Symphytum uplandicum) and plantain (botanical name Plantago major).

Both have a long history of helping maintain healthy skin, regrow skin after injury, reduce pain from sprain, strains, and more.

Multiple studies have shown that comfrey aids in relieving pain from sprains and strains, and you can easily use oil infused with comfrey to make salves.

Now, there’s plantain the herb (botanical name Plantago major, also known as broadleaf plantain) and plantain the fruit (banana cultivars of the genus Musa) – they’re two different species of plants with nothing to do with each other. 

The plantain we’ll use in this recipe (Plantago major) is a traditional home remedy for insect bites and as an anti-inflammatory.

how to infuse oils with herbs

What oils should you use?

There’s lots of options here. The easiest oil to use is a high quality olive, although you can use sunflower, grapeseed (which has lots of antioxidants and vitamins), jojoba, coconut oil (fractionated or not) or any other oil you can imagine.

I would stay away from corn oil, which is likely to be impure and genetically modified, and anything with soy. I’m also not 100% sure how well peanut oil will work.

The key is to use a 100% pure, high-quality oil.

How to infuse oils with herbs

This is probably the simplest thing you’ll do all week. To get the benefits of the herbs in the oils, all you need to do is soak the herbs in your oil of choice.

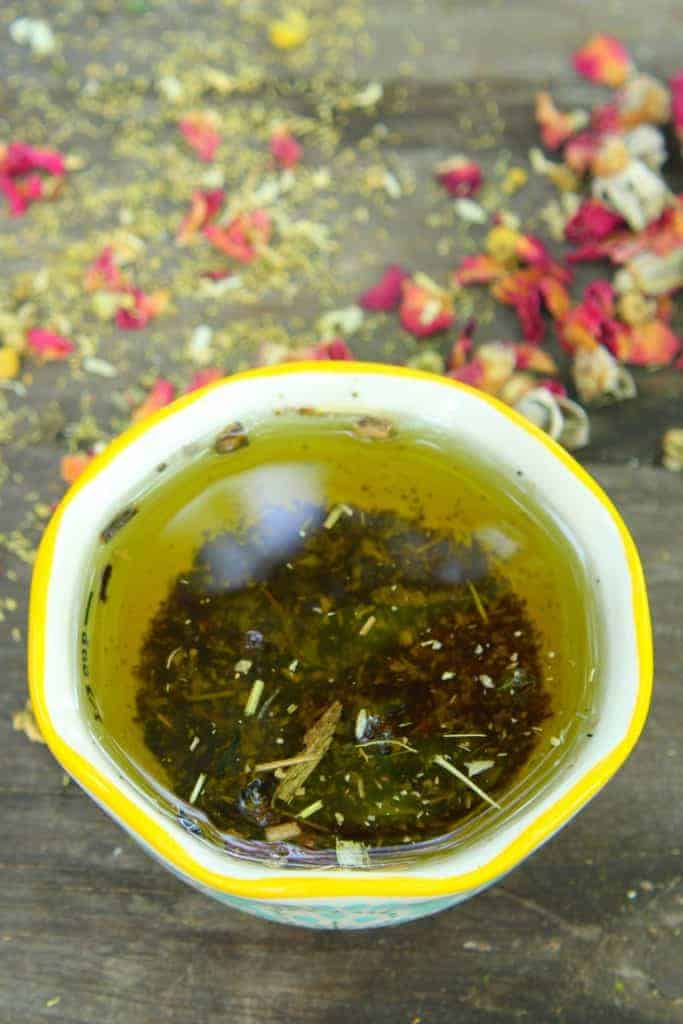
I use mason jars to infuse oils with herbs because they’re easy to clean, keep on a shelf out of sunlight, and are readily available.

Place the herbs in the mason jar – for this recipe I used a 1:1 ratio of comfrey and plantain, about ½ a cup of each. For a pint mason jar, 1 cup of herbs total is what I use – that way, the oil soaks all the bits of plant and nothing molds or invites bacteria into the mixture.

As long as the herbs are covered in oil, they won’t mold, but if any air pockets remain, there’s the potential for them to rot.

Pour the oil over the herbs until the jar is full, then top with a mason jar lid.

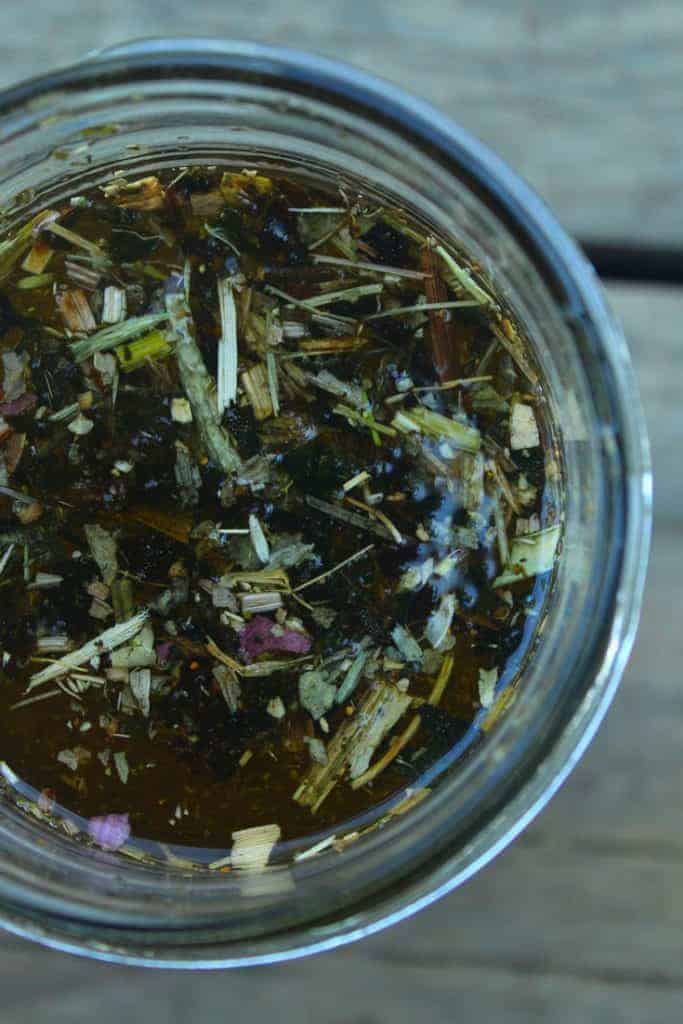
Allow the mixture to infuse for up to 6 weeks. Realistically, you can do it for much longer than that, but you’ll want to use the mixture as fast as possible and in my experience, any longer than that has diminishing returns.

After 6 weeks, pour the mixture through a mesh strainer and into a clean mason jar to separate the oil from the herbs. Your infused oil is now ready for other recipes!

Depending on the herbs you’ve infused (calendula is one of my favorites!) you can also cook with this oil or use it as a salad dressing.

What herbs can you infuse oil with?

Pretty much any herb you want. A great alternative to plantain and comfrey are oregano and, as mentioned before, calendula and rose, which have great properties to promote healthy skin.

A frequent question I get is what do chickens eat, and the answer is pretty much anything (my Araucana chicken will eat me out of house and home if she could!)

But, there are definitely things you should feed them and things you SHOULDN’T feed them. So let’s talk all about what your chickens should and shouldn’t be eating.

We’ll also debunk some myths about what chickens eat. So let’s get started!

Up close of chickens head while she is eating grass

So, what do chickens eat?

It’s incredibly important to give your hens a high-quality, varied diet.

To ensure your hens are getting a varied diet, you need to know what chickens eat. Plus providing your chickens with a high-quality, nutritious diet means that you will have great-tasting eggs!

My chickens aren’t super picky. Honestly, they’ll eat ANYTHING. But I like to see to it that my chickens are getting the nutrients that they need. Here are some of the things that I think are the best things to feed your flock.

Layer feed

Layer feed is the cornerstone of any good diet plan for your hens. It contains all the nutrients they need to be healthy – laying eggs is taxing on a hen’s body, and the protein and nutrients it requires must be replenished.

Once they start laying eggs, you should feed them a high-quality feed with at least 16% protein daily. You can make your own feed using my recipe here or you can buy it already made here.

You might find that your hens will gobble a pelleted layer feed and refuse to eat a mash (or vice versa) – that’s okay. My Araucana chicken LOVES her mash – chickens are funny creatures and have their preferences just like we do.

Herbs

Herbs are really important for chickens because:

1. Chickens love them

2. They provide important nutrients

3. While providing nutrients they also provide some environmental activities for your chickens in their run.

I just made a DIY Herb Pot for my chickens and they absolutely love it!  

what do chickens eat araucana chicken

Some of my favorite herbs that I use for my chickens are peppermint, oregano, and sage. Oregano has antibacterial properties, so it promotes cleanliness in your coop. Studies have also shown that oregano helped chickens to be healthier and lay more!

Garlic is great to add to feed – in studies, it’s been shown to boost immune systems in humans and animals alike.

I also love using peppermint because it smells SO GOOD! And it also can help keep insects away from your chickens and possibly help maintain a healthy respiratory system.

Sage is one of my go-to herbs for healthy digestive systems. It smells great like peppermint and my chickens love to peck at it. In studies, it also reduced internal parasites (wormwood and chili are also great options.)

Check out several great herbal blend products here.

Fruit

Fruit can be great for your chickens because there are a lot of vitamins and minerals provided. Grapes, apple flesh (see below for more about apples), pears, raspberries, strawberries, and blueberries are all great for chickens.

Just keep in mind that some chickens won’t want fruit – mine don’t seem to be too partial to fruit (Hawk, my Araucana hen, really loves her black soldier fly larvae).

Like anything else, fruit should be fed in moderation since too much of anything can be harmful to your chickens. I normally make sure that when I’m feeding my chickens “table scraps” (i.e. leftover fruits and veggies) it doesn’t exceed more than 10% of their diet.

Three barred rock chickens eating watermelon

Leafy greens & vegetables

Chickens do like leafy greens – some go-to leafy greens are lettuce, kale, spinach, arugula, etc. Every year we grow our hens their own special greens garden by broadcasting seeds into a raised bed and then harvesting as needed.

I don’t suggest letting the hens have access to the garden 24 hours a day – they’ll shred it to bits in no time flat.

You can also grow greens and herbs in their coop, but give them limited access with a DIY grazing box, which is VERY easy to put together and durable – ours has lasted us several seasons.

There are some leafy greens you should avoid feeding backyard chickens, but we’ll talk about those later!

By and large, your chickens can eat any vegetables you do – keep in mind that cooked, soft vegetables might go over better than raw. However, cooked veggies typically don’t have the same amount of nutrients as raw, so one option is to ferment your vegetables for 3-7 days so they get soft without losing nutrients.

So feel free to let your chickens eat carrots, cucumbers, broccoli, and even pumpkin. They’ll love it and you will love the health benefits too!

Fermented vegetables are also super healthy for hens because they have beneficial bacteria such as lactobacillus which can help balance their digestive system and possibly lower their pathogen load. In studies, hens fed fermented foods had lower incidences of salmonella in their systems.

Sprouts & Fodder

My chickens LOVE to eat sprouts. And sprouts are so easy! Sunflower sprouts are simple, although you can sprout wheat, oats, beans, etc.

Chickens love them because they’re fresh greens plus seeds, and they love picking at both. They’re also extremely nutritious for chickens since seeds are full of all the vitamins and minerals required to generate new life.

To learn how to sprout seeds, here’s a tutorial for sunflower seeds.

Fodder is also something chickens eat – it’s basically sprouting seeds, but allowing them to grow into grass or actual plant. Learn about growing fodder for chickens here.

Eggs

There are many myths about feeding your chickens egg shells, but egg shells are a great source of calcium and protein for your chickens and they are totally fine for them to eat.

Cooked eggs are best – as you know, raw eggs carry a chance of pathogens, and you don’t want your hens transmitting bacteria to each other accidentally or reinfecting themselves. You can scramble the eggs – just make sure they’re cool before giving them to your chickens.

Eggshells are also great for chickens & an easy source of calcium. Again, dried, toasted eggshells are better than raw.

Insects (live & dried)

One crucial aspect of your chicken’s diet is ensuring that they get enough protein. Protein is a critical part of nutrition. Chickens require a lot of protein to lay eggs and have healthy feathers, among other things.

And one thing chickens LOVE to eat are dried insects such as Black Soldier Fly Larvae and mealworms.

You can either mix in mealworms and black soldier fly larvae into your chicken’s feed to help them get the protein that they need or feed them separately – just be prepared to be jumped on when your hens see the bags!

Here are articles about how you can raise your own Black Soldier Fly Larvae and Mealworms for your chickens.

Meat

Yep, when asking yourself “what do chickens eat?” you might not think of meat. Remember, chickens are omnivores, so they will eat other animals given the need and opportunity.

In fact, my Araucana hen will attack baby mice or frogs as sport. You might find that if your hens are protein deprived, they’ll start going after other animals to rebalance their nutrient deficiency.

You can also feed meat as a treat. Our hens go bonkers over local crawfish.

What do chickens eat araucana chicken crawfish

Other things to feed chickens

  • High-protein snacks or chicken treats like these
  • Oyster shell for calcium
  • Scratch grain because they love it (this is our favorite)
  • Grit (especially if they don’t free range at all)

What to avoid feeding chickens

Feeding chickens isn’t too complicated, but there are some things that you should avoid feeding them. Here’s a brief list (not comprehensive):

  • Dried or undercooked beans
  • Moldy food
  • Apple seeds
  • Pits from stone fruit such as peaches, avocados, nectarines, cherries
  • Dry rice
  • Undercooked/raw potatoes
  • Potato skins (cooked and raw)
  • Rhubarb
  • Excessive amounts of beet leaves, swiss chard, and spinach (which contain oxalic acid which can be poisonous in large amounts)

So now let’s talk about some of the feeding myths that I hear ALL the time.

Feeding myth #1: It’s okay to let chickens forage 100% of the time.

Sure, if you want scrawny birds that don’t enjoy human interaction. Chickens can survive foraging on their own, but letting them forage can be detrimental to their egg production and temperament.

I’ve let my chickens forage for 100% of their food in the past, but I noticed that my hens weren’t as healthy and they didn’t lay nearly as many eggs. You can let your chickens forage, but I recommend that you still supplement their diet with layer feed, so that your chickens stay healthy.

You also run the risk of losing birds to predators when you let them forage 100% of the time, so I just don’t risk it anymore.

Feeding myth #2: Citrus is poisonous to chickens

It’s not, it’s actually healthy for them. See this article here to learn more about why citrus is good for your chickens.

My chickens won’t even touch it when I give it to them, but it’s not poisonous and it has health benefits for your chickens. If you want your chickens to have the health benefits of citrus, you can always add a little to their water.

Feeding myth #3: Letting chickens eat eggs is cannibalism or will turn them into cannibals

This one is just not true. I don’t know who started this vicious rumor but it’s BS. Allowing your chickens to eat eggs is good for them and I do it all of the time.

Just be sure to cook the eggs since pathogens such as campylobacter and salmonella have a chance of passing into the egg and you don’t want your chickens to reinfect themselves.

Ahhh….coop envy. We’ve all been there.

I’m not a very “crafty” person, so I love writing this blog post every week that has beautiful coops, designed by very talented chicken owners – coops that are destined to give you ideas to beautify your own coops or just inspire a bit of “coop envy.”

Every week, we feature the “best of the best” coops we’ve found on Instagram – and we hope you enjoy them!

If you want your coop featured, you can email me at [email protected] or use #PamperedChickenMama on Instagram! We might just choose your coop to feature (because I know y’all are a talented bunch!)

https://www.instagram.com/p/BiaTiJEBQxq/?tagged=chickencoop

https://www.instagram.com/p/BixOVK8hXMS/?tagged=chickencoop

https://www.instagram.com/p/BixVCDkB7ih/?tagged=chickencoop

https://www.instagram.com/p/BixthywAc3i/?tagged=chickencoop

https://www.instagram.com/p/BixXM_lHcJm/?tagged=chickencoop

https://www.instagram.com/p/BiyErBlgl5R/?tagged=chickencoop

Which coop is your favorite? Which ideas will you use for your own chicken coop? Leave a comment below!

So I LOVE pallets. They are so handy to have around and they are an inexpensive way to build things around the homestead!

I love creating DIY projects out of pallets. So I’ve compiled a list of my favorite pallet projects that are handy for any homestead!

Before I get into the list of projects keep it mind that it is very important that you make sure you are using pallets that are NOT treated with chemicals.

Back in the day many pallets were treated with a chemical called methyl bromide (MB) that is dangerous for humans and animals! Now pallets are no longer treated with this chemical, they are heat treated, but you want to make sure that you know how your pallet has been treated! Most pallets will have a stamp that will tell you how they were treated. Check out this blog post I wrote about how to tell if your pallets are safe to use.

So here are my favorite DIY pallet projects for your home and garden.

DIY Pallet Vertical Herb Garden

I love this Pallet Herb Garden! This project is so easy because you don’t even need to take your pallet apart to create this project! Check out more detailed instructions here

 You can also build a barn out of pallets!

Garage Storage Space

I love this idea of using an old pallet to store all of your garden tools! There is no work required for this project! All you need to do is set up your pallet and stow your tools inside! Easy!

DIY Pallet Shed

This project is amazing! I love that this shed is built out of pallets because buying a shed (or even buying the materials to build a shed) can be really expensive! This project is a great way for a homesteader who is just starting out to save some money!

Pallet Hanging Chair

My favorite thing during the summer is to take a nice break in the shade, relaxing and enjoying the outdoors. So I am definitely going to make this Pallet hanging chair this summer so I have a nice chair to relax in. All you need is one pallet and some paracord and you can create an amazing chair that you can relax in all summer long.

Pallet Fence

I love this cute pallet fence. It can be painted any color you want and it is a great way to create a closed in area for your chickens to roam.

Pallet Walkway

This project creates a simple walkway out of pallets that adds a beautiful decoration to your yard! Plus it’s pretty easy (Bonus!)

DIY pallet planter box

This planter box is a quick and easy project that you can create for free out of any pallets you have hanging around. I love using planters for herbs and they make a fun indoor or outdoor decoration.

Another DIY planter box

Ok so here’s another one. I really love all of these planter box ideas and I can’t choose which is my favorite! This one is a bigger planter box that is so cute and easy to make. Planter boxes are great for those who are just starting out gardening or have limited space so check out this awesome tutorial!

Pallet Shoe Rack

So as a mom I deal with finding my kids’ and husband’s shoes ALL OVER the place. So I love this simple DIY pallet shoe rack that you can place right next to your door so everyone’s shoes end up in the same place! Check out the tutorial here

Easy Pallet Blanket Ladder

So here’s another lifesaver project for all of my moms out there. This DIY pallet blanket ladder is a cute and easy way to store blankets! I love how easy this project is and how cheap it is to make! I’ve definitely seen ladders just like this online for about $100 so this DIY project is awesome!

Pallet Dog Bed

This for all my dog lovers out there! This easy dog bed looks really nice and it creates a nice space for your furry friend! It’ll work in summer AND help your dog stay warm all winter!

Pallet Swing Chair

Ok so this is awesome! Some of my favorite memories are from sitting on a swing chair in my grandma’s backyard when I was a kid. So this one was a little bit nostalgic for me! I’m definitely going to be trying this project out this summer!

DIY Pallet Hammock Stand

So it’s always the worst when you don’t have any trees to hang your hammock from. So I love this DIY hammock stand! This project looks ten times nicer than any hammock stand I’ve seen in the store and it’s practically free!

Pallet Bench

So I love this DIY Pallet bench! It’s so simple and it helps create an amazing place to relax outdoors this summer.

Pallet Adirondack Chairs

Ok, so I clearly love outdoor furniture. I love the outdoors and an adirondack chair is the perfect excuse to spent a little extra time outside this summer! Check out this awesome pallet wood adirondack chair tutorial!

Pallet Garden Tools Organizer

Ok, ok. So my shed is a little bit disorganized. It’s a work in progress. But when you have so many awesome gardening tools it can get a little bit messy.  That’s why I love this DIY gardening tool organizer! It’s a simple project, but there are so many ingenious ideas included in the plans! Check out the tutorial here!

Pallet Bookshelf

I love this pallet bookshelf idea! It’s a simple project that looks amazing in any home!

Pallet wood baby gate

So baby gates you get from the store just aren’t that cute. But this DIY Pallet wood baby/pet gate is adorable! I love that it looks like a barn door and it only takes about 3 hours to make! Be sure that you triple check your pallet to be sure it is heat treated and not chemical treated for this project though!

Pallet wood coffee table

This pallet wood coffee table is pretty cool! I love the hairpin legs that give it a little bit of a modern touch! Check out the full tutorial here!

Pallet Pot Rack

Last but not least we have this amazing pallet pot rack! My pots and pans drawers can be a little bit disorganized sometimes (i.e. I normally have to grab something out and quickly shut the cabinet before everything falls out) So I love that this DIY pallet pot rack allows everything to be easily accessible and keeps things organized!

Are you going to use your spare time this summer to make some awesome pallet projects? Share your ideas with me in the comments below!

Hey y’all! Here’s this week’s sneaky peek photos of life on our farm!

These images also appear on my Instagram account where I share MANY more photos and stories from the farm!

If you aren’t yet following me there, you can right here.

Enjoy the photos & be sure to share some of yours with me!

https://www.instagram.com/p/BissusSg4D-/?taken-by=pamperedchickenmama

https://www.instagram.com/p/BivRbPCBjs-/?taken-by=pamperedchickenmama

https://www.instagram.com/p/Bix2tlGg5kw/?taken-by=pamperedchickenmama

https://www.instagram.com/p/Bi0bFDbAiZI/?taken-by=pamperedchickenmama

https://www.instagram.com/p/Bi2_0O2h6TY/?taken-by=pamperedchickenmama

https://www.instagram.com/p/Bi5koCBBbgK/?taken-by=pamperedchickenmama

https://www.instagram.com/p/Bi8JIIWAuUc/?taken-by=pamperedchickenmama

So I’m a little bit of a clean freak. I’ll admit it. It’s really important to me that things are clean!!!

But I do not like using conventional cleaning products that are FULL of chemicals. Yikes! I am not a fan!!! Especially if you’ve got little kids around the house that could possibly get a hold of those nasty chemicals! Scary! So in this article I’m going to discuss some of my favorite natural cleaning hacks to help you keep your home or homestead squeaky clean.

[This page might contain affiliate links, which means for any item you purchase using our links, we earn a small commission at no extra cost to you. Thanks for supporting our website and being a part of the Pampered Chicken Mama family!]

Use the Environmental Work Group’s (EWG) website

So my first tip is to use the Environmental Working Group’s (EWG) website. I use this website for everything!

The EWG is awesome because they give information about many products that are out there to allow you to make an informed choice before you purchase a product. They even have a handy app that allows you to scan a product’s barcode! It then automatically pulls up all of the information about that product.

Each cleaning product on the EWG is rated from A-F which allows you to see how good or bad that product is for you and how it could impact your health. The EWG rates products based on several factors including asthma/respiratory, skin allergies & irritation, developmental & reproductive toxicity, cancer, and environmental impact.

I also love that this website breaks down each of the ingredients in every product so that you can know exactly what is in your cleaning products and what each ingredient does. If you can’t tell I absolutely love the EWG’s website! It’s an amazing resource for anyone who wants to live a more natural lifestyle. They also have product reviews for cosmetics, food products and more! Check out their website here.

Vinegar

My next tip is to use vinegar! That’s right, just normal distilled white vinegar. Vinegar is awesome! You can use it to make vinaigrettes (yum!) and you can use it as a natural cleaning product.

Vinegar is a natural cleaning agent that you can use to clean surfaces in your home. I love using vinegar to spray down my counters and table after a meal because it cleans everything off, but it isn’t full of chemicals! No one wants to use chemicals on a surface that you are eating on! Yikes! I normally mix one part vinegar and one part of water in a spray bottle and then I use that for spraying down many of the surfaces in my home! I just use normal white vinegar like this one for all of my home cleaning!

I seriously use vinegar for EVERYTHING! I clean doorknobs, bathrooms, and I even spray it on my floors when I’m mopping. Be careful with this one though you want to make sure the vinegar won’t damage your floors-especially if they are wood! Do your research and even do a spot test in a low visibility area before you spray vinegar all over your floors.

Use Baking Soda

So baking soda is awesome. Baking soda is gritty so it’s super useful for getting off anything that’s extra stuck in your home. I use baking soda to get hard water marks out of my toilets and I also use it to clean my shower and sink. It really helps clean off any soapy scum that accumulates in those areas. I normally use baking soda and vinegar together when I’m cleaning my bathroom to make sure everything is really clean!

Plus you can also use baking soda to neutralize odors! Check out my recipe for a natural coop refresher using baking soda and flour.

Pumice

For tougher stains I use pumice scouring stones like this one. These scouring stones are made out of a volcanic rock called pumice. They’re natural and non-toxic. Not only are these bad boys cheap, but they also get off stubborn stains like no other. Seriously these things are the best! I use one of these monthly to clean my shower (it’s white tile which is the WORST to clean) and I LOVE it!

Buy a hair catcher for your sink and shower

So let’s talk about hair. It clogs up all of my drains and causes all sorts of problems. Ugh. SOOO this isn’t a cleaning product, but I love these drain hair catchers. They are so useful and they eliminate the need to buy drain cleaner which can be very toxic. You simply put these ones over your drain and it blocks the hair from going down the drain. I also love these drain snakes that you can put inside of the drain in your sink. They catch the hair and then you can remove them and clean out the hair!

Use essential oils instead of air freshener

I love my essential oils diffuser! It’s amazing and it has health benefits beyond just the amazing smell! I recommend using essential oils over spraying an air freshener in your home or bathroom. I’ve also hung peppermint in the bathroom and it makes a huge difference

If you want to get started with safe, great smelling oils, here’s the brand I recommend. You can get an entire kit of everything you need to get started with oils for just $162 – diffuser, 11 multipurpose essential oils, and more!

Hydrogen Peroxide

Another cleaning hack you can use in your home is to use hydrogen peroxide. This stuff can clean almost ANYTHING. It’s awesome! Check out this article about different ways you can use hydrogen peroxide to clean in your home.

Keep in mind that this product is rated a B on the EWG’s website. So it’s not bad, but it’s not great either. It can cause some skin and respiratory irritation if it is used incorrectly. Generally though, there is little to no concern for any issues if this product is used correctly.

Read labels

Do I still not have you convinced to switch to natural cleaning products? Well then, I highly recommend that you read labels of every product you buy, especially cleaning products.

Use the EWG and get familiar with ingredients that are toxic and can have nasty side effects. After using the EWG’s website for awhile I started being able to immediately identify toxic ingredients in my products that I was using!

I also recommend that you read the label because typically (if you’re using conventional products) they will give you information about how to store the product!

If you decide to continue to use conventional products it’s important that you know the risks and hazards of the product, so that you are storing it correctly!

Choose natural cleaning product brands

So I know not everyone is ready to make an immediate switch to totally natural cleaning products, and that’s OK! If that’s the case there are some amazing brands that make great products for cleaning.

I think Attitude is an amazing brand. (Plus they have good ratings on the EWG’s website) Keep in mind that buying a natural product from the store is going to be more expensive than buying some good ole vinegar (which is why I use vinegar for everything).

I also really love the Grove Collaborative for natural cleaning products. They supply you with all natural cleaning products that can be delivered right to your door step. Handy right?

Join Grove today and get a free gift set with your first purchase!


Do you have any more natural cleaning hacks? Share them with me in the comments below!