If you have an urban farm (or wish you had one), it’s common to feel you can’t homestead like you should.

But nothing’s further from the truth.

For years, I felt the same way. I lived in a condo in the Washington, DC metro area, where homesteading was not only uncommon, but frowned upon.

This is my neighbor’s building, mine looks exactly the same! Everything has to match per our HOA.

The county even had an ordinance that forbade owning chickens unless they were 25′ away from any other residence (which almost never happened), and HOAs could restrict them altogether.

I didn’t have anyone to show me how to homestead in an urban home, so I read books, but felt very limited. (There’s a list of books to read at the end of this post!)

In fact, that feeling is one of my main inspirations for starting this website – to provide inspiration and answers to readers who want to have an urban farm, but don’t know how.

If you want an urban farm, you certainly can, even if you can’t keep livestock or have a large garden. Here’s 3 common urban farm problems, and their solutions!

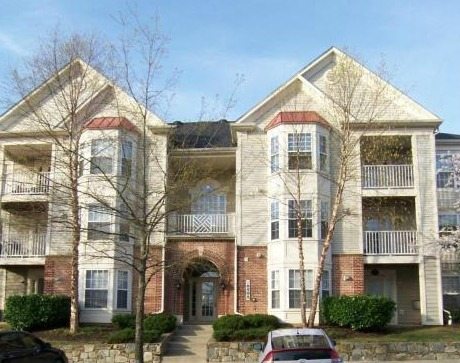
1. I have no land to farm/I have a restrictive HOA

If you have a restrictive HOA, I sympathize with you. At our condo in the DC metro area (my homestead is in the Midwest but I still own a condo in DC because I’m still waiting for a good uptick in the real estate market to sell), we have one of the worst HOAs in the area, with high rates, very unreasonable restrictions, and nasty staff.

My husband even got into a tiff with HOA staff once over whether they could restrict our right to fly an American flag (my husband is an Army veteran). If this sounds like you, I know what you’re going through.

We aren’t allowed to have anything but seasonal plants on display.

That being said, we WERE allowed to have seasonal plants, which included fruiting plants. Cherry tomato plants were one of my favorite seasonal plants to grow there because they looked pretty and were easy to keep in hanging containers.

tomatoes
Grow cherry tomatoes in hanging baskets

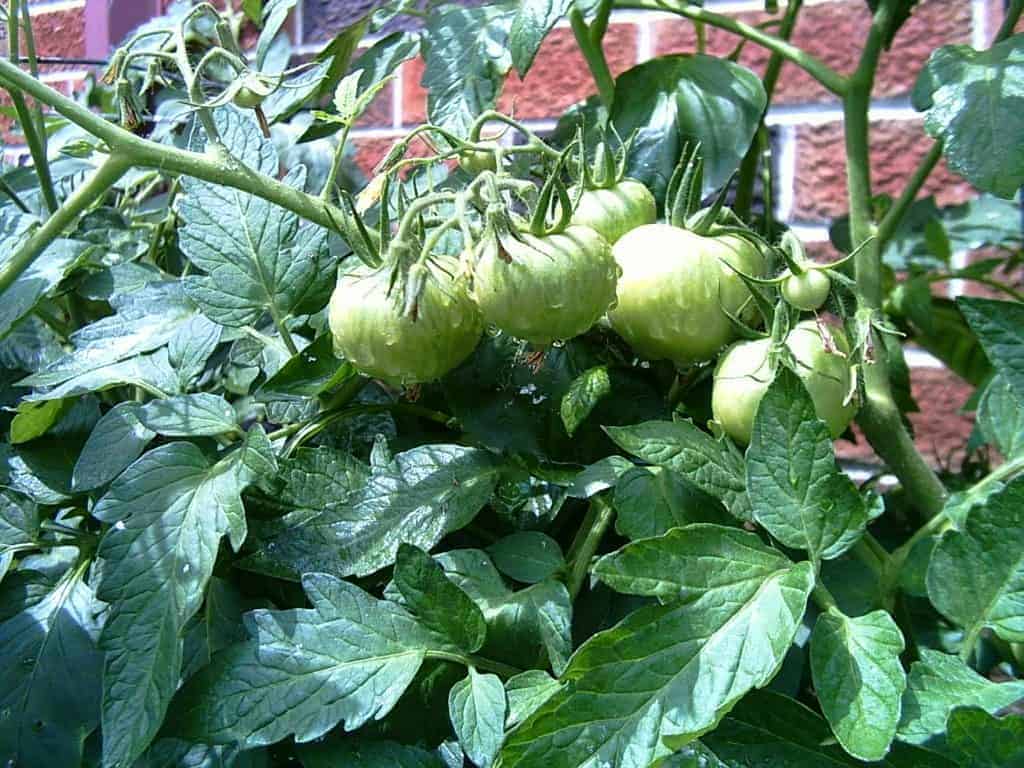
I raised cherry tomato plants that grow in a bush, rather than a vine, which makes it easier to keep them in a visually-appealing container while still being productive. I also did a lot of vertical gardening, which allowed me to grow squashes and cucumbers.

Edible landscaping

One great and easy solution to make an urban farm more productive is to swap ornamental plants with edible plants.

You can plant blueberry bushes, which make a nice substitute for suburban staples like boxwoods, and you can trim them to make them look orderly. You also can consider raspberry and blackberry bushes, and uncommon bushes, such as gooseberry bushes.

You can plant fruit trees, which have both pretty flowers and fruit to harvest.

If you’re allowed to have trees, you can use fruiting trees instead of ornamental trees. They have pretty flowers, which would appease most HOAs, and you can still harvest the fruit!

For example, plant a couple apple, pear, or peach trees. Just be sure you plant 2 different varieties to make sure your tree gets pollinated.

Consider nut trees, like a pecan!

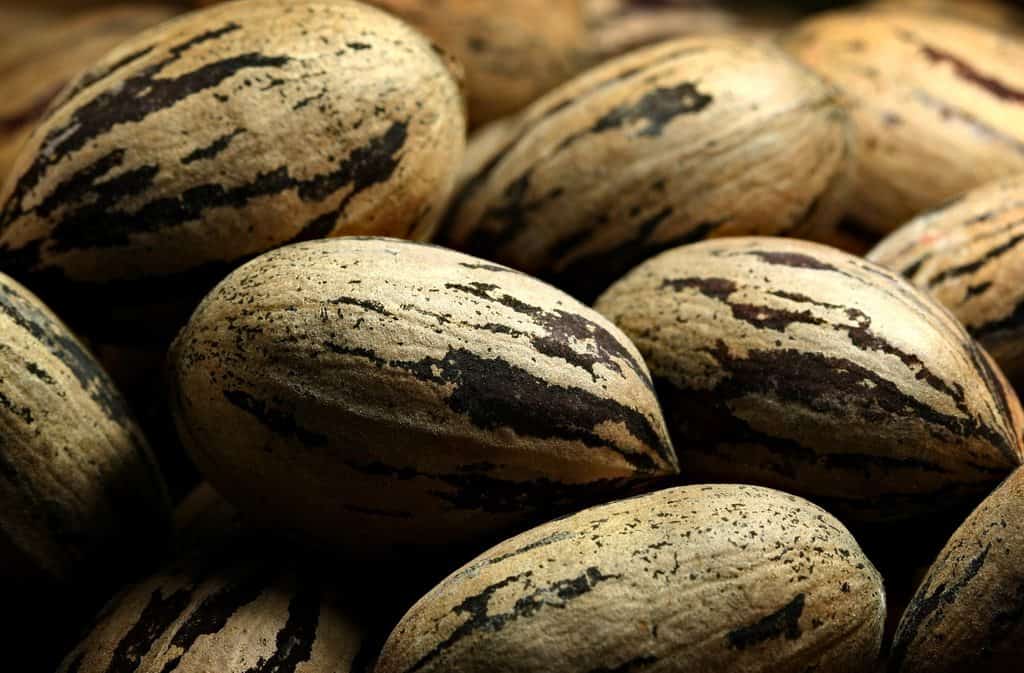
Nut trees are also a nice alternative – walnut trees and some species of pecan trees produce nice, big nuts that won’t fall everywhere come harvest time. (Some species of native pecan trees are very prolific, and you’ll have nuts everywhere come November).

Interested in making your own nut butters?

Container Gardening

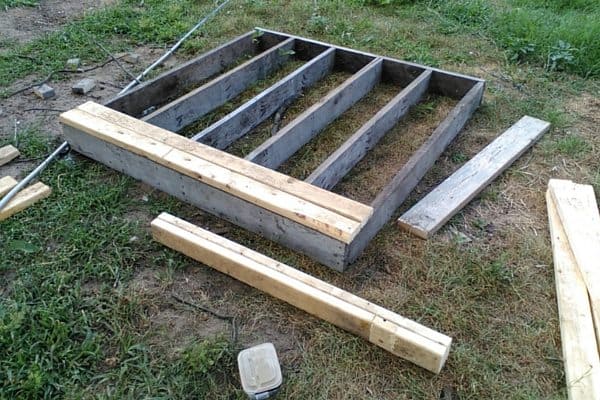
If you don’t have any room for grass, or your soil is actually asphalt, consider container gardening. Some HOAs don’t allow for raised beds, or require your lawn to be grass, so containers are a great way around this restriction.

Consider container gardening for less-than-ideal locations.

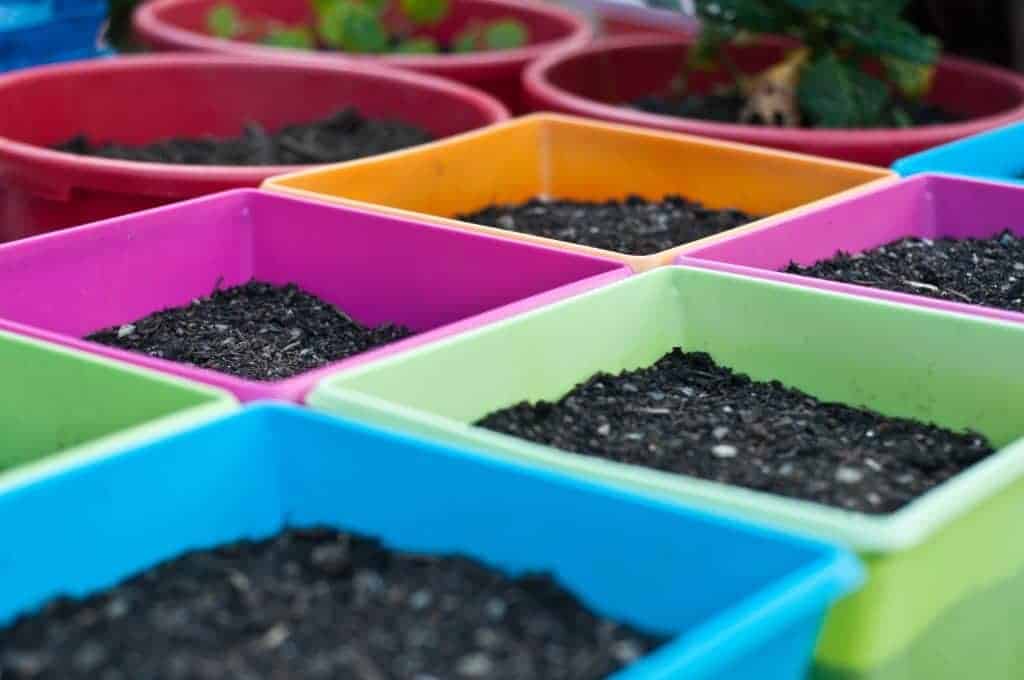
A friend of mine has only a rocky hill in her backyard, so she grows vegetables in containers located on her concrete patio. She has an excellent harvest every year, since she practices intensive gardening!

To make it easier, you can use self-watering containers like these. I’ve used self-watering containers in the past, and they did increase my yield because the plants drew the water they needed right at the root source – where they need it most.

Some trees, like fig trees, actually do better in pots. Leafy greens like lettuce and spinach do great in containers, and when you have a container garden, you have better control over your soil and garden pests.

There is a third alternative, which is particularly great for city dwellers – you can have a window farm. Britta Riley is an urban farmer in Brooklyn, NY who, along with a world-wide collective, developed a method to gain control over her food source, while living in her very urban apartment. You can learn more here.

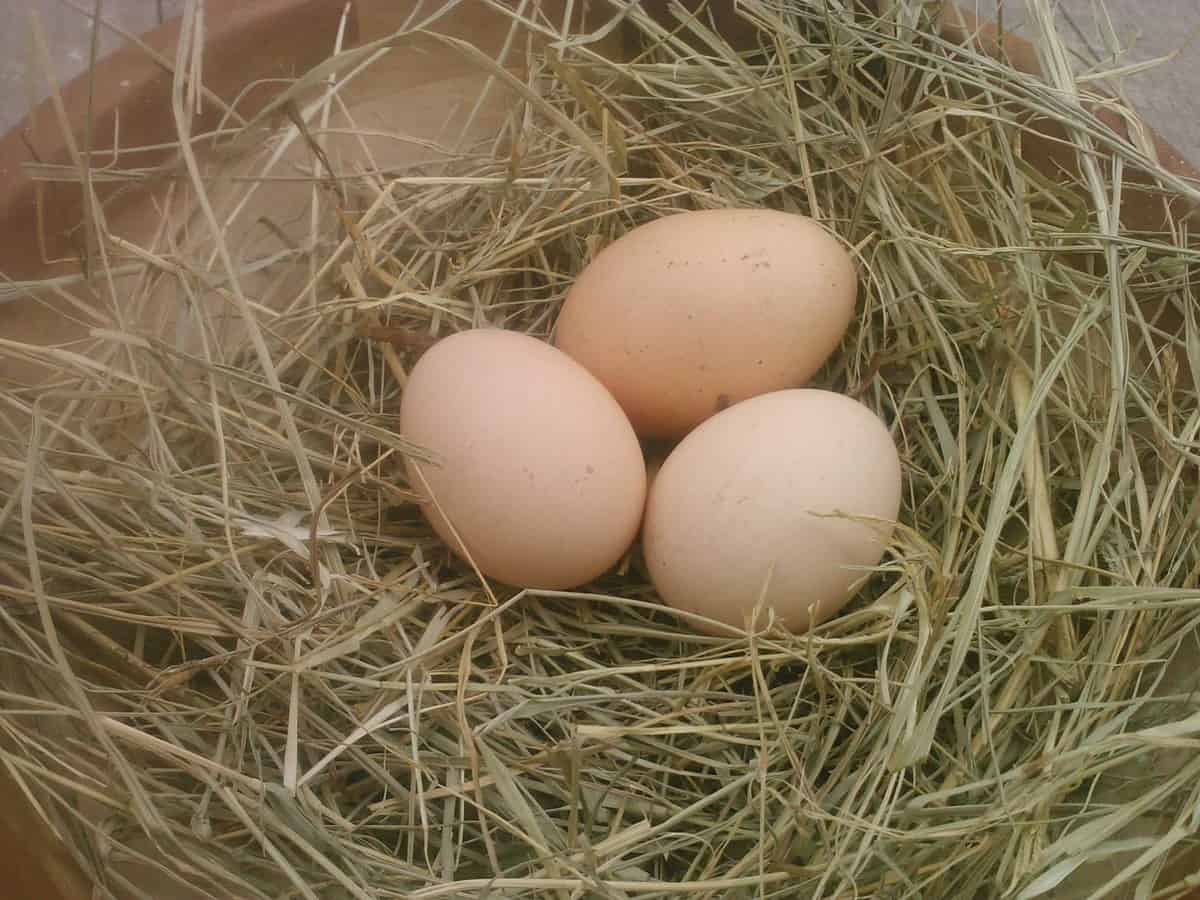
2. But I can’t fit a cow/goat in my apartment

If you want to produce dairy, but can’t have livestock at your urban farm, your first option is to find a local farmer who’s willing to sell you raw cow or goat milk. There’s so much you can produce in an apartment with raw milk!

You can make your own butter, cheese, yogurt, whey, and much more. Homesteading isn’t all about milking cows and growing vegetables – it’s also about producing food from raw materials like milk and vegetables.

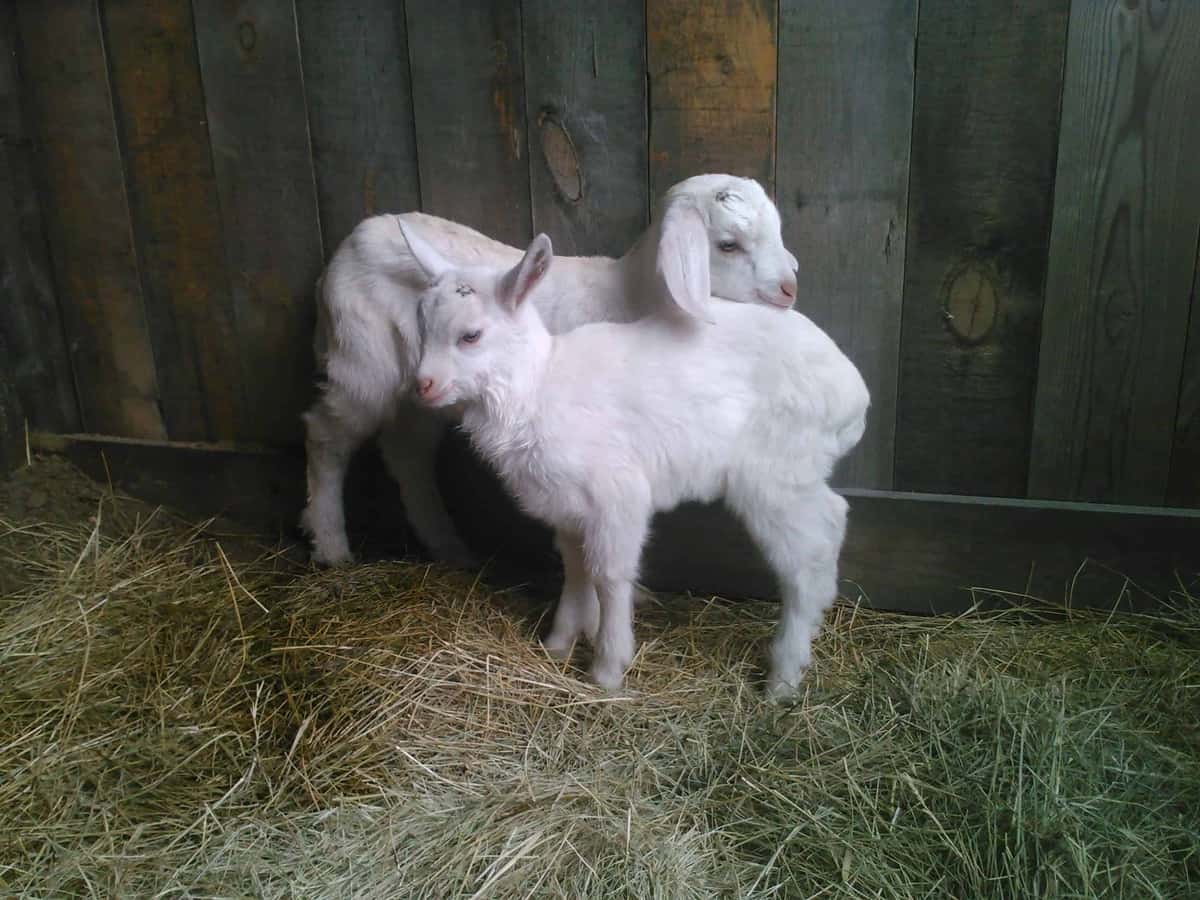
Some cities are relaxing their laws about goats. If you’re lucky enough to live in one of those areas, then Nigerian Dwarf goats are a great choice. They won’t have as much production (perhaps around a quart a day), but they’re small and friendly goats.

You can still produce milk and cheeses 

But let’s say you can’t find milk in your area, or selling raw milk is against state laws. You can still produce nut milk, which is an excellent (and vegan!) alternative to traditional dairy.

almonds
You can make milk and cheese from nuts!

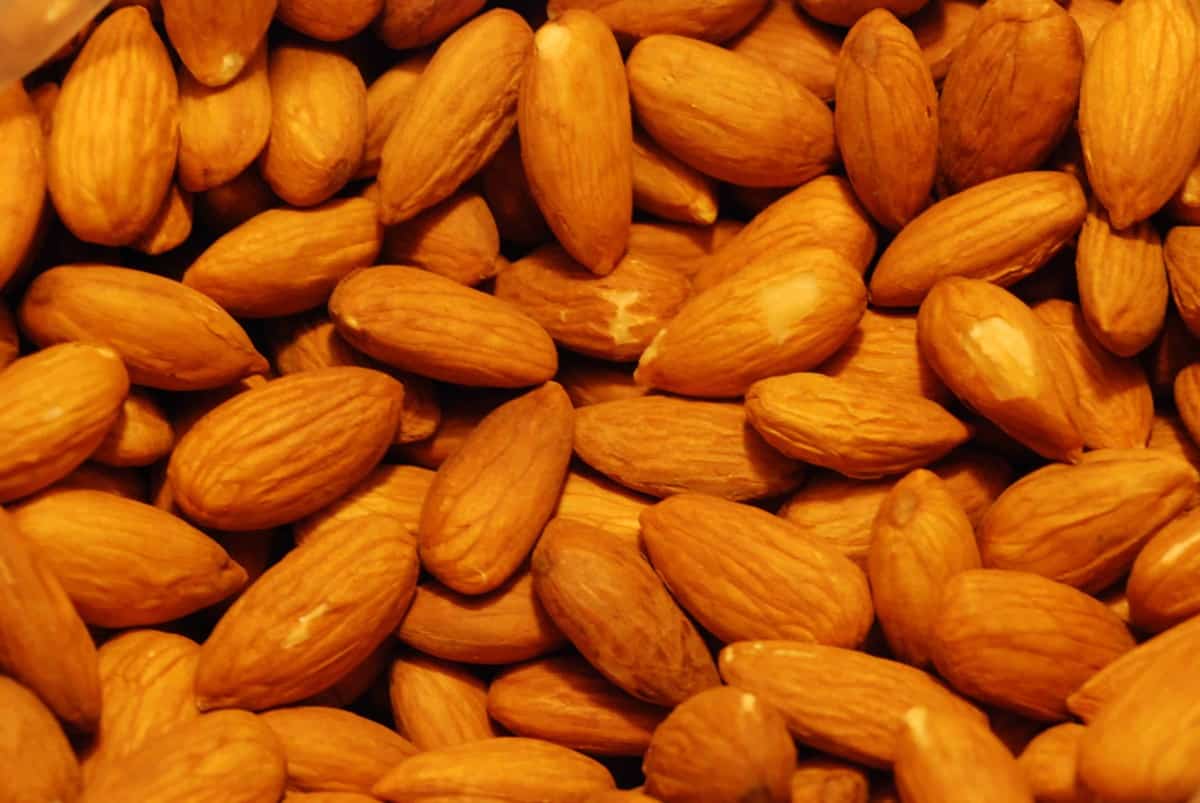
Did you know you can even make cheese from nut milk? You do now.

Thrive Market (yes, the online natural foods retailer that’s better than Costco and Whole Foods combined) has an excellent tutorial about nut milk (remember those nut trees I suggested you plant above??). 

If you want to make your own nut milk, but don’t have access to, or can’t plant, your own nut trees, you can buy raw, organic almonds from Thrive Market here.

3. My property faces the wrong way/I don’t get enough sun

I’ve been there, too, and I promise there’s solutions, and even some advantages. My condo in DC faces north – no matter the season, light is limited.

Growing with limited light gets a little tricker, but I was still successful with sun-loving plants. Even though I had weak light, I still had a successful farm.

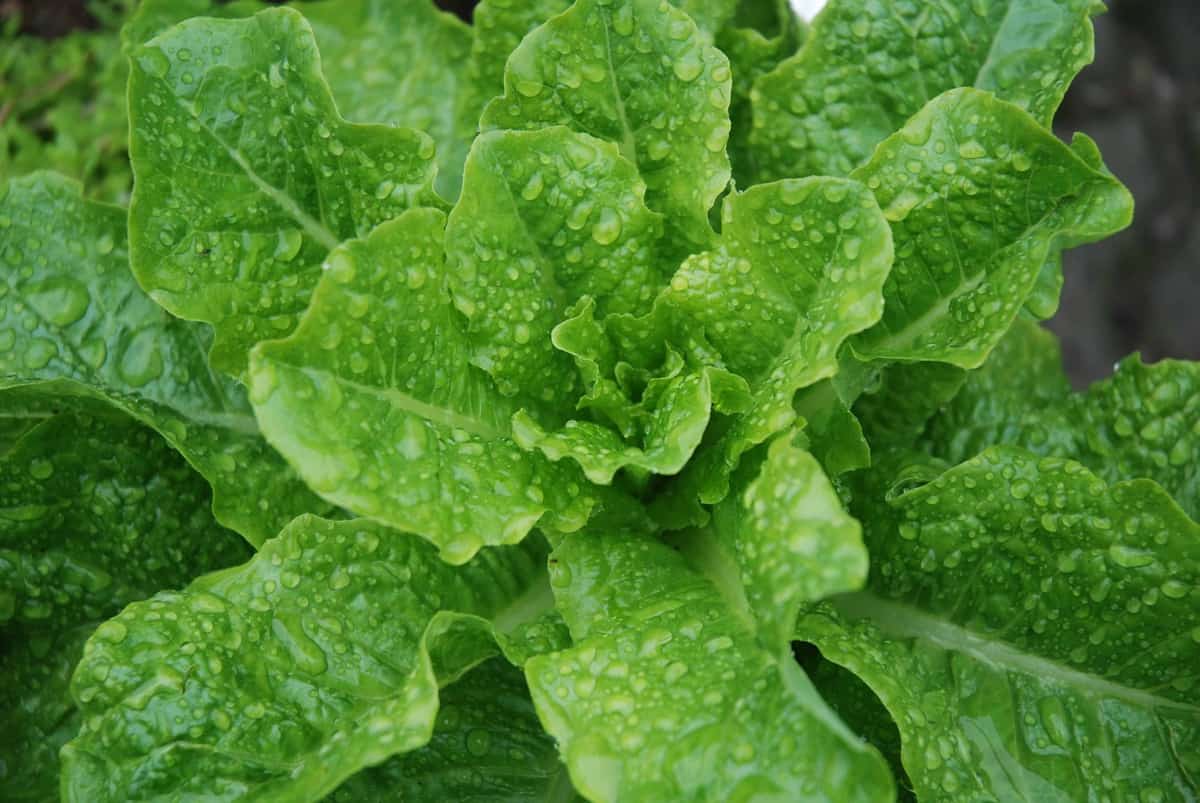
I still did very well with tomatoes, and especially lettuces and herbs on my urban farm. During the summer, traditional gardeners can have difficulty growing greens because the heat can cause lettuce to bolt (grow very fast to produce seed, which makes leafy greens bitter). 

Homes that get a lot of shade, however, are ideal to grow leafy greens and herbs.

lettuce
Lettuce grows well in areas that get partial shade.

To increase the amount of light, one solution is to use light reflectors. We use this solution even in our farm house, during the winter, so we can grow lettuces inside.

We use aluminium foil as a sun reflector so all sides of the plant get light, and it increases the amount of light the plant is exposed to. You can also set up grow lights in your farm area to increase the amount and length of light your plants get.

Additional Reading

If you want to get your homestead on, and do some reading, here’s a list to get you started:

backyard homestead

The Backyard Homestead – a great introduction to everything homesteading for your backyard farm. One of my favorites.

Homemade Beauty Essentials – Shows you how to use natural products to produce your own beauty products.

Apartment Gardening – The title says it all. A great guide to farm in small spaces.

Homegrown Herbs

Homegrown Herbs – An indispensable guide to planting, growing, harvesting, and using more than a hundred popular herbs.

Do you have an urban farm question you’d like me to answer? Contact me!

Until next time!

(This article may contain affiliate links. I earn a small commission at no extra cost to you. Any commissions I earn I spend on the homestead. Thank you!)

This year, I’m using my refund to improve my homestead.

I’m not sure what exactly I will do with it, however. We need to improve the property, invest in some livestock, and I could always learn more.

The possibilities are pretty varied. 

My options are:

Investing in some livestock

I’ve considered purchasing a dairy cow with my refund this year, or possibly a dairy goat or two. I’d prefer to buy a cow because of the cream and the quantity, however, I can see advantages to goats.

Goats are smaller, and require less food and land than cattle. They also make nice companions, and generally cost less than a cow to acquire. I can purchase 2 nice pregnant goats for less than one dairy cow.

Our new bucklings!
Our new bucklings!

We already have 2 small bucklings (more on these guys in another post). They are Saanen/Nubian crosses, and I wouldn’t mind having a dairy goat herd, since that would mean meat, milk, cheese, and soap.

I think it’s important to spend my refund to make us more sustainable, but I want to spend it in a meaningful way.

Since I haven’t found a reputable cattle breeder in my area yet, I worry about being taken advantage of when buying a cow. A cow that currently isn’t pregnant causes me to worry about her being a free martin (a heifer that’s the twin of a bull calf; a free martin is sterile).

I’m not sure about spending my refund on a cow that has a calf at her side because unless I can see vet records, I worry she might not take easily. Cows can be more expensive to feed and care for than goats, so I want to make sure I find a cow that works for our farm.

With horses, it’s common to sell an older broodmare while pregnant or with a foal at her side to show she CAN produce, but it speaks nothing of whether she catches easily. You need to examine vet records, and speak to the vet individually.

I know less about cows than horses, but I do know that if I purchase a cow to breed, I will want to have a vet look at her. I’m unsure of whether I want the additional expense and hassle of a pre-purchase exam on a cow.

I might just spend my refund on goats, unless I find a reputable cattle breeder in my area.

If you’re considering livestock, chickens, sheep, and goats are smaller, easier to handle livestock that will let you take the next step towards a more self-sufficient lifestyle.

FREE online events, plus takeaway options

I can finally let you in on 2 free events you don’t want to miss. 

I’ve known about these events for a while, and now I can finally tell you about them. I’m attending both, and I hope to see you there!

homegrown

Home Grown Food Summit – April 6 – 12, 2015.

This awesome event will be jam-packed with presentations, and you’ll be sure to walk away with a ton of valuable information you can implement immediately on your homestead.

Interested in learning more?


TheEssentialOilsRevolution_Small

The Essential Oils Revolution – May 11 – 18, 2015

This event is also online, and will be full of informative information about essential oils. It doesn’t focus on any one brand of essential oils, but rather how to use essential oils to change your life. 

I’m becoming more interested in using essential oils for health (we have skin issues in this house) and cleaning, so you’ll definitely be able to meet up with me at this online summit.

Interested in learning more?


You will WANT to be at these events, and they’re rolling out in the most convenient way possible.

Each presentation will be available for free for 24 hours per presentation, or you have the option to purchase a complete collection of the presentations after the event.

Even if you attend, if you buy the complete collection of videos, you’ll have them refer back to them if you need to.

I’m considering spending my refund to purchase the presentations at both of these events. 

It would be a nice addition to my library, and I’m sure, even though I plan to watch all the presentations, that I will pick up even more watching them a second time. 

(If you’re looking for some great reading before these summits, Mountain Rose Herbs has a great book called The Naturally Clean Home. There’s a ton of information about making your own cleaning products without the chemicals found in commercial products).

Another way to further my education

I’ve been thinking about taking an introductory herbal course with the Herbal Academy of New England. It’s a 6-unit introduction to incorporating herbs into your life beyond the everyday ways I already use them.

I’m particularly interested in their unit on common discomfort – just the other day I had a headache and wondered about natural remedies. Spending my refund to improve my natural remedies skills is another step towards independence.

This spring, I pledge to improve my preservation skills.

I want to improve my preservation skills, since our garden is already producing, and I think we’ll have a large crop this year.

via Pantry Paratus
via Pantry Paratus

I’m thinking of using my refund to add a Chop Rite Clamp-Down Medium Chopper (#10), like the one above from Pantry Paratus to my kitchen. Since we either have meat we produce on the homestead, or meat we buy in bulk (like beef), having a grinder would be great!

My husband is a big fan of sausages, but since we don’t have a meat grinder, it’s harder to produce them on the homestead.

via Pantry Paratus
via Pantry Paratus

To can meat, you need a pressure canner, so I’m thinking of buying the All American Model 915 from Pantry Paratus. It’s in my price range, and is the 2nd smallest pressure canner available.

Since I do a lot of canning on my own, I want a smaller pressure canner I don’t have difficulty handling on my own. 

For our extra produce, whatever I don’t can, I want to ferment or dehydrate.

And while I’m on the subject of produce…

I’m considering purchasing a Seeds of the Month Club Subscription with my refund. Every month I would receive 4 or more packets of seasonally-appropriate seeds straight to my doorstep.

Since some of the seeds I purchased at the end of the season last year haven’t sprouted (kind of a waste of money), I like that the Seeds of the Month club will automatically send me viable seeds every month.

Soaps, because I like nice soap

After years of marriage, I finally got my husband to agree that spending a little more on nice soap is one of those small things that makes life better.

I was actually surprised he agreed with my opinions on soap, since he’s a basic needs kind of guy.

via The 104 Homestead

I’m in love with the soaps from The 104 Homestead Shop. They’re handcrafted, and since we have skin issues in this house, I might buy a few bars of the Honey Oatmeal soap (pictured above) with my refund to improve our daily lives.

via 104 Homestead
via 104 Homestead

I also love the Dirt Lovin’ soap. I still have long nails, and this soap will help get the dirt out from under them after I’ve been caring for the animals or planting in the garden. 

Fermenting Products

I’ve been learning more about fermenting lately, and have wanted to try to make milk kefir and water kefir. I don’t know much about these ferments, and I look forward to sharing my journey with you.

When I get my refund, I think it’s a perfect time to try making kefir.

Thrive Market has milk and water kefir starter that I’m thinking of investing in. I won’t be able to find starters in my area, so I will have to order some online.

via Thrive Market
via Thrive Market

They’re a little bit of an investment, but once I have my kefir started, I can use the grains again and again, so I’ll get a lot of value! I’ve been wanting to add more healthy drinks to my diet, and kefir is definitely on my list to try.

Do you have plans to improve your self-sufficiency skills this year? I’d love to hear about them! Leave a comment, or drop me a line!

I used to let my hens free range without plans to ever use chicken tractor, thinking I was doing them (and myself) a favor.

Great yolks come from a chicken who can eat bugs and all, right?

Our hens were allowed to free range because I think a pasture-raised chicken is a healthier chicken.

We also originally got them for bug control – with horses comes manure, and with manure comes flies and mosquitoes.

And they did a great job keeping those populations under control.

When my dog started attacking my hens, I didn’t get it. Yeah, I’m not too smooth. Plus, there was all those freeloading mosquitoes still milling about.

The dog was put in a pen, and the chickens were allowed to continue to free range (in reality, it turns out my dog is a Houdini, so this wasn’t a great solution).

It wasn’t until Mrs. Leedle, my reliably-laying production red hen, mysteriously disappeared one day (I suspect a hawk got her), that I decided it was time to build a chicken tractor.

Winter was coming, and the mosquitoes had gone under ground, and we had a lot of time for projects.

How we built our chicken tractor

Building a simple but effective chicken tractor turned out to be an easy project, and, with our plans, that took only a few hours.

Luckily, our chicken flock still thinks it’s the bee’s knees.

Your chicken tractor can be any size or shape, as long as it keeps them safe from predators, can be moved, and has some way to provide them shade and water.

For us, this chicken tractor handles the overflow from our main coop, and we’ve set up a second flock of our hybrid chickens we’ve bred on the farm.

So, for this tractor, we wanted to house 5 or so chickens, since the purpose of a chicken run is to let them free range while protected.

We first started out with pallet wood for the base, which was free. 

Make your own DIY chicken tractor using these plans and pallet wood. Easy step-by-step plans. From FrugalChicken
Making sure the 2x4s are the right length

Each piece was 5′ long, and made of solid wood that had been heat treated. 

If you want to construct your chicken tractor out of pallet wood, be sure to check if it’s safe for you to use.

Some pallet wood is safe, while some isn’t.

If you’re not sure where to get pallets, you can read about it in my article, How to Use Pallets for Homestead Projects.

After we constructed the base of the tractor with the pallet wood, we then began framing the chicken tractor using 2x4s that were custom cut to 5 feet.

Adding a floor

Once the base of the tractor was complete, we added a floor using 1/2″ plywood, which gave our new chicken flock a firm place to stand and rest.

After cutting the plywood to fit the 5’x5′ base, we screwed the floor down using 4″ wood screws.

Framing the chicken tractor

Make your own DIY chicken tractor using these plans and pallet wood. Easy step-by-step plans. From FrugalChicken
In this photo, my husband is mocking up the frame, before we screwed the frame in, we added the plywood floor.

Once the base was complete, we began framing the tractor using 5′ 2x4s. 

Constructing each wall was simple, just a matter of screwing a 2×4 to the base, then creating a sturdy wall with studs to support the frame and roof. 

While we screwed the frame to the base, we also stabilized it by adding an additional beam on the back and the front that attached to the two side walls.

Make your own DIY chicken tractor using these plans and pallet wood. Easy step-by-step plans. From FrugalChicken


On three walls, the two sides and the back, each 2×4 is 12″ apart, and screwed to the top and bottom of the frame. We double studded each corner for extra support.

Make your own DIY chicken tractor using these plans and pallet wood. Easy step-by-step plans. From FrugalChicken

In the end, this was a matter of just cutting wood for the chicken tractor, then screwing it all together.

Building a doorway

Make your own DIY chicken tractor using these plans and pallet wood. Easy step-by-step plans. From FrugalChicken

For the doorway, we left a 16″ gap in the center so the chickens can easily get in and out of the tractor, and so I can get in to clean it out easily. 

Framing the chicken tractor roof

Make your own DIY chicken tractor using these plans and pallet wood. Easy step-by-step plans. From FrugalChicken

Framing the roof of the tractor was easier than you’d think.

Using a miter saw, we angled 2x4s to 22 degrees, then attached them to a center beam with 4″ wood screws.

We affixed them from underneath the beam and upwards, angling the screws so they firmly attached to the 2x4s.

We made sure to leave a 8″ overhang so rain could easily slide off the roof without getting into the chicken tractor, leaving our birds dry in stormy weather.

Make your own DIY chicken tractor using these plans and pallet wood. Easy step-by-step plans. From FrugalChicken

We also affixed the roof beams to the main structure by angling the screws downward and into the frame.

Adding walls to the chicken tractor

Once the frame and roof were secure, we added 1/2″ plywood to to complete the exterior walls.

Make your own DIY chicken tractor using these plans and pallet wood. Easy step-by-step plans. From FrugalChicken

We used 4″ wood screws and drilled them in every 4″ into the studs to secure them into place.

We knew we wanted to leave a 4″ gap between the top of the wall and the roof for ventilation; we weren’t worried about rain because we left an overhang in the roof.

Hardware cloth added to the 4″ gap will keep out predators and keep any chicken with wander-lust in. 

Make your own DIY chicken tractor using these plans and pallet wood. Easy step-by-step plans. From FrugalChicken

To the triangular gap over the door and over the back of the coop, we added hardware cloth for more ventilation, and we can either put a tarp over it for the winter (easy removal in the summer), or enclose it fully with plywood.

Make your own DIY chicken tractor using these plans and pallet wood. Easy step-by-step plans. From FrugalChicken

Adding a roof to the chicken tractor

For this project, we used corrugated sheet metal for the roof, and we chose white so it reflected heat in summer. 

It was also relatively inexpensive.

The roof was affixed to the roof studs with metal screws drilled directly into the studs every 3″.

Make your own DIY chicken tractor using these plans and pallet wood. Easy step-by-step plans. From FrugalChicken

Hardware we used for our chicken tractor

Here’s the hardware we used for this chicken tractor.

Here’s the staple gun we use:

Just add chickens, and you’re done!

That’s it! Building a chicken tractor is a fairly simple project – once you have your plans in place – that can be done in a couple of hours.

Your chickens will thank you when they’re able to hang out in the sun, dust bathe, and scratch for goodies and still be protected.

Part of being sustainable and living naturally is making the commitment to eat seasonally.

Eating seasonally didn’t come naturally to me – it’s been a process of taking small steps. When I started growing my own food, a natural pull to eat what I’ve grown emerged. I spent all that time and effort growing it, and I wanted to see a result for all that effort.

This season is no different.

I’ve started growing my lettuce, arugula (even though I’m not too fond of it), radishes, beets, cauliflower, and much more. Starting to eat seasonally is sometimes difficult – there’s some items you will give up for the time being, but it’s a frugal and healthy way to live.

The key to eating seasonally isn’t to just eat what’s in season, it’s also to enjoy it by using flavor, adding nutrients, and finding a new way to use well-known vegetables.

Radishes

1. Replace out-of-season items with in-season items

I started eating based on the season by replacing my regular food items (that were out of season) with foods that were in season. It’s a simple method, but effective.

With your homegrown lettuce, you can make a salad, but if carrots aren’t harvestable yet in your garden, you can replace the carrots with shredded radishes or sliced beets. 

Replace potatoes with cauliflower for mashed cauliflower with garlic and green onions. Cauliflower is an early spring, low-carb substitute that’s packed with more nutrients than potatoes. 

You can find a recipe at the end of this article.

With a little creativity, you will create new dishes, and find new ways to eat overlooked foods.

Sauerkraut. Photo credit: Idlewild Alaska

2. Ferment to add interest

Tired of radishes? That happens to me too.

One solution is to ferment your in-season vegetables for a different texture or taste. When you ferment vegetables, you unlock beneficial probiotics, enzymes, and nutrients.

Vegetables just got a whole lot more interesting.

When you ferment something, besides unlocking all those natural goodies, you also add a different taste to your pallet. You can ferment in brine, add whey, or ferment different vegetables and fruits together for different tastes.

It’s a different world than raw or cooked veggies.

To eat seasonally with ferments this spring, you can try your hand at sauerkraut, which uses cabbage, and Kimchi, which is a Korean dish of fermented vegetables.

growforagecookfermentkimchi
Photo credit: GrowForageCookFerment


Here’s a couple recipes to get you started:

How to Make Kimchi from Grow Forage Cook Ferment (If peppers aren’t in season yet in your area, you can leave them out).

Homemade Sauerkraut without a Crock from Idlewild Alaska 

3. Add other in-season items like eggs for extra protein

Eating seasonally isn’t limited to vegetables, or what you can grow in your backyard. Eating seasonally encompasses all of the goodies that are available during that season. In spring, there’s, for example, eggs, wheat grass, and milk products. 

IMG1663

Eggs

Now is the season when chickens come out of their winter break, and start laying again. If your chickens have started laying (or if you have access to farm-fresh eggs), add eggs to your meal to up the protein value.

My husband loves to add hard boiled eggs to all his salads. It’s one way to get him to actually eat a salad! You can mix lettuce, beets, and eggs with your favorite dressing for a simple but flavorful salad.

Wheat grass

Winter wheat grass is also coming in season. In my area, it’s grown for its seeds, but it’s valuable as a spring crop as well.

If you don’t have ready access to it, you can buy organic wheat seed marketed specifically to sprout, and grow some in a sunny window in your home. Wheat grass is a great source of protein!

You can add it to smoothies by blending it with your other ingredients, or dehydrate it, then blend it to make a powder. 

Another alternative to eat seasonally is to sprout wheat seed, then dehydrate it and grind it into a flour. You can use it just like regular flour. It’s much more nutritious than regular flour because you unlock a lot of vitamins when you sprout it.

Whey

It’s also the start of calving season. If you’re lucky enough to have a cow, or have access to cow’s milk, you also have access to whey. While you can use whey in your ferments, you can also add it to smoothies or meals for an extra nutrient and protein boost.

This is not necessarily the same whey that is sold in natural food stores. Real whey is a by-product when you make cheese or yogurt.

You can use it in place of water in recipes, add it to mashed cauliflower, make pancakes with it, or use it as a substitute for buttermilk in salad dressings.

For example, if you’re making a stir fry, add whey when you start cooking. The vegetables and meat (if you’re using it) will be infused with some of the whey’s nutritional properties. 

mozarella

Cheeses

Making cheese is something of a lost art that’s making a comeback. It’s super easy, and a great way to eat seasonally (and it’s also a great way to get whey, as I discussed above). 

You can add homemade mozzarella to a sandwich of arugula and marinated beets, or use ricotta in a spinach salad to add flavor.

Adding a homemade mozzarella to your salad, or ricotta to dinner is a great way to liven up seasonal vegetables to eat seasonally. 

4. Find new ways to use vegetables in meals 

Have a lot of homegrown veggies to use up? Want to try something new?

Did you know you can use vegetables to make dough? You probably know about potatoes, but what about cauliflower? You can make pizza dough from caulifower for as nutrient-packed, low carb option. 

A better known option is to trade out taco shells for large lettuce leaves when eating tacos. The lettuce leaves are a healthier option, but still full of flavor. You can substitute couscous with ground cauliflower in Moroccan dishes and tabbouleh for an easy but flavorful way to eat seasonally.

5. Infuse with flavor

One way to eat seasonally without getting tired of your produce is to use marinades and roast your vegetables. I create marinades by combining my oil of choice (usually olive oil) with vinegar, and add herbs or spices in whatever flavor I feel like that day.

I’m a big fan of curries, so I marinade in different curries I’ve invented, or if I feel like adding Italian flavors, I might add oregano or thyme.

For example, since beets are in season in early spring, you can marinade your beets in an Italian-inspired marinade, and grill or roast them. Or, consider marinating turnips, then mashing them!

You can also add marinated seasonal vegetables to a sandwich or salad for a different taste and texture. Since arugula can be a little bitter, if you include it in a sandwich with vegetables marinated with a sweeter flavor, it will counteract that bitterness, and you’ll still get the benefits of nutrient-packed arugula.

These are just very general ideas to help you eat seasonally, but you get the picture. Dress up your vegetables with a little flavor for a new way to eat them!

[amd-yrecipe-recipe:1]

Until next time!

When we first moved to the homestead, money was very, very tight, and we had to learn to be frugal adjust our thinking to establish our homestead and stay above water.

We were overwhelmed by the amount of work and the discipline that comes with being frugal, but were willing to change both ourselves and our property to gain financial independence.

I’m sure you can relate.

Frugal living has become our lifestyle, and I use these secrets on my homestead every day. Not only will they save you money, but they’ll also empower you into a more self-sufficient, fulfilling lifestyle.

Imagine being able to shape your own tools, and not run to the grocery every time you want pizza (which is every day here). Life is just simpler when you’re frugal.

Incorporate even a few of these frugal tips into your homestead, and you’ll soon see the benefits.

A lot of these are apartment-friendly for the urban homestead. If you’re a family trying to adjust to the frugal nature of a one income life, these tips are for you!

1. Pallets, pallets, pallets

Pallets are beyond useful on the homestead for a variety of projects from chicken coops to flooring to sheds. We practically built all our horse stalls from pallet wood.

We also made sub flooring for our mud room from pallets.

The sub-flooring in our mud room. All done with pallet wood.

It’s sturdy and does the job, and it was free. 

Not sure where to get pallets or how to use them? Read about our various pallet projects!

Before you use them though, make sure your pallets are safe to use in your projects!

2. Seed saving

This year, one of my homestead goals is to save more seeds. It’s easy and frugal, and you’ll be assured the following year’s crop will get off to a great start.

Pick the best produce from this year’s garden and save those seeds. If you’re not sure what to plant, here’s cold crop suggestions.

3. Shop sales for items you can’t produce yourself.

The day I came home with nearly 50lbs of sugar, I thought my husband’s eyes would roll out of his head. And when I find an amazing deal on flour, I’m not shy.

Here’s the deal:

Although you might feel ridiculous at first, you’ll soon see the benefit of this frugal habit.

Bulk buy when the item is on sale and you won’t spend more when you really need it!

4. Breed for sustainability.

Last fall, I placed orders for chicks to be delivered in March – seemed like a frugal idea for the homestead because we could then sell the eggs.

Over the winter, I’ve been hatching chicken eggs from a pair of hens bought last June.

I realized today that we now total over 30 chickens on the homestead, with more on the way.

IMG_0478

The only cost has been to run the incubator, which isn’t very much. This isn’t for everyone, but if you keep hens and a friendly rooster, building and sustaining your homestead flock will make a big, frugal, impact.

I’ve since canceled my chick orders, saving a few hundred dollars – and we still get a ton of eggs for our homestead.

Not sure which breeds to buy? Here’s 5 great chicken breeds to start your backyard flock.

[Since writing this article, we’ve been fortunate enough to go all out and bring along a breeding pair of pigs on the homestead as well as goats – we now have a frugal, sustainable supply of meat, milk, and cheese!]

5. Keep tools in good repair and fix instead of buying.

I can’t tell you how many handles my husband has busted with the various homestead DIY projects we have going on.

This frugal activity is huge on the homestead, and not as difficult to learn as it seems. 

Our handheld tools are older hand-me-downs or auction finds. Instead of buying a new tool, he just reshapes and attaches a new handle (remember that pallet wood?).

It’s a frugal and important skill for any homestead.

IMG1230

6. Butcher and preserve meat yourself.

While not everyone can produce their own meat, but if you have an apartment homestead on a rental property, this one’s still for you.

You can save a TON buying meat in bulk. Next time you’re at the store, examine the prices of pork shoulder or loin sold in bulk cuts.

If I buy chicken, I only buy the whole chicken and butcher it myself. It’s a lot easier than it seems, and is an unbelievable money saver (think chicken breasts for $0.95).

Looking for an amazing video about butchering? Check out this one by the Portland Meat Collective.

You’ll see how frugal homestead butchering can be (and you might be inspired to start preserving meat by brining, drying, or canning!).

7. Make your own cheese, yogurt, and bone broth.

Cheese, yogurt, and bone broth are all super easy and frugal to make, with a little practice. (Have you gotten my free cheese making book yet?)

If you have a raw milk source, you’re in business, but even if you have to use store-bought milk, you can still make your own cheese and yogurt on your homestead.

It’s easy, and it’s frugal for any homestead.

From one gallon of milk you can make several types of cheese and yogurt. You can even make your own cheese press like this one!

Bone broth is one of the easiest and most nutritious pantry staples you can make. Once you start, you’ll keep making it because it takes little effort, but yields big results.

8. DIY your cleaning supplies.

Aside from the frugal aspect, making your own laundry detergent is a great idea.

You’ll avoid dangerous chemicals on your homestead, and you can use your favorite scents using essential oils.

laundry detergent

Use my tutorial to craft you own laundry detergent.

9. Save on grain with sprouted seed.

The first time I saw a fodder system in use on a homestead, you could see the explosion in my head a mile away.

It revolutionized my feed program.

When you sprout seeds for your livestock, you’re taking advantage of a natural process that at least triples (some say up to 600%) the nutritional value of your feed.

It’s a simple and frugal idea for any homestead.

wpid-img1286

For the full explanation and space saving tips, check out my guide to growing fodder at home.

10. Don’t be afraid to barter.

You’d be surprised at what might transpire – and anything frugal for your homestead is a great idea.

When we sold our old tractor, a neighbor asked if we would accept an ATV instead of cash.

After blue booking the value of the atv, we found out it was worth 3 times the value of the tractor, enough that when we sold our truck, we could trade the ATV for a new truck or as partial payment.

We turned a $700 tractor into a truck worth several thousand dollars – pretty frugal.

You can barter eggs for meat, vegetables for services, you name it. You never know, and the money you save goes right in your pocket.

Finally, know the value of your goods or services, and don’t be afraid to ask for an even trade.

11. DIY repairs.

YouTube is a wonderful (and frugal) resource where you can find the answer to pretty much every repair question you have.

When we repurposed the abandoned barns on our property, YouTube became our go-to resource. We’ve been able to turn our shed into a great new horse barn, and an old pier and beam barn into an updated car shop.

Reusing old wood and pallet wood
Repurposing an old barn

(We’re lucky because we don’t need to ask county permission to do our own repairs on our homestead.)

If you have a plumbing issue, before you spend money, see if it’s an easy repair you can do yourself. It pays to be frugal, and you might learn a new skill for your homestead!

These are 11 easy ways to save money, but incorporating them all into your life at the same time can be overwhelming. The most important way to incorporate these tips into your life is to start slowly, and to start with the tips that make the most sense for you and your family.

I’d love to hear from you!

What’s your best money saving tip? Email me, or comment below!

save money on the homestead

I’m writing something of an obligatory spring post, probably along with every other blogger in the northern hemisphere, but this spring is different.

This is my first real spring in a while.

IMG1810

Before 2014, we lived in warmer states, and I hadn’t suffered  experienced a winter in a while. This spring brings a sense of independence and accomplishment I haven’t yet experienced. A sense that we made it to the other side and somehow survived.

This winter was even harder than past winters. It was our first winter in a turn-of-the-century house that sorely needed updating. It was our first crack at a house that was drafty, who’s pipes inexplicably froze.

Our winters are milder compared to other areas of the country, but we still had pretty cold days and our fair share of frozen pipes. We spent quite a few days unfreezing pipes to provide water to the animals.

I wondered what winter would have been like here in the 19th century, when it was settled. We at least had the pleasure of creature comforts, a warm shelter, access to food if we ran out of homegrown canned goods.

I moved south particularly because I was tired of winter. I hate the cold. I hate the ice. I hate everything about winter. I can do without that first snow that covers everything and makes the world look beautiful.

Because I really hate cold weather that much.

IMG1752

Homesteading in the winter has its pluses and minuses. On the one hand, you can’t grow anything. Scratch that, we had a garden inside, but you get my point.

Winters in the south provided ample time to continue the growing season, and in South Florida, winter actually WAS the growing season. June, July, August, and September was our winter, when it was so hot everyone took a break.

During this time, I tried growing tomatoes, but they didn’t take off, lettuce wouldn’t even grow a few leaves before withering in the heat. My eggplants grew robust, and the sweet potatoes did surprisingly well, though!

Watering was necessary constantly, and in order to have a proper raised bed, we had to bring in our own organic dirt. Otherwise, our dirt was just sand with ZERO nutrition and a mountain of red ants.

In cooler regions, though, winter means time away from the madness of growing and harvesting, so we had time to focus on longer term projects, building, repurposing, and planning. It’s a time to repurpose old buildings.

We began repurposing several barns, which were useful only as storage sheds before we restructured them.

If you’ve followed along this blog for a while, you’ll know that our homestead had 2 abandoned structures – a barn and a shed, when we moved in. Clearly, neither had been used in many, many years, and I’m betting they were built in the early 1900’s and maintained and used until about 1960’s or so.

IMG_3824

They’re structurally sound, but they were so full of trash, old corn cobs, old fertilizer bags, and long-forgotten items that I didn’t know if we would ever get them clean. It took the better part of a year to decide how to repurpose them.

In fact, the first time I saw our property, I actually cried, because it was so ugly and there was so much trash everywhere.

So, once we decided what to use these building for, how did we go about actually repurposing them? Since we are still in the process of reconstructing the barn, I can take you inside for an in depth look!

1. Before you do anything, decide what you’ll use the building for, and why you want to repurpose it.

Like I said before, this took us the better part of a year, and we waffled back and forth about how to repurpose old buildings on our homestead. We knew we wanted one barn for a horse barn, and my husband knew he wanted a structure to work on his race cars. We also knew eventually we would need a storage shed for farm equipment, like our wonderful haybaler.

This should have been pretty clear cut, but the problem was the big barn wasn’t obviously set up for anything we needed it for. It was an old grain silo, and constructed in a pier and beam fashion. It also has a dirt floor, and the pier and beam construction makes it difficult to add concrete for a cleaner floor.

unnamed (1)
Barn after we pulled off the siding


In addition, the pier and beam structure doesn’t use headers, but instead studs every 2 feet connected to a  ground beam, so deconstructing the barn wasn’t as simple as knocking down some studs to open it up.

There were days when I wanted to burn it down, and start all over.

Luckily, lack of money to build a new structure, made that move impossible.

It’s really important to think through why you want to repurpose old buildings on your homestead. It will save you from work you’ll just have to undo later on. Even if it takes you 2 or 3 years, it’s better than wasting time and money.

2. Check if your idea will work – is it built for that? If not, how can it be?

Let’s say you want to turn your building into a workshop. Double check if it can be repurposed as a workshop. Is the ceiling high enough? Is it sound enough? Does the floor lend itself to your purpose? Is there enough air circulation? What will it be like in all seasons?

Our now-horse barn, which was a shed, easily lent itself to a new life as a horse barn. It was super simple to construct some stalls, and break down some existing walls and adding new walls to repurpose it. One thing we didn’t bank on, though, was needing to add a 4th wall and a rain gutter.

IMG_3823

Whenever it rains, the rain flows off the roof, and into the barn. A 4th wall keeps the flooding down, and the rain gutter re-routes the rain away, keeping everything dry.

Repurposing our barn for horses was easy, but we had to have some flexibility in our plans to make the overall construction work well.

3. Check for structural soundness

Is your building even worth saving? We had an old chicken coop on our property that I would have loved to save, but the wood was so rotted, all we could save was the tin roof.

The rotting chicken coop.

We ended up burning it to make way for a pig habitat.

The site of our new pig house.

If your building isn’t structurally sound, check to see how you can make it structurally sound, and if it’s truly worth the effort to repurpose old buildings on your homestead. In our case, the main structures were very sound construction, so we needed to decide how to support the structure in a way that made them useable.

The shed was pretty simple – when we moved here, there was a terrible sag in the roof from a support beam that had broken below the ground. We purchased 2 4×4 beams and first attached them temporarily to the roof to support it while we dug out and replaced the broken beam.

IMG_4781

We dug out the broken part of the beam, then used a jack to support the remainder of the beam for a couple days to ensure the building wouldn’t inexplicably collapse on us, and to make sure the weight redistribution didn’t effect other areas of the structure.

Keep in mind, we aren’t structural engineers, so we did our best, but we didn’t exactly do the math a structural engineer would do. So we elected to wait and make sure the changes we made wouldn’t haunt us later.

That’s the thing when you repurpose old buildings yourself – you just try to do your best. In our area, a contractor isn’t needed, especially for rebuilding barn structures.

After we fixed the sag, we decided where to put our doors. We knew we wanted a barn with a lot of airflow, so 2 doors across from each other were necessary.

On one side of the barn, there was a big gap between the siding and the 4th wall, so we replaced the siding and created a door where we wanted it. We moved a beam that was in the middle, where we wanted our door, that wasn’t a structural support. We replaced it with a 4×4 that could act as additional support.

Where we wanted to place the 2nd door, there is a beam that provides structural support, so for now we’ve left it there.

4. Reuse as much as possible

Because we didn’t have a lot of money to pour into our adventure to repurpose old buildings, we tried to reuse as much as possible. Not only did this save us money, it also kept our yard from looking too much like a construction zone, since it lowered our trash output.

We were able to replace siding on our reconstructed shed with siding from the old barn. We were able to build our horse stalls out of repurposed pallet wood.

Reusing old wood and pallet wood

This saved us thousands of dollars. With a little creativity, it was easy to figure out how to reuse and repurpose items we came across for free.


This is a lot to cover, so I’ve broken it up into 2 different posts. Stay tuned for How to Repurpose Old Buildings, Part II!


Until next time!


I participated in Simple Saturdays Blog Hop!


Join other happy homesteaders for free updates today…..Learn More