Hey y’all! Here’s this week’s sneaky peek photos of life on our farm!

These images also appear on my Instagram account where I share MANY more photos and stories from the farm!

If you aren’t yet following me there, you can right here.

Enjoy the photos & be sure to share some of yours with me!

https://www.instagram.com/p/BgZ6vLWH5o9/?taken-by=pamperedchickenmama

https://www.instagram.com/p/BgXV8DoH3Hr/?taken-by=pamperedchickenmama


Got a hen that loves black soldier fly larvae? (Who doesn’t?!)

Yes, my hens love black soldier fly larvae!


https://www.instagram.com/p/BgcfhhVnHsa/?taken-by=pamperedchickenmama

https://www.instagram.com/p/BgSMV2Fn-9R/?taken-by=pamperedchickenmama

https://www.instagram.com/p/BgPnkK5Hbld/?taken-by=pamperedchickenmama

https://www.instagram.com/p/BgKk1EZnTEK/?taken-by=pamperedchickenmama

https://www.instagram.com/p/BgIACACHd02/?taken-by=pamperedchickenmama

Coffee grounds are one of those hidden treasures that can transform your garden.

If you make a cup of coffee every day, then you have an amazing source of organic matter at your fingertips that can help you grow a healthy harvest of fresh vegetables.

Coffee grounds are full of nitrogen, which as you know, is the difference between a garden that’s lackluster and a harvest that can support your family through the winter.

So how much nitrogen is actually in coffee? Well, according to science, coffee grounds are approximately 1.45% pure nitrogen – ideal for your backyard garden.

But nitrogen aside, coffee grounds are also awesome sources of magnesium, potassium, calcium and other types of trace minerals which help your organic garden grow healthy.

Not sure how to use coffee grounds in your garden? Here’s 5 pro tips to get you started!

Pour spent coffee grounds into your compost bin.

There are organic gardeners I know who regularly go to local stores to collect their spent coffee grounds (so if you don’t make coffee yourself, you can try this in your local area – a lot of places are happy to recycle as long as you provide a container.)

As you probably know, when it comes to compost, there’s “green” matter and “brown matter.” Green matter is full of nitrogen, while brown matter has carbon, and is a natural accompaniment to the nitrogen. Especially if you hot compost, you will want your ratio of carbon to nitrogen to be correct.

Although this seems unbelievable, especially due to the fact that coffee grounds are brown, they’re a “green” in compost rubbish, meaning that they’re highly rich in nitrogen.

Simply toss your coffee grounds on your compost pile, making sure the ratio of carbon to nitrogen is correct.

Add coffee grounds directly to the soil in your garden

This can be done in a wide variety of ways; you can choose to scratch it into a couple of inches of soil at the topmost layer, or just sprinkle the spent coffee grounds into the top layer of the soil and leave it alone.

Coffee grounds are comprised of some useful mineral materials, and these can help in adding to the fertility of the soil, especially if your plants are lacking nutrients or if you just want to be proactive.

They can be used to create a barrier for slugs and snails.

Coffee grounds are abrasive and acidic, and a barrier made of them will fend off slugs and snails that otherwise might snack on your harvest.

To create these barriers, lace grounds around plants that are highly susceptible to slug infestations. To preserve their soft bodies, slugs will find another plant to eat.

Make coffee ground “tea”

To make this, all you have to do is add 2 cups filled with used coffee grounds to a 5-gallon bucket of water.

Leave the “tea” to mix and steep for a few hours.

The concoction you’ll wake up to in the morning can be used as a liquid fertilizer for both garden and container plants.

It is also an awesome source of foliar feed, especially for plants like peppers, which need SOME nitrogen, but are liable to grow only leafy green leaves instead of fruit if they get too much.

Add some coffee grounds to your worm bin

Although you might not be aware of this, worms are actually suckers for some good coffee grounds. The worms will consume them, leaving healthy castings you can use as plant food.

However, you should be very careful to add too much; you don’t want the acidity to harm or repel your red worms.

Just add one cup every week to your worm bin, and that should be enough to do the trick perfectly.

I’d like to hear from you!

Will you try adding coffee grounds to your garden? Leave a comment below!

One of our goals this year is to expand our herb garden, and try to establish it as a true perennial herb garden.

I’d like it if, year after year, we got as many plants as possible to voluntarily grow and produce aromatic herbs and seeds.

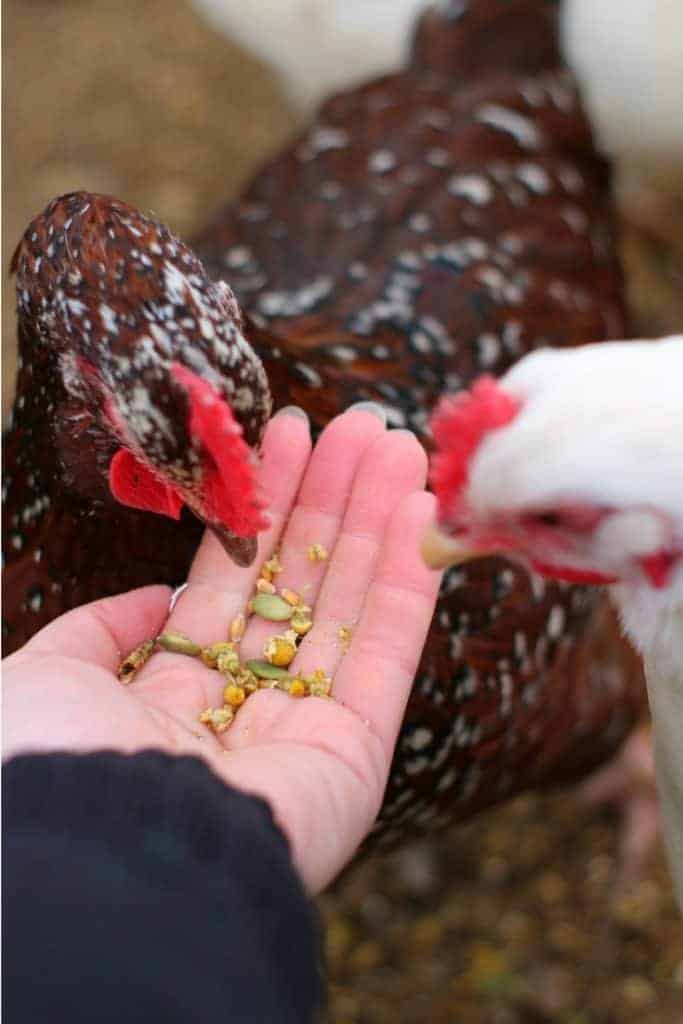
Our hens love herbs, and it’s one of those small luxuries that’s easy to produce, and easy to impress other people with. And it doesn’t even take a lot of space.


Have chickens that LOVE herbs? (Who doesn’t?!)

nesting box herbs

Yes, my hens love herbs!

For this project, we chose a shady plot in the garden, since many herbs do well in the shade, and it’s a good use of otherwise limited land.

Cilantro, in particular, is one herb I want to establish since I like to cook with cilantro and coriander.

Some herbs are hard to find in the store (like super fresh coriander) or you have to buy a TON just to get a tablespoonful (who uses a half pound of dill, for example?).

Your own herb garden solves both those dilemmas.

If you also want to plant a perennial herb garden, here’s some tips.

1. Decide which herbs to grow

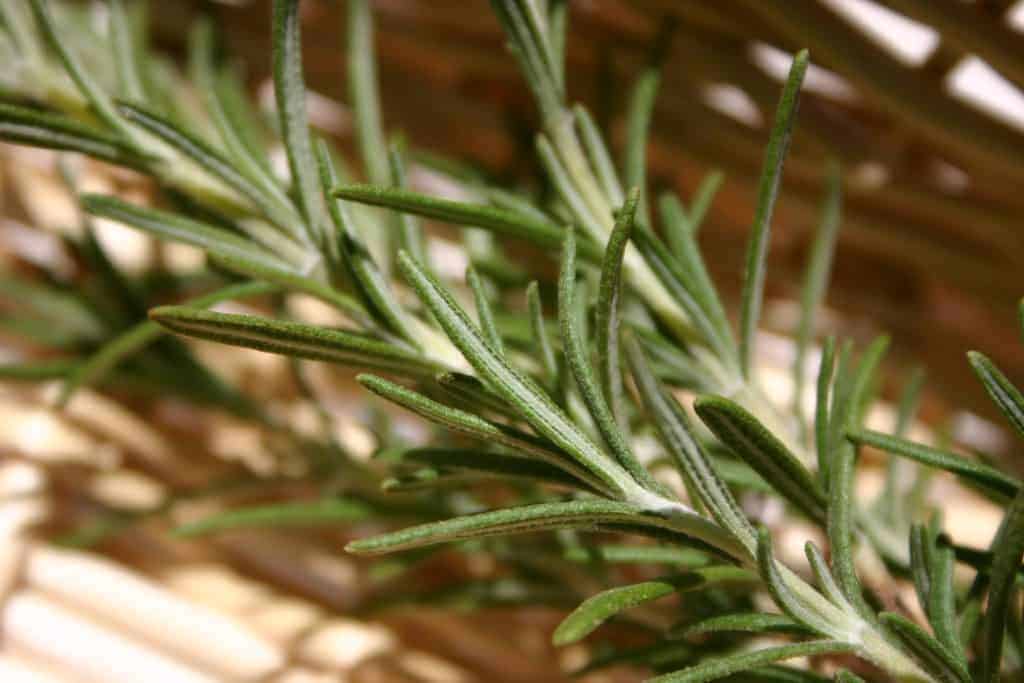
If you’re just starting your garden, decide which herbs you’ll most likely use and enjoy, and plant those. If you use a lot of rosemary in bread baking or as a savory for steak, it’s a great bet to include in your garden.

You’ll end up using it frequently, and feel fulfilled after stepping just outside your door to snag a handful of fresh rosemary.

How to Grow a Perennial Herb Garden. It's a simple luxury that's easy to grow! Here's how to do it, and what you need. From FrugalChicken

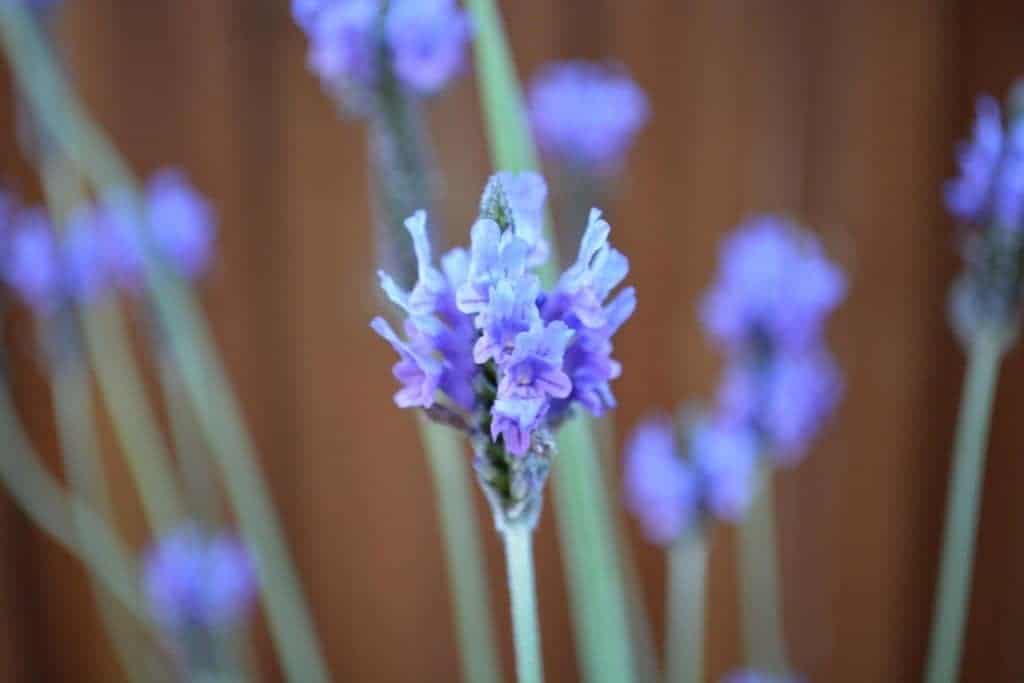
Don’t just focus on only herbs you can cook with – if there’s a particular herb you love for the scent or just to look at, plant it!

For example, if you love lavender, but don’t necessarily see yourself using it a ton, you should still plant it. You might end up trying to use it, and discover a new flavor.

Just remember to plant herbs according to their needs – are they ok in full shade or do they need 8 hours of sun? Do they need only 4?

Will some grow so tall they’ll shade out others? Does your herb need to be 12 inches from another plant or 2 feet?

You get the picture.

2. Choose herbs that are likely to establish themselves in your area

Not all herbs will survive all climates, so do your research and figure out which herbs will survive your local environment. An herb that can survive in the extreme cold of Minnesota might not live in the extreme heat of Arizona.

Rosemary, mint, parsley, and oregano are some herbs that will survive winter, although you might have to use a cold frame around your herb gardenLavender and yarrow are two that do well in hot environments.

If there’s an herb you want to grow that won’t continue to reseed itself year after year, it’s better off in a container. You can bring your plant inside as needed to keep it growing.

3. You can start from seed or buy established plants

Some herbs are tough to start from seed. Or perhaps you started a bunch from seed but a wayward goat ate them or a chicken scratched up the seedlings.

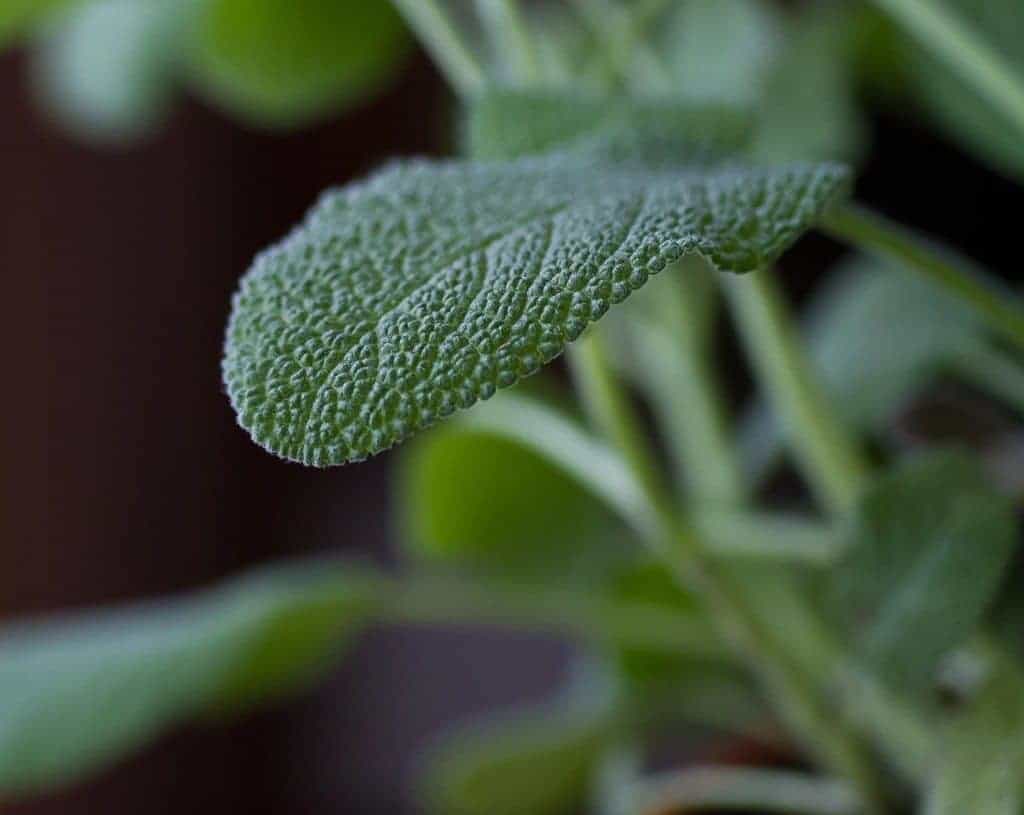
I’ve had luck raising some plants from seed.  Sage in particular has been easy to start, and – surprisingly – so has dill.

How to Grow a Perennial Herb Garden. It's a simple luxury that's easy to grow! Here's how to do it, and what you need. From FrugalChicken

Others…let’s just say I’ve struggled with some.

I struggled with cilantro for years, and couldn’t keep even potted plants alive.

After some research, I learned that cilantro has a long tap root for an herb, which means in order to survive, the tap root (or main root) needs to dig deep into the earth to provide nutrients to the plant.

It’s one herb I purchased as an established plant, and transplanted into my garden. Finally, I’m having luck, and eating a ton of salsa!

Basil, on the other hand, is an herb I’ve always had an easy time growing even in containers. It grows wonderfully in a garden, and can grow large and bushy.

4. Consider different varieties of the same herb

If you have an established garden, or just want to try a bunch of different herbs to test your homesteading skills and your pallet, try different varieties.

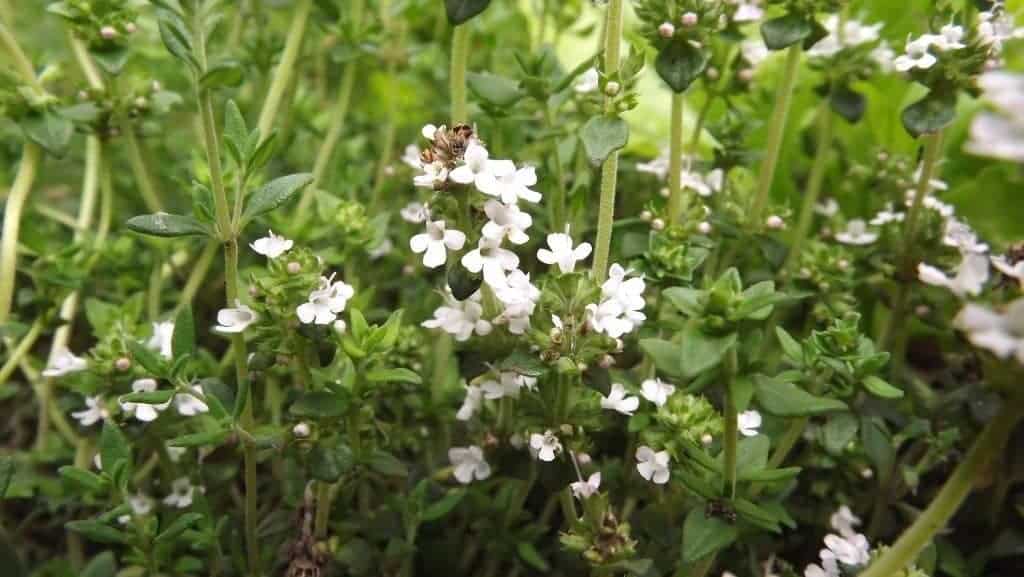
Try a boxwood basil next to a traditional, large leaf basil. Try lemon mint next to peppermint. There’s also a ton of varieties of thyme!

Different varieties of the same plant species bring different flavors to the table, and are a great way to diversify your garden.

They also bring a different visual texture to your garden, since some might be large and leafy, while others might be short with tiny sprigs going out every direction.

How to Grow a Perennial Herb Garden. It's a simple luxury that's easy to grow! Here's how to do it, and what you need. From FrugalChicken

5. Prepare your soil

Once you decide what to grow, it’s time to prepare the soil. To get rid of any grasses or weeds that might be growing, I use a spade to remove an inch or so of soil, leaving only fresh dirt exposed.

I add a couple inches of composted manure, and mix it with with the soil by chopping it together with a hoe. Next, I use a metal garden rake to flatten the area so water doesn’t collect. A flat area is also easier to work with.

Using a hand trowel, I either dig a hole for an established plant or loosen up dirt to plant seeds. 

I use a hand rake a ton in my garden to dig around stubborn weeds to yank them by the roots.

I love leaf scoops to remove mounds of pulled weeds from the garden quickly.  They make a super tedious job quick and simple.

You definitely want to get good, sturdy equipment – I’ve bent many a trowel digging up a stubborn root.

6. Help the plants establish themselves

Whether you’ve started your herb garden by seed or used purchased transplants, give them a while to become established. Water regularly in the morning or evening (not during the day to prevent sunburn). 

Keep pests, chickens, and small hands away from your garden to help your plants establish themselves. 

Keep your herb garden weed free by removing any unwanted plants and laying down mulch or garden fabric to kill any potential weeds.

Steer clear of putting down hay – I’ve found that seeds from volunteer weeds like to hang out in hay, and can be hard to destroy once they’ve gotten their claws into your healthy, nourishing soil.

Make sure there’s a lot of branches on your herbs by regularly trimming the top of the plant an inch or so for the first few weeks – this will help the plant grow healthy and increase your yield.

It also keeps the herb from shooting straight up and going to seed by prompting the plant to put energy into creating strong, healthy roots.

Don’t harvest until your herb is least 6 inches tall to give its roots time to grow and spread into the soil.

7. Harvest, then allow for reseeding

Harvest your herbs continually throughout the spring and summer so they don’t immediately go to seed. Simply cut a couple inches off the top every now and then. 

Not only does going to seed deprive you of their herbal lusciousness throughout the season (because they’ll stop producing), but once they start going to seed, it can change their composition. 

Cilantro, when allowed to go to seed, gets thinner and a little bitter. To keep the leaves large and fresh-tasting, pinch off any flowers.

How to Grow a Perennial Herb Garden. It's a simple luxury that's easy to grow! Here's how to do it, and what you need. From FrugalChicken
When the season is over, though, let your herb plants go to seed – they’ll first bloom flowers, then drop their seeds. Your garden will hopefully be established when your plants grow voluntarily next year.

Which herbs will you try to create a perennial herb garden with this year? Leave a comment below!

This week’s recipe is one of my hen’s favorites (just watch the video below!) and yours will love it, too.

This time of year, it’s important to make sure your hens have enough protein and calcium in their diet so they produce healthy, strong eggshells as the return to laying.

That’s why today’s treat features some high-protein seeds and insects, as well as dried eggshells, which are bursting with calcium.

You might have heard that eggshells can turn your hens into egg eaters, and honestly, if the shells are raw, there’s a possibility that might happen.


Have a hen that love her herbs? (Who doesn’t?!)

nesting box herbs

Yes, I want nesting herbs for my spoiled hens!


I know on our farm, we’ve had some egg eaters, and they started out as opportunists.

Meaning that they wouldn’t have tried eating their eggs, except one cracked one day, and they realized there was something delicious in there.

Chickens are SMART. (I know, because I tried swapping black soldier fly larvae one day for a different, non-insect treat, and Lagertha looked at me like I grew a second head!)

Now, this isn’t to say that if all hens eat raw egg shells, they WILL turn into egg eaters. Of course, we can’t make blanket statements like that.

However, I personally err on the side of caution, and try to toast eggshells before feeding them as often as possible.

All you need to do is clean them off and allow them to toast in the oven at about 200 degrees for about 10 minutes, or until dry. It’s very easy!

Please just make sure that you crush them to tiny fragments. They might have sharp edges and you don’t want your flock getting micro-abrasions or possibly choking!

Remember, if you want, you can always grind them in a spice blender after they’ve been toasted.

I love the pumpkin seeds in this treat as well, and the pumpkin seeds, also known as “pepitas” in Spanish, are said to help prevent worms.

Technically, “pepitas” are the seeds without the shells. While chickens can and WILL eat both, if you have the shell-less variety, that’s the one to use, since they’re easier to digest, and the nutrients will be more bioavailable.

The jury is still out whether the pepitas actually DO anything to prevent worms in chickens, but it’s one of those “can’t hurt, might help” ingredients, and chickens LOVE the little tear-dropped shaped seeds.

The chia is another great ingredient for spring. As you probably know, chia has cleansing properties, and might help clear any toxins, potential blockages, etc from your flock’s digestive system.

You want your hens’ little bodies to be in tip top shape for spring, right? Well, chia seeds it is, then! (And it helps that hens love poking around, looking for the tiny black seeds!)

This recipe does call for non-GMO, organic ingredients, but if you don’t have access to organic, non-gmo ingredients, particularly wheat and corn, don’t worry – it’s okay to swap it out with what you do have.

Your hens will love it all the same.

In fact, as I prepared to take the photos for this article, Rooster Teeth looked on – and got VERY excited when she saw the big bowl of goodies!

She takes her role of “Chief Treat Tester” VERY seriously!

As with all my chicken treat recipes, you should also feel free to include your own ingredients if you want to make substitutions.

For example, mealworms would be a great substitution for the black soldier fly larvae, and you can easily use calendula in place of chamomile!

Have fun with your flock!

Pepitas & Chamomile High Protein Mix

Ingredients

¼ cup Pumpkin Seeds

2 tablespoons Chia Seeds

1 tablespoon crushed Eggshells

¼ cup Dried Chamomile (you can buy it here)

¼ cup Black Soldier Fly Larvae (You can buy them here.)

¼ cup Organic, non-GMO Corn

¼ cup Organic, Non-GMO Wheat Berries

Directions

Wash, dry, and lightly toast the eggshells at 200 degrees for about 10 minutes. Crush them thoroughly so your hens can swallow them.

Combine the eggshells with the remaining ingredients, and have fun watching your hens gobble it down!


Have a hen that loves her herbs? (Who doesn’t?!)

nesting box herbs

Yes, I have a spoiled hen who wants nesting herbs!

Last week we tackled your backyard chicken’s first 6 weeks, and in this episode we take on weeks 7-16!

(Want to listen to last week’s episode first? Click here!)

Weeks 7-16 are a little bit different then weeks 1-6 (especially weeks 11-16!) so we break down how you should care for your chicks each week so they grow into healthy layers.

You’ll learn:

  • What to feed,
  • How to introduce your chicks to your existing flock
  • How to keep them safe outside (in and out of the coop)
  • And more!

Links we discuss:

Manna Pro

Chickens: Naturally Raising The Sustainable Flock


Have a hen that loves herbs?(Who doesn’t?!)

nesting box herbs

Yes, my hens love herbs!


I’d like to hear from you!

Are you getting baby chicks this spring? What breeds? Leave a comment below!

Growing up, we didn’t use natural Easter egg dyes to celebrate the holiday.

Instead, we used those chemical dyes you can buy at the grocery store.
As I’ve learned more and more about the negative impact commercial dyes can have on our bodies, we’ve switched to using all natural Easter egg dyes that we can make in our kitchen.

Think about it – do you really want your kids handling and eating an egg that has been soaking in commercial dye made from unpronounceable ingredients? Of course not.

It’s really simple to make these non-toxic egg dyes, and you probably already have all these ingredients on hand (or you can very easily source them before Easter.)

These all natural Easter egg dye recipes will create a beautiful basket of Easter goodies with subtle, yet rich shades and hues.

Your eggs will not have the solid, consistent color of those made with commercial dyes. Instead, every egg will be different, with a cool, mottle, muted, almost marbled effect all the way around.

Kids love them!

The following recipes will help you create your own Easter egg dyes from natural ingredients you probably already have in your home.

But before we make our all natural Easter egg dyes:

A few words of caution:

  • Boil eggs ahead of time
  • Boil a few extra in case of accidental drops or cracked shells
  • Use a slotted spoon to carefully remove the egg from its dye
  • After removing an egg from the dye, let it rest and dry before handling (the colors will dull into beautiful pastels – this is normal!)
  • Keep a close eye on the children while they handle hot eggs (or let each egg cool before placing it in the dye)
  • Use vinegar to help set the Easter egg dye

Lavender-Grey

Mix 1 cup of frozen blackberries with 1 cup of water. Bring to room temperature, and remove the blueberries.

Pale Blue

Cut half a head of red cabbage into chunks and add to 5 cups of boiling water. Add 2 tablespoons of white vinegar. Boil 10 minutes, then remove from heat. Strain out cabbage and add eggs. Soak each egg individually for 30 minutes.

Deep Blue

Soak each egg individually in the above cabbage dye overnight.

Duck Egg Green

Peel the skin from 6 red onions and simmer in 2 cups of water for 10 minutes; strain. Add 1 tablespoon of white vinegar.

Gold

Take the outer papery skins of 6 yellow onions and simmer in 2 cups of water for 10 minutes (reserve the rest of the onion for something else). Strain and add 1 tablespoon white vinegar. Soak each egg for 20 minutes.

Deep Orange

Take the outer papery skins of 6 yellow onions and simmer in 2 cups of water for 10 minutes (reserve the rest of the onion for something else). Strain and add 1 tablespoon white vinegar. Soak each egg in dye mixture overnight.

Light Brown

Make a cup of espresso as normal. Add 1 tablespoon vinegar, and soak each egg until desired color.

Pink

Mix 1 cup of pickled beet juice with 1 tablespoon of vinegar. Soak egg until desired shade.

Grey

Mix 1 cup pure grape juice (NOT grape flavored apple juice – look at the label) and 1 tablespoon of vinegar.

Side note: You might read elsewhere on the internet that you can use grape juice for purple. We tested it out and while our eggs were a beautiful grey, but definitely not purple.

For purple eggs, test out a pink egg (soaked in pickled beet juice overnight) then dipped in red cabbage dye for 15 minutes (if not purple yet, put back into dye and check every 5 minutes).

Pale Yellow

Stir 1 tablespoon turmeric into 1 cup of boiling water; add 1 tablespoon of white vinegar.

Carefully place eggs in the dye for 30 minutes.

Something to remember about natural Easter egg dyes!

The gorgeous eggs you create last until you eat them, but the dyes are only potent for a few hours, so use them as soon as possible after mixing them together.

Try using masking tape and stencils to create geometric shapes, fun designs, and initials.

Hint: Initials are a creative way to keep the kids from fighting over at least a few of the eggs!

There you have it. Safe, all-natural, chemical-free dyes that produce eggs that are as safe to eat as they are lovely to look at. Gather your kids and go have fun!

I’d like to hear from you!

Will you make all natural Easter egg dyes this season? What colors? Leave a comment below!