So you want to be a rockstar. A frugal rockstar, that is.
My story: When we moved to our homestead, our financial life was out of control.
We were way stressed because we were constantly trying to keep up with the financial output.
I adjusted how we were living to cut our spending and increase our control. The out-of-control, impossible-to-keep-up feeling stunk, and I was done. I hope by sharing these tips, you’ll gain some control (you CAN do this!), or if you’re already a frugal rockstar, these tips will take your frugal-awesomeness to the next level.
1. Cut the cell phone. Sort of. We made one significant switch to our cellular service, and saved over $350 each month. And a lot of headaches. Read about it here.
2. Buy in bulk effectively. I used to use coupons, but now I’ve learned how buy in bulk, when the sales are right, to save big bucks on meat and veggies. That means whenever the price is right, say around $1.20 per pound on pork butts, I buy as much as possible within my budget. (Spending $250 on meat doesn’t work if you can’t pay the electric!) Just last week, I bought ground beef for $2.50 per pound, and we have enough for a month. I’ve come home with 40 lbs of flour. If tomatoes are in season, and you love tomatoes, you can always can some for later, so you don’t buy when they’re more expensive. Yes, there were times when we ate the same thing, or went without to buy the sale items. That’s just how it works sometimes. You’ll adapt.
3. Don’t be afraid to be inconvenienced. Joe Salatin said the only thing Americans fear is inconvenience. There have been times when we’ve simply had to make do with what we had so we could achieve our goal. I’ve become a master at cooking substitutions. When we had a payment on our washer/dryer set, and I just couldn’t stand the payment anymore, I sent it back and went without. I dealt with the inconvenience, which, incidentally, lasted a week, because we were able to pick up a usable, close-to-new washer for $20.
Yes, really, $20. Don’t be afraid to be inconvenienced. Repeat. Don’t be afraid to be inconvenienced. You don’t know what opportunity might come.
Bonus tip:Try to produce as much as possible. Can you keep chickens? Go for it, and stop buying eggs! Can you have a garden? Grow those tomatoes you love, can what you don’t eat immediately! Do you love yogurt, ricotta cheese, and milk? Learn how to make both yogurt and ricotta from a gallon of milk instead of buying each separately. Eventually those dollars will start to add up.
Our lives are a little more stable now and my blood pressure is thanking me for it. What are some ways you’ve saved?
Sigh. As a horse breeder, I’m pretty used to hormones and hormonal animals. I’ve developed patience, and learned to accept there are just days when nature gets the best of all of us, and my creatures act in not-so-pretty ways.
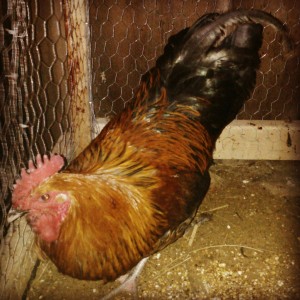
My new black copper maran rooster. I think he will just be on bug patrol, and not part of the breeding program.
But these chickens are stressing me out.
I introduced some new roosters into my flock so I could breed my cuckoo maran and not dilute her blood, Continue reading “Chicken Update!”
Everyone wants to save money fast, including me.
When we moved to the homestead, our financial lives were out of control.
I mean beyond out of control, spending money hand over fist. We weren’t in debt, but we were blowing through our savings, and I had had enough.
We needed to get to a $0 net-overhead lifestyle ASAP, and I didn’t care what sacrifices we had to make or the amount of work needed to achieve that goal.
We consumed more than we produced, and we couldn’t achieve any of our own personal life goals and were way stressed because we were constantly trying to keep up with the financial output.
With this one simple step, I saved over $350 per month, and gave myself some better security. I put myself in control. What was it?
A pay-as-you-go cell phone for both my husband and I.
If you haven’t done this yet, hear me out. For years, I thought a pay-as-you-go plan spelled trouble, and the service couldn’t possibly be as good. And of course we needed the data plan.
Then, one month, we were charged $800 by a cellular provider that claimed we went WAY over our data plan limits even though we were attached to our home WiFi the whole month.
After multiple discussions with this provider, it became clear we needed to make a change that allowed us to be in control.
With our pay-as-you-go plan, the service is just as good, and in many ways it’s better.
My cellular service, with a data plan, used to cost me $400 for two lines, and often times cost me more. There were surprise fees and added costs we couldn’t control.
I now pay $30 per month, per phone. We have unlimited minutes each, unlimited texting, and no data
(I keep my phone attached to our internet at home and to free WiFi when out and about. You would be surprised how easy it is to live without data all the time, and how often you are at a location with free WiFi).
We aren’t automatically charged every month, so we’re in control – we choose when to pay.
With the exception of the data, this plan is almost identical to the monthly plans I had with providers who wanted to charge me over $200 per month plus taxes and hidden fees.
We were able to use the phone we’d already had for years, so the change cost us nothing except for the new plans.
If you do want a data plan with your phone, there are pay-as-you-go plans with data, and they’re a fraction of the cost of monthly plans. The service is just as good.
The quality of the service with our pay-as-you-go provider is exactly the same. I’ve never had a problem texting or making a call, or getting on the internet.
If you want to know which provider I use, please contact me and I will share the full details, but there are plenty of mobile companies to choose from. Make sure you choose one that has service in your area.
Do you have any money saving tips? Leave a comment below!
Fluffy chicks are the best and learning how to hatch chicken eggs (and hatch eggs at home without an incubator) is a ton of fun!
Letting Mother Nature (who knows how to incubate chicken eggs perfectly) do her thing is always best, but if your hens aren’t broody (wanting to sit on eggs) or if you want to maintain a precise environment for your hatching eggs, incubating them is a good option.
If you want to know how to hatch chicken eggs without an incubator, we’ll cover that, too.
First things first. It usually takes 21 days for a chicken egg to fully incubate. A day is the full 24 hours after you put the egg in the incubator, so I write the next day’s date on the egg to remind myself what day I started incubating. So, if I put eggs in the incubator on January 18, I write 1/19 on the egg. I tend to see external pipping (when the chick starts to break the egg) on day 19, but it can take up to 28 days in some cases. (Full disclosure: I’ve never personally had an egg take that long to hatch but it reportedly happens on occasion). I use a Little Giant Still Air incubator that I bought locally for about $50. I’ve had a good hatch rate with it, it’s easy to figure out, and it’s a great starter incubator. It’s important to run it for 24 hours before you put eggs in to ensure the temperature is correct and stays steady.
These eggs were fresh and were fertile.
1. Choosing eggs to incubate. Don’t incubate eggs older than 10 days, and eggs no older than 7 days are best. If you come across a bunch of eggs you’re not sure about, and want a test, put the egg gently in water and do an egg float test.
If you’re saving eggs for a few days before putting them in the incubator, store them at room temperature. I use an old egg carton, and I store them pointy side down. This is to protect the air bubble at the fat end. More on that later.
Do not refrigerate them. (note: if it’s winter, the sooner you gather the eggs the better, but if they’re cold for a couple hours, it’s ok. Bring them back to room temp before incubating). Put only unbroken eggs in your incubator.
You can make sure they don’t have any cracks by candling them before you put them in the incubator. (If you’re wondering how to hatch eggs from the grocery store, you can’t because they’re not fertile. If you don’t have any chickens, or if you don’t have a rooster, you can check out Craigslist and see if anyone’s selling hatching eggs near you).
(Hint: Keep small hands away from the incubator! While this might seem intuitive, if you’re an obsessive temperature and humidity checker like me, you can inadvertently place the incubator in a place where children can get inside. And you might just find an omelette on your floor. Not fun for anyone (ok maybe for your kids).
2. Maintain a temperature between 100°-102° with a still air incubator and 99-99.5 with a forced air incubator. Your goal is to keep the temperature inside the egg as close to 99.5° as possible. Since you can’t actually take the temperature inside the egg, the best you can do is maintain a slightly higher temp outside the egg.
I’ll admit it. Occasionally I’ve let the incubator get too hot, especially when I was first starting out. It got as high as 113° one day while I was out running errands, and I swore I killed all the chicks. I had an 80% hatch rate, which means I’m either incredibly lucky or small, short changes in temperature do not necessarily mean disaster. By all means, keep your temperature between 100°-102°, but if the worse happens, don’t panic and assume all is lost.
Busy chicks in their brooder, checking things out.
3. Keep your humidity between 40-50% days 1-18, then increase to 50%-60% on days 18-21. Humidity is important, especially in the last days of incubation. If the humidity is too low, you run the chance of your chicks getting “shrink-wrapped”, and unable to break out of the egg. The last thing anyone wants is to get super excited for hatch day, only to have fewer eggs hatch because the chicks died. I keep a digital thermometer in the incubator that measures both temperature and humidity. It’s been a lifesaver (literally) and it keeps me from guessing. I try to adjust the temperature by opening and closing the vents instead of turning the dial. It’s a slower and less dramatic change.
4. Turn your eggs at least 3 times a day from days 1-18, then don’t turn them at all on days 18-21. Turning your eggs an odd number of times each day is important for embryo development. In nature, a hen turns her eggs constantly. Don’t turn your eggs after day 18 – let the chick orient itself to break the shell and hatch. Remember the air bubble I mentioned? When the chick is being born, it “pips” (breaks) into that air bubble, then pips into the external world. To help the chick hatch, keep the incubator shut (we call this time “lockdown”) and don’t open it unless necessary.
5. Candle your eggs starting on day 7. If you have darker eggs, you might have to wait until day 10, but you definitely want to candle them at some point. Candling an egg just means looking at the inside by shining a light through the egg. You should see veins and eventually a chick moving in there (which is the coolest thing ever, aside from seeing a human in the womb). If by day 10, you only see the yolk (looks like a shadow and the rest of the egg clear), then the egg either wasn’t fertile or the embryo never developed. Eggs that don’t develop need to be removed.
A new chick just born! The light keeps him from getting cold.
6. Once they’re born, move the chicks to the brooder. Congrats! You made it to day 21, and now you have baby chicks. You can leave chicks in the incubator up to 3 days. When you move them to the brooder (I do it the day after they’re born, once they can stand and walk ok), make sure your brooder is at least 95° but not too hot or the chicks will overheat (you’ll know if they start panting). I usually keep mine 95° – 100°.
Newborn chicks have a harder time regulating their own temperature, so I keep a thermometer in the brooder too. I use straw in my brooder because we have it on hand. Some people use wood chips; if you use wood chips, use larger ones so the chicks don’t try to eat the finer shavings.
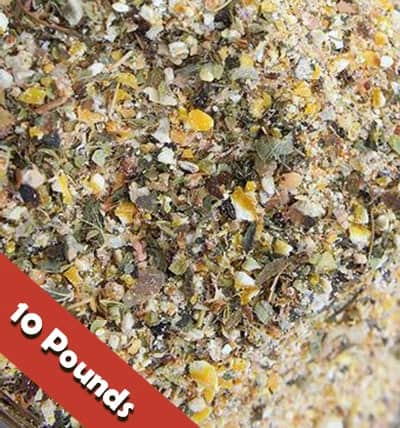
We love and recommend this chick starter (below) because our chicks love it and we love the extra herbs mixed in:
✔️ 24 HOUR ACCESS TO BENEFICIAL HERBS LIKE OREGANO & GARLIC
✔️ CHICKS LOVE IT!
I gave these chicks a probiotic the same day they were born, and they’ve grown up very healthy.
7. Give your chicks a probiotic in their water. I used to think probiotics were a useless trend, but after losing some newborn chicks inexplicably, I gave them a try on a friend’s recommendation, and every one since (knock on wood) has been very healthy. All you do is add it to their water, and I heavily recommend them. The probiotics help establish good gut flora and aid in helping the chicks poop correctly, and avoid pasty butt (pasty butt is when a chick’s feces dry and cover their vent, and they’re no longer able to poop correctly). Pasty butt is a #1 killer of newborn chicks.
What if you’re off-grid? If you’re interested in how to incubate chicken eggs with a heat lamp, or how to hatch eggs at home without an incubator, or how to incubate chicken eggs without electricity, for example if you’re off-grid, as long as the temperature in the incubator is at these levels, you’re doing ok. Make sure whatever you’re using as an incubator is able to consistently maintain these temperatures. Newspaper makes a good insulator, as do styrofoam ice coolers (that you buy at the grocery store). The styrofoam will be less of a fire hazard and easier to maintain the temperature. You will also need a cover for your homemade incubator, as well as a way to turn the eggs easily without disrupting the temperature or humidity.
You can always let the hen incubate the eggs for you if you’re off grid. Silkies are a good choice, since the breed tends to go broody.
If you want to improve the quality of your chicken eggs for hatching, give the girls a calcium supplement, such as crushed egg shells (mine go NUTS for these) or oyster shells. The added calcium increases the strength of the shells.
Hatching eggs really is that easy! If all your eggs don’t hatch, don’t worry. A 80% hatch rate is normal, and if your first hatch yields a 50% hatch rate, you’re doing great! Have fun, watching the chicks grow up is a blast!
For years, we simply purchased laundry detergent from the dollar store, not ever thinking about making our own. When we moved to our homestead, and as the desire to produce more than we consumed became greater, I researched how to make laundry detergent at home, and found that we could save more by producing our own. It takes a little more leg work, but it’s super-easy, and I get a lot of satisfaction creating my own.
I like knowing that we aren’t using the chemicals in mass-produced laundry detergents! And the bonus is that I can choose my own scent!
If you’ve ever been interested in making your own laundry detergent at home, and it’s an important skill to have as a homesteader, then this post is for you. I decided to make powdered detergent over liquid detergent because liquid detergent takes longer to make.
Here’s how to make laundry detergent at home. Any of these ingredients can be found at your local big box store, so no excuses why you can’t produce your own, even if you’re an urban homesteader.
Shredded Fels Naptha soap
Homemade Laundry Detergent
1 bar laundry soap (I used Fels Naptha, you can also use Ivory or Zote or your own)
Shave your laundry soap until it’s shredded. (You can use a cheese grater. I purchased one especially for this project.) Mix with the borax and washing soap, and store in a clean, air tight container.
That’s it! It’s really that easy to make laundry detergent at home. As a homesteader, you can go all out and produce your own laundry soap too. I plan to do this the next time we burn a bunch of wood. I have the fat sitting in the freezer! (Stay tuned for the tutorial.)
You can use your own laundry detergent at home in both regular and HE washing machines.
So, how to make laundry detergent smell good? Well, the good news is the ingredients, as they stand, smell like clean linens. But if you want to add your own scent, simply add essential oils. I personally like the scent it already has, so I leave it alone.


