If you’re looking for a surefire way to keep your flock from getting the stuck-in-the-coop blues, build a grazing box for your chickens.

And the best part? Building a grazing box for your chickens (using chicken wire or hardware cloth) won’t cost you a ton of money!

You might already know your chickens need boredom busters so they don’t start fighting and picking at each other’s feathers.

Building your chickens a grazing box for herbs and healthy greens will help reduce unnecessary stress in your flock, and give them a healthy, constructive hobby – and you’ll get healthier eggs too!

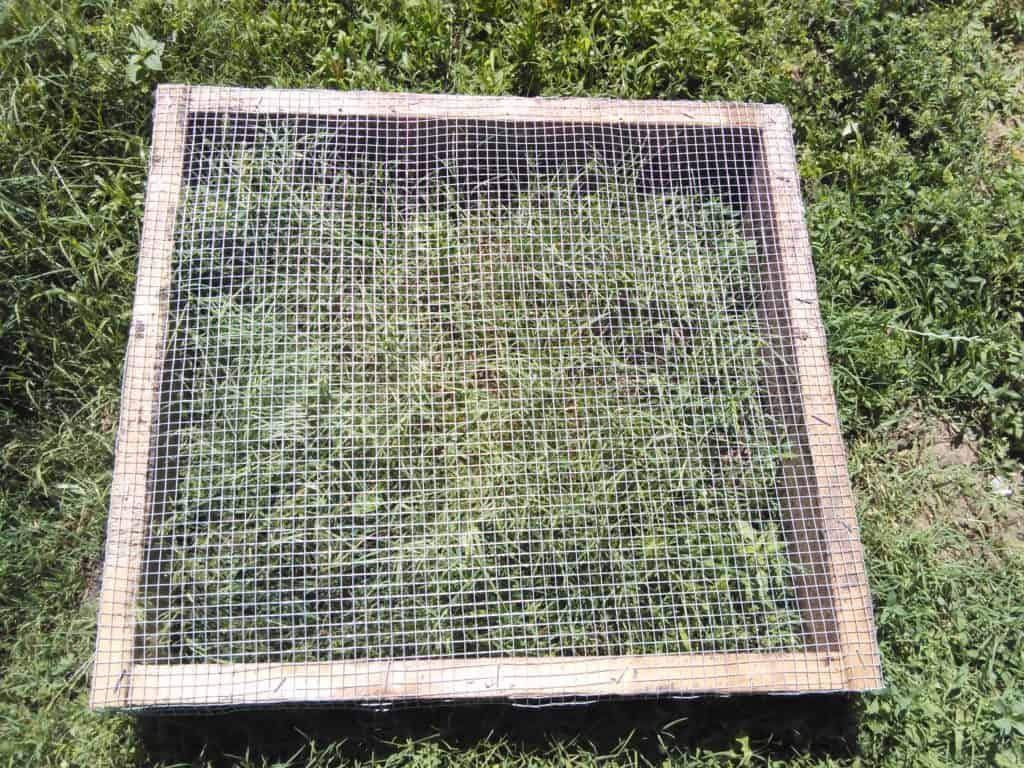
The main benefit of a grazing box is that as the herbs and greens grow through the hardware cloth, your chickens can eat them, but can’t devastate them or scratch them up by the roots.

For just a few minutes of work on your part, your chickens will be rewarded with a healthy, fresh treat again and again.

Here’s how to build a grazing box for your flock for under $15!

Build a grazing box for your chickens

What you’ll need:

  • One 2x6x10 heat-treated board, cut into four 2’6” pieces
  • ½-inch or 1-inch hardware cloth (at least 2’6” by 2’6”)
  • Staples or finishing nails
  • Eight 4” wood screws
  • Hammer
  • Screwdriver
  • Stapler (if using staples)
  • Wire cutters
  • Seeds for herbs and greens, or starts if you have them
  • Good soil or composted manure


Our Costs (yours might vary):

  • Wood: $4.89
  • Hardware cloth: $5.97 for 36”x10’
  • Screws: Leftover from a previous project
  • Finishing nails: $0.99 from a dollar store

How To Build A Grazing Box For Your Chickens

This project easily scales, so if you have a lot of chickens and you want a larger box, you can easily make your design larger or smaller as needed.

For a flock of 5-10 chickens, the size of the box in this article works very well.

Cut the wood into four pieces, each 2’6” long and screw them together.

It’s important to use heat treated wood that hasn’t been exposed to chemicals so your chickens stay safe while snacking on their treats.

We purchased new wood for this project from a trusted source, costing us less than $5 at a local lumber yard.

Using a circular saw or a handsaw, cut the wood into four separate pieces, each 2’6” long.

Screw the pieces together to form the box. We used 4-inch wood screws for this project to make sure the pieces were secured together, and we could move it around without danger of it falling apart.

While it might be tempting to use a thinner piece of wood, the box won’t be as sturdy, so I recommend sticking with the 2x6s.

Add the hardware cloth

build a grazing box for your chickens

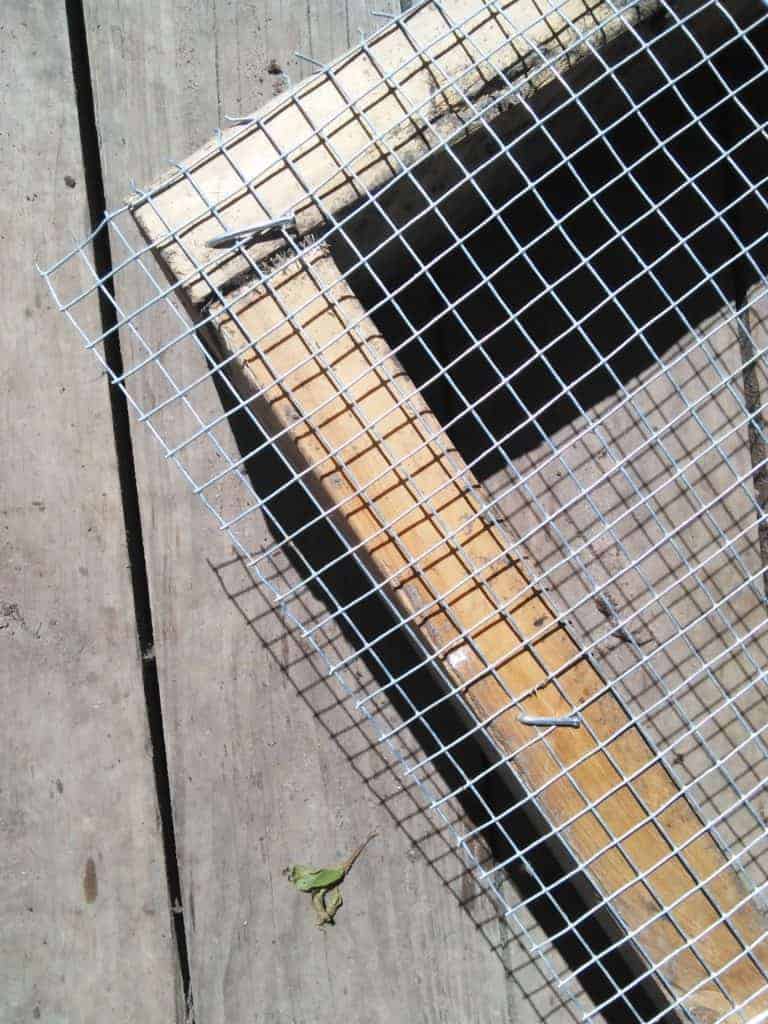
Decide whether you’ll use staples or nails to attach the hardware cloth to the box.

We used finishing nails because we already had them on the farm and they’re easy to bend, but staples work just as well. Just make sure the hardware cloth is secure to protect the growing herbs and greens.

Both finishing nails and staples withstand chickens well.

Cut the hardware cloth so there’s only a slight overhang. Be sure to tamp down the edges of the hardware cloth with the hammer so there’s no chance one of your chickens won’t get cut on a sharp edge.

Identify where you’ll place it in the coop

Ideally, you will choose where you’ll keep the grazing box in your coop before building, which will give you a good idea of how big to make it.

But if you’re like me, and tend to just make stuff before figuring out where to put it, then now is the time to measure out a 2’6” by 2’6” square in your coop so your chickens can easily access it.

Make sure you choose an area that drains well and doesn’t flood. It should also be near a water source, or otherwise be an easy place to water.

Before putting the grazing box in the coop, first amend the area where you plan to keep it to make sure you can actually grow greens or herbs there.

Add a good quality topsoil or composted manure to the area, then plant your seeds or starts. Top with the grazing box, making sure the hardware cloth is facing up.

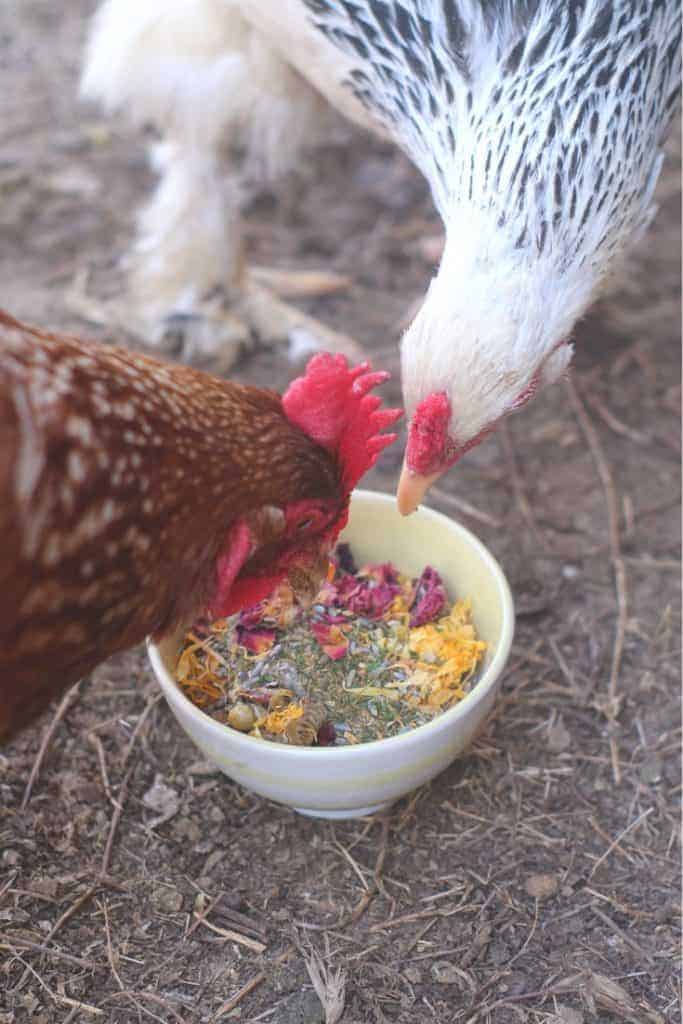
It will take a few weeks before the greens are large enough to eat, but when they are, your hens will get a treat!

I recommend finding something to cover the grazing box with as the seeds sprout and grow.

As we all know, chickens like to poop…and they’ll poop all over your grazing box as the grass is growing. So, it’s necessary to protect it with a clear cover; a large piece of plastic is a good option.

I recommend keeping it away from your chicken feeder so poop doesn’t get over the feeder as well.

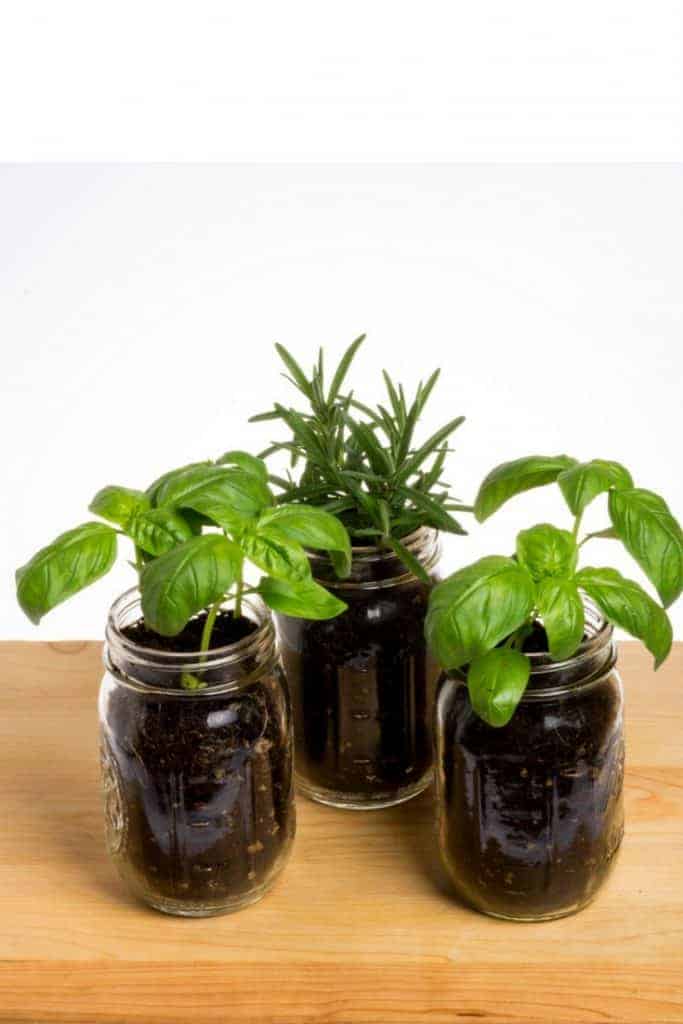
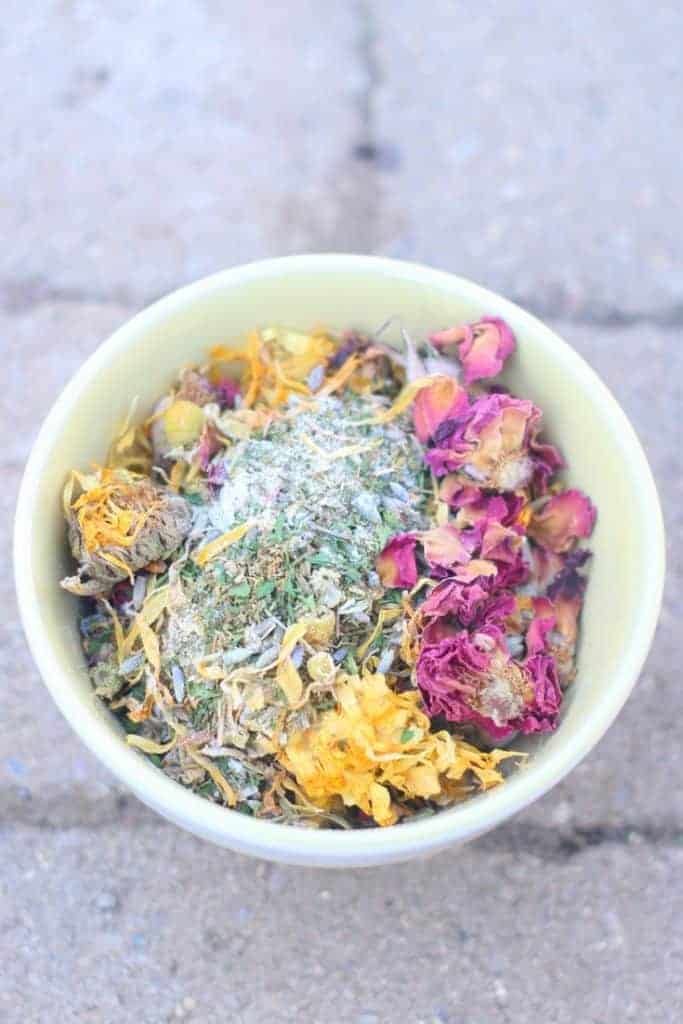
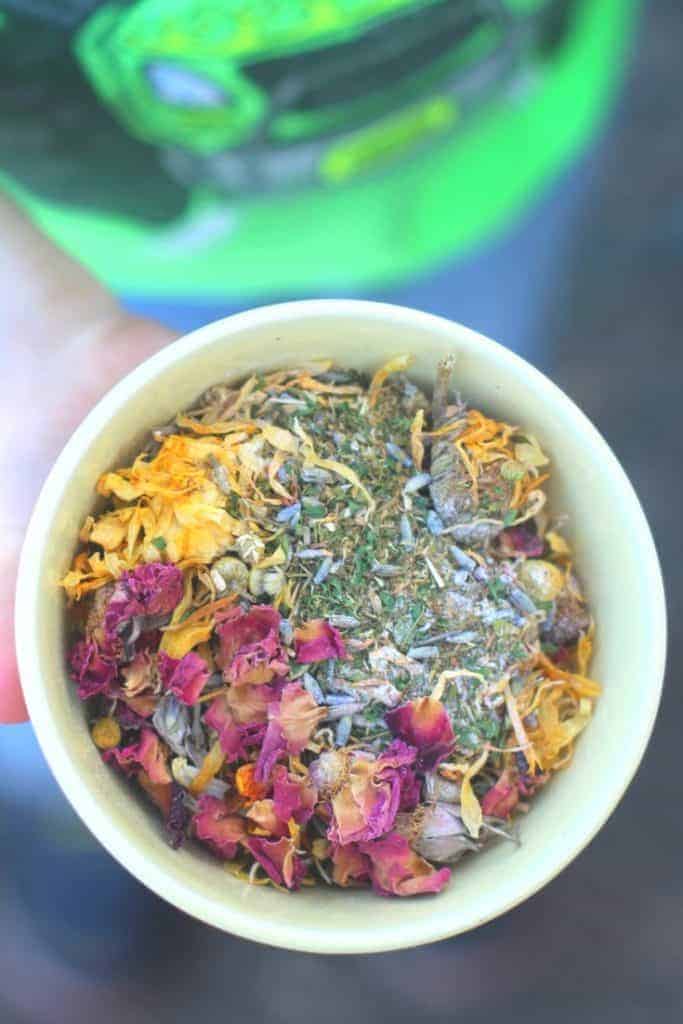
What to grow in your grazing box

Now that we’ve built the grazing box for your chickens, you might wonder what’s best to grow in it.

Here’s some options your chickens will love:

Alfalfa grass – high in protein

Oregano – supports a healthy environment

Sage – natural dewormer

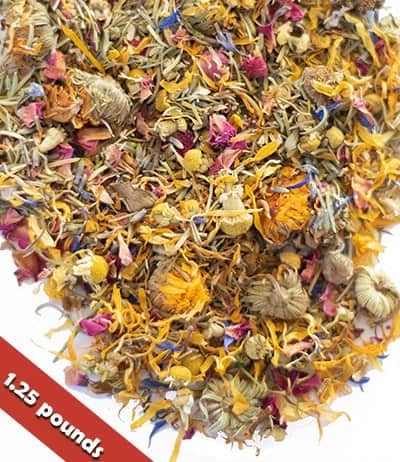
Calendula – Flowers have lots of beta carotine, supports healthy yolks

Parsley – source of many essential vitamins

Garlic (for leaves/scapes) – supports a healthy immune system

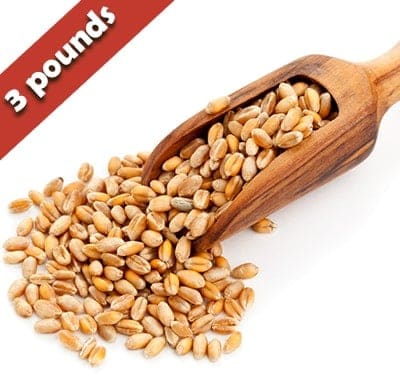
Wheat grass – great source of protein, vitamins

Barley grass – great source of protein, vitamins

Kale/Mustard/Other greens – great source of protein, essential vitamins

Grab my free cheat sheet about 7 herbs you can start feeding your chickens today and in just 10 minutes, you’ll have healthier hens at TheFrugalChicken.com/ChickenHerbs

We also love and recommend this wheat berries product. It’s non-GMO and makes growing wheat grass so easy!

  • OUR MOST POPULAR FODDER SEEDS!
    $19.99
    Non-GMO Wheat Seeds for Sprouting Fodder (Wheat Grass)
    3 POUNDS
    ✔️ SUSTAINABLY GROWN IN MISSOURI
    ✔️ ENCOURAGES POSITIVE BEHAVIORS LIKE FORAGING
    ✔️ EASY TO USE
    ✔️ NON-GMO & ALL NATURAL

I’d like to hear from you!

Do you think you’ll build a grazing box for your chickens? Leave a comment below!

Hey y’all! Here’s this week’s sneaky peek photos of life on our farm!

These images also appear on my Instagram account where I share MANY more photos and stories from the farm!

If you aren’t yet following me there, you can right here.

Enjoy the photos & be sure to share some of yours with me!

https://www.instagram.com/p/BhiAsuSAZsh/?taken-by=pamperedchickenmama

https://www.instagram.com/p/BhaSkpggsdb/?taken-by=pamperedchickenmama

https://www.instagram.com/p/BhXuQ51BcTr/?taken-by=pamperedchickenmama

https://www.instagram.com/p/BhVI_HCBvM1/?taken-by=pamperedchickenmama

https://www.instagram.com/p/BhSljhVBxKr/?taken-by=pamperedchickenmama

https://www.instagram.com/p/BhP_5IPBFEv/?taken-by=pamperedchickenmama

If you have a glut of zucchini hanging about, turning them into a warming and nutritious soup is simple and rewarding.  

Even if you don’t have an excess supply of the popular green squash, add them to your grocery list, this soup is worth making. 

Which Zucchini Are The Best??

When picking which zucchini to add to your soup, don’t assume that a larger one is the best choice. In fact, the smaller sized ones are packed with more flavor and will provide your soup with the perfect partner to accompany the distinctive Parmesan taste.

Try and use zucchinis around 7 to 9 inches long, and the darker the skin, the better. Did you know the darker skinned zucchinis offer more nutrients than the lighter skinned varieties?

If you are tempted to grow some of your own zucchini at home, it’s easier than you might think. But be warned, some varieties can produce a huge harvest!  If you don’t have the ground space to spare, they can also be grown in large containers.

If you are looking for further zucchini recipe inspiration, this versatile ingredient also works well grated into muffins and cakes, as well as spiralized into zucchini noodles.

It’s In The Stock!

A good wholesome vegetable stock can make all the difference to the flavor of a soup. Whereas you can get some great tasting stock from the store, nothing quite beats the taste of homemade.

You know exactly what is in it and can control the salt levels. And vegetable stock is versatile too, you can include it in a variety of other cooking methods such as stews, casseroles and curries.

It also freezes well, just portion it up once it has cooled into freezer bags, or other suitable containers and store for up to 3 months.

Making vegetable stock at home is straight forward (a suggested recipe is included at the end of this post).

You can be flexible with what you add depending on what is in season, and what tastes you prefer. The more variety of ingredients you can include, the better the result.

Zucchini and Parmesan Soup

Serves:  4

Cooking Time: 20 to 25 minutes

Preparation Time: Less than 5 minutes

Ingredients

1tbsp olive oil (or oil of your choice, coconut oil works well too)

2 medium zucchinis, chopped

1 clove garlic, peeled and crushed

1 medium onion, peeled and chopped

3 ½ cups 1 ½ pints vegetable stock (see recipe below)

1 cup parmesan cheese, grated

Sea salt and ground pepper to taste

Directions

  1.  Heat the oil in a pot. Add the chopped onions and crushed garlic. Gently saute for 5 minutes, or until soft.
  2. Add the zucchinis and saute for a further 2 to 3 minutes.
  3. Add the vegetable stock and bring to the boil. Once boiled reduce the heat and simmer for 20 minutes, or until the zucchini is soft.
  4. Switch off the heat, and using a stick blender, blitz the soup until smooth, or until it reaches your desired consistency (leaving a few chunks in this soup gives it a welcome texture).  Take extra care not to let any of the hot soup splash you during the blending process.
  5. Once smooth, stir in the grated parmesan cheese and slowly mix until melted.
  6. Season with salt and pepper if required and according to personal taste.
  7. Pour into bowls and enjoy with some crusty bread and a green salad.

Homemade Vegetable Stock Recipe

1 tbsp olive oil (or oil of your choice)

2 large onions, chopped into small pieces

2 cloves garlic

2 bay leaves

4 medium carrots, chopped into small pieces

2 stalks celery, sliced

Fresh herbs of your choice (thyme, parsley, rosemary all work well)

Freshly ground pepper

Salt to taste (optional)

6 cups (1.5 L) boiling water (approx)

  1. In a pot heat the oil on a medium heat. Add the onions, garlic, carrots, celery and herbs. Gently saute for 5 minutes, or until the onions start to soften.
  2. Add the water and pepper. Bring to the boil and then reduce to a simmer. Leave it uncovered and allow it to simmer for 15 to 20 minutes, or until the vegetables feel soft (the time it takes will largely depend on the size of the chopped vegetables).
  3. Strain the stock with a sieve to remove the vegetables.
  4. Use the stock straight away or allow it to cool and store it for later use. Stored in an airtight container vegetable stock will be good for 3 days in a fridge, or around 3 months in a freezer.   

Notes: Remember you can use any herbs and vegetables you have to hand for the stock. Vegetables such as fennel are also great to include, as are tomatoes, mushrooms and a variety of herbs.

About Liana: Liana blogs over at Liana’s Kitchen! You can sign up for her newsletter right here to get more great recipes!

Ok, I get it. You have no idea what to get your mom or mother-in-law for Mother’s Day. It’s tough. I know.

While there are tons of expensive, fancy gift ideas all across the web, here at the farm I like to keep things pretty simple.

So all of these gardening themed Mother’s Day gifts are exactly what I want my family to get for me.

DIY Garden Kneeler and Seat

So this first gift might be one of my favorites. It’s a DIY garden kneeler and seat that’s super easy to make.

It saves your knees when you are kneeling down in the garden, and it can also be flipped over to become a bench when you’re ready for a rest. This gift is multipurpose and I’m pretty sure any mom would love it!

All you need is one 1 x 10 in board that is 24 inches long and 4, 12 inch long smaller boards for the legs. You attach the legs to the 1×10 in board and then you have your bench!

Add a piece of foam covered in a pretty fabric to your bench and you’re good to go! For more detailed instructions go to this link

Or if you aren’t into making things yourself, here’s where you can buy one. I love that it has pouches on the side for you to store tools!

Gardening Gloves with Fingertip Claws

Ok, ok! So these do look a little bit silly, but think of the benefits!

The “claws” on the end of the gloves are meant to help you dig into the dirt easier to get out those pesky weeds with deep roots!

Also, let’s talk about getting dirt out from underneath your fingernails. It’s the WORST.  

These would make a perfect gift for a mom who loves gardening, but doesn’t want to ruin her perfect manicure. Plus she’ll definitely get a good laugh when she opens up these fun gloves.

DIY Mason Jar Herb Garden

Looking for a simple and easy DIY project for mom? I’m loving this cute DIY mason jar herb garden!

This project is simple and it uses mason jars! Which is amazing because I always have extra mason jars lying around.

This would be an inexpensive gift for a mom who doesn’t have a backyard anymore or who love herbs! Don’t forget to remind your mom not to overwater these herbs because there isn’t any way for water to drain from mason jars unless you drill a hole in the bottom.

Check out this article about how to help your plants survive in planters without drainage holes

DIY Garden Stepping Stone

This next idea might be my favorite. It’s a gorgeous DIY garden stepping stone.

I love the pattern and that it was made from a plastic lid (the ones that cakes or rolls come in from the bakery). It looks elegant, but doesn’t require a lot of time or skill with concrete.

You can also make one with your kid’s handprints in it! (This is a great gift for grandparents too!)

Homemade Gardening Soap

This last idea is so fun and unique and I’m sure any gardener would love it! Now you might be thinking there’s nothing special about soap, so how did it end up on this list?

See, it’s not just soap. It’s GARDENING soap specifically made to help get dirt off your hands after you finish up in the garden.

This is amazing because getting dirt off your hands (and out from under your nails) after you finish has got to be one of the worst parts of gardening. At least for me.

This soap recipe is easy and it smells amazing!

Aren’t sure you want to make it yourself?? No worries – grab a bar of my Organic Rebel Calendula soap for the perfect Mother’s Day gift!

Do you have more gardening themed gifts ideas? I would love to hear them! Comment below and share your gardening gift ideas for Mother’s Day!

It’s spring, and yes, the hens are starting to lay again! Which means I get extra concerned about the quality of the eggs they lay.

Improving the egg quality a hen lays has been the subject of many studies.

  • Best Eggs Ever! {1.25 pounds}
    $32.99
    Best Eggs Ever! (TM) Nesting Herbs (Chamomile, Roses, Lavender, Cornflowers, & Calendula) For Pet Chickens
    All Natural Nesting Herbs For Pet Chickens With Oyster Shells for Great Eggs!
    ✔️ 100% ALL NATURAL & NON-GMO
    ✔️ SAFE FOR COOPS
    ✔️ OYSTER SHELLS PRE-MIXED IN

The egg industry, after all, is concerned about getting as many eggs as possible, and researchers are concerned about the overall health of the eggs laid so people don’t eat contaminated food.

This week’s recipe includes some of the best herbs and other supplements you can give your hens to improve egg quality – and that’s why I’ve called it Best Eggs Ever!™.

Apple Cider Vinegar, Garlic, & Oregano For Healthier Eggs

You’ll notice something interesting in Best Eggs Ever!™, which is the Apple Cider Vinegar granules.

If you’ve never heard of ACV granules, it’s really neat stuff: It’s raw apple cider vinegar that has been dehydrated.

In studies, chickens fed apple cider vinegar, were healthier, grew better, and the eggs they laid had lower amounts of pathogens such as salmonella and campylobacter.

Similarly, when they used oregano around their chickens and in the feed, industrial egg farms found that the chickens were healthier and less likely to get sick.

Garlic is also included in Best Eggs Ever!™ because one of the chemical constituents in garlic – allicin – has been shown in studies to improve immune systems and can ward off mites in backyard chickens.

While fresh garlic is great to add to your flock’s water, granulated garlic is the perfect supplement to their regular feed because it can be mixed easier and the hens are more likely to eat it. Sometimes they miss fresh garlic if it’s not in their water.

Oyster Shells for Better Eggshells

If you want to make sure your girls lay nice, strong eggshells, then oyster shells are where it’s at!

All the calcium in them will give your hens the calcium they need so they lay healthy eggshells WITHOUT pulling the calcium from their own bones – which they might do if they aren’t getting enough calcium in their diet.

Oyster shells = better quality of life!

I’ve found that when the oyster shells are mixed with other yummy treats for my hens, they’re more likely to eat it.

Yes, they’ll eat it separately also, but they get wrapped up in the goodies, and down more of the calcium when it’s mixed.

If you don’t have oyster shells on hand, then feel free to substitute crushed eggshells.

Calendula for Better Yolks

You can see here the difference between a farm fresh egg from hens fed calendula and one from the store.

Calendula has a lot of beta carotene in it, which is super healthy for your hens AND will give you those golden yolks you’ve been dreaming of.

That’s why it’s a natural to be included in this recipe! (It also smells HEAVENLY which is an added bonus!)

Lavender & Chamomile for A Relaxed Hen

Hens that are relaxed lay easier and better – and they’re overall healthier than hens who are stressed (and they lay eggs with stronger, more regular shells, rather than wrinkled or abnormal eggs).

Hens also love to nibble on flowers & of course, they enjoy the scent! You can line your nesting boxes with lavender and chamomile, and they’re also great to include in their diet!

Are you ready to make Best Eggs Ever!™??? Here’s the recipe!

Best Eggs Ever!™

Ingredients

¼ c Calendula (buy in the store here)

¼ c Lavender (buy in the store here)

1/4 c Rose Buds (buy in the store here)

¼ c Alfalfa

¼ c Chamomile (buy in the store here)

¼ tsp granulated Garlic (buy in the store here)

¼ tsp Apple Cider Vinegar granules (buy in the store here)

1 tbsp Oregano (buy in the store here)

1 tbsp Parsley (buy in the store here)

1 tbsp Oyster Shells

Directions

Mix all ingredients together and serve as part of a complete diet. You can feed separately or with their regular layer feed. Feed Best Eggs Ever!™ to layers and adult roosters.

Ok, it’s right after Easter….which probably means you’re trying to figure out what the heck to do with all that ham.

Well, I invited Deb from Bowl Me Over to set us straight – and her Famous Leftover Ham Pasta Salad is SO EASY to make, even I can do it!

This makes a delicious pasta salad that’s a perfect side dish, light lunch, or practically a whole meal!

Ham Pasta Salad is easy to make and a crowd pleaser too. It’s great for a barbecue or on the buffet at your next family gathering – and it’s a great way to get everyone talking about your cooking!

All I can say is that I’m going over to Deb’s for dinner!

Ham, feta cheese and veggies are packed into Ham Pasta Salad and topped with a creamy mayonnaise dressing.
Ham Pasta Salad is a great salad for your next barbecue!

Hi my name is Deb and I’m thrilled to meet you today! Maat has invited me to do some guest blogging here and I specialize in recipes.

Before I share that recipe with you today, I thought I’d tell you a little bit about myself! I grew up in St. Helens Oregon and we lived in a little house in the country. We always had big garden, dogs and cats – goats, ducks and of course chickens!

Now Fresno, CA is home. On my blog I share meals inspired by our travels and of course what is in season here in the central valley.

I’ve been blogging for about three years. My blog is named Bowl Me Over. It’s aptly named because most often I share meals in a bowl!

The majority of my recipes are quick and easy. Soups and stews are prevalent in the fall and winter. Spring and summer is filled with delicious salads and grilling favorites.

My Instant Pot is always nearby (isn’t it the great kitchen appliance next to the dishwasher? ) I’m excited to share my creations with you!

Ok… let’s talk pasta salad!

If you’re like me right after Easter you have some leftover ham. This recipe for Ham Pasta Salad is a great way to use up some of your leftovers. I think you really will love it!

If you’re looking for more recipes to use up leftover ham check out this recipe for Deviled Ham, Instant Pot Potato Soup with Ham or Ham and Bean Soup (one of my personal favorites!)

A green bowl filled with Ham and Cheese Pasta Salad. It's a big bowl piled high and there's enough for everyone!
Ham and Cheese Pasta Salad is a great use of leftover ham!

As delicious as ham sandwiches are after a day or two you get tired of eating the same thing over and over. That’s where this salad comes in!

I love this salad because…

1. it uses everyday ingredients (in fact you may even have everything you need!)

2. It’s quick and easy to make.

3. Uses up leftovers – always a bonus, right? And

4… that same family that loved your holiday ham is going to gobble up pasta salad with ham!

Shopping List for Deb’s Famous Leftover Ham Pasta Salad

A large green bowl filled with pasta salad with ham. There's a white plate dished up and ready to be devoured!
Ham Pasta Salad is a crowd pleaser that’s easy to make!

Steps to Make Deb’s Famous Leftover Ham Pasta Salad

  1. Cook the pasta and allow it to cool completely
  2. Dice ham into half inch cubes
  3. Clean and dice the vegetables. Dicing the veg into small pieces will allow you to get a scoop of everything when you grab a big forkful!
  4. Make the dressing by combining mayonnaise and vinegar. Mix until creamy and add to the salad bowl

Easy right?!!

Tips to make this pasta salad

Cook the pasta ahead of time and allow it to cool completely.

Why? Because if you try and dress the salad when the pasta is hot it will soak up the dressing and you’ll end up using twice as much! Cook the pasta ahead of time and tuck it into the refrigerator.

A white plate piled high with pasta salad. A green bowl behind it is filled to the brim with salad too so there's something for everyone with this Ham and Pasta Salad Recipe!
Grab your fork or even better yet a spoon so you scoop up a big bite of Ham and Pasta Salad

Deb’s Famous Leftover Ham Pasta Salad

  • Ham
  • Feta Cheese
  • Pasta
  • Red bell pepper
  • Green onions
  • Broccoli
  • Celery
  • Carrots
  • Red onions
  • Mayonnaise
  • Vinegar
  1. Cook the pasta and allow it to cool completely

    Dice ham into half inch cubes

    Clean and dice the vegetables. Dicing the veg into small pieces will allow you to get a scoop of everything when you grab a big forkful!

    Make the dressing by combining mayonnaise and vinegar. Mix until creamy and add to the salad bowl

If you love a great pasta salad, I’m going to send you over to the blog for more terrific recipes!

Souper Chef DebDebra Clark blogs over at Bowl Me Over where she shares her love of all things in a bowl! Soups, stews, salads, Buddha bowls, ice cream you name it! Comfort food that is delicious and full of flavor. Most meals are quick and easy!

You can also connect with her on Facebook, Pinterest, Instagram, Twitter and YouTube.