Well, it’s hot, which means you’re probably a bit worried about your backyard chickens experiencing heat stress. Keeping your chickens cool in summer is easy with frozen treats!

Heat stress is no joke – each year, many chickens lose their lives because they couldn’t cool down and rehydrate themselves.

Since chickens have an internal body temperature of about 106 degrees, and they don’t sweat, they experience high temperatures different from humans, and are much more susceptible to dying from overheating.

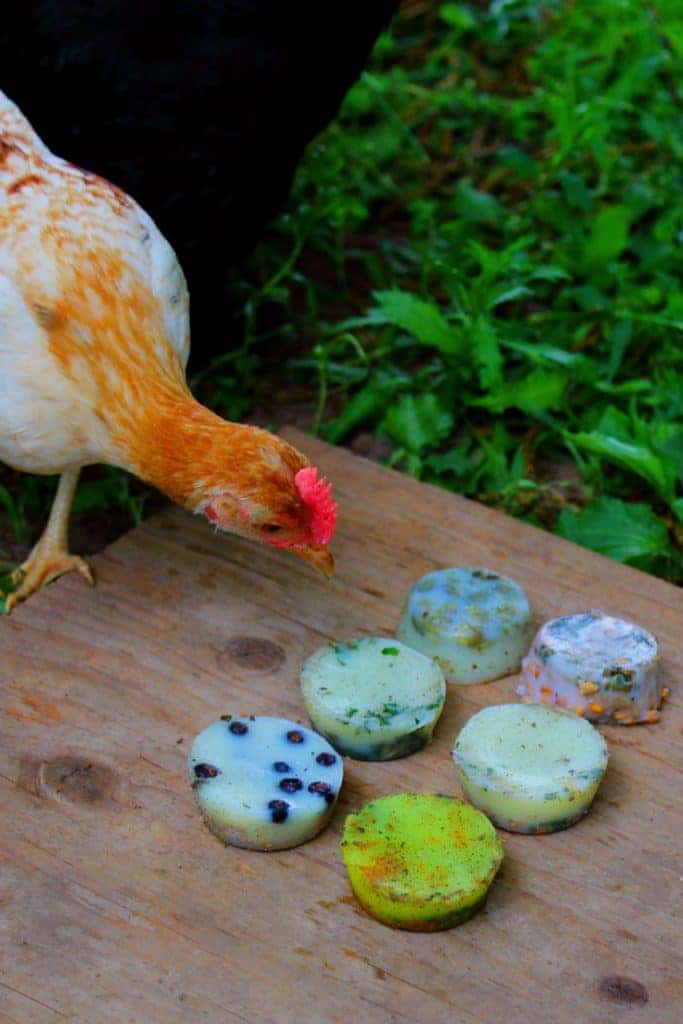
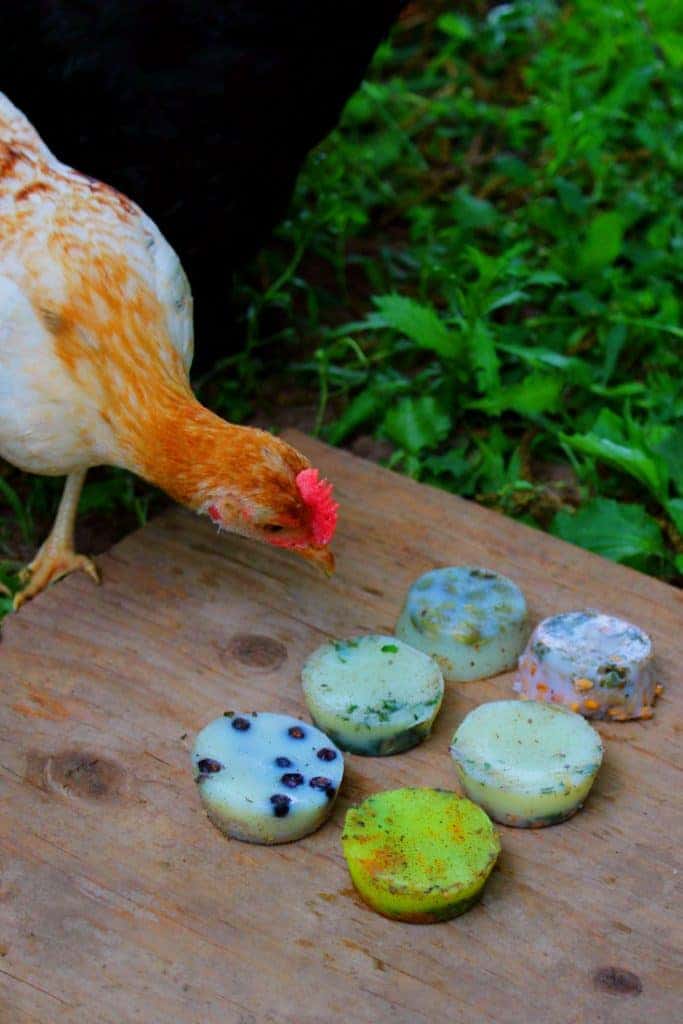
Frozen suet cakes are easy to make, but very effective to help your hens stay cool when the mercury rises.

Making frozen suet cakes is easy: simply melt your oil of choice (more about this below), add other ingredients such as corn, herbs, fruit, greens, seeds, etc, and pour into a muffin tin. Then, freeze until solid.

backyard chicken beef tallow treat

Choose the right oil for summer temps!

Some great oil choices include:

You can also combine any of the above oils together.

For frozen treats to help ward off heat stress, beef tallow or lard are a better choice than coconut oil. Although coconut oil is very healthy, it melts at 77 degrees F, which is inconvenient for warm summer days.

It’ll melt too fast for hens to get the benefit of the cool treat, and you’ll end up with a gooey mess very quickly.

Beef tallow has a melting point of about 100 degrees, which buys you a little more time during hot days.

Seeds, herbs, berries, oh my!

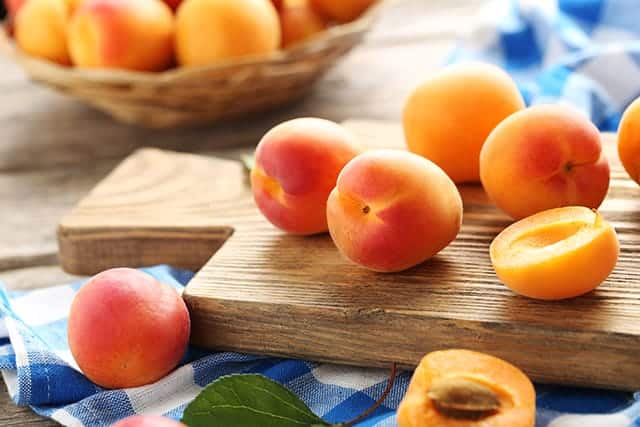
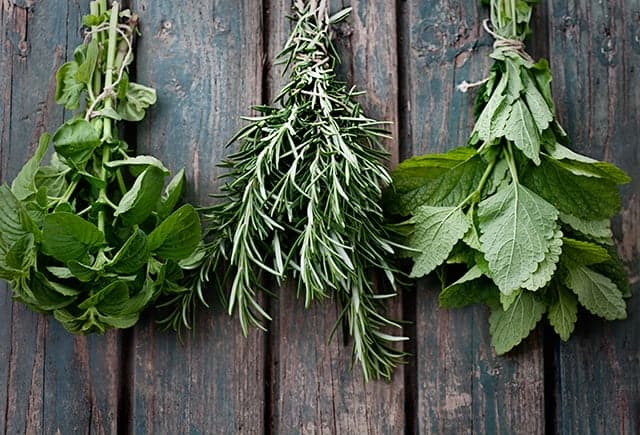
I like to also include herbs for their health benefits and nutrients, seeds such as pumpkin or sunflower seeds for fat and nutrients, and orange peel & thyme because studies show that the combination can help reduce the chances of heat stress.

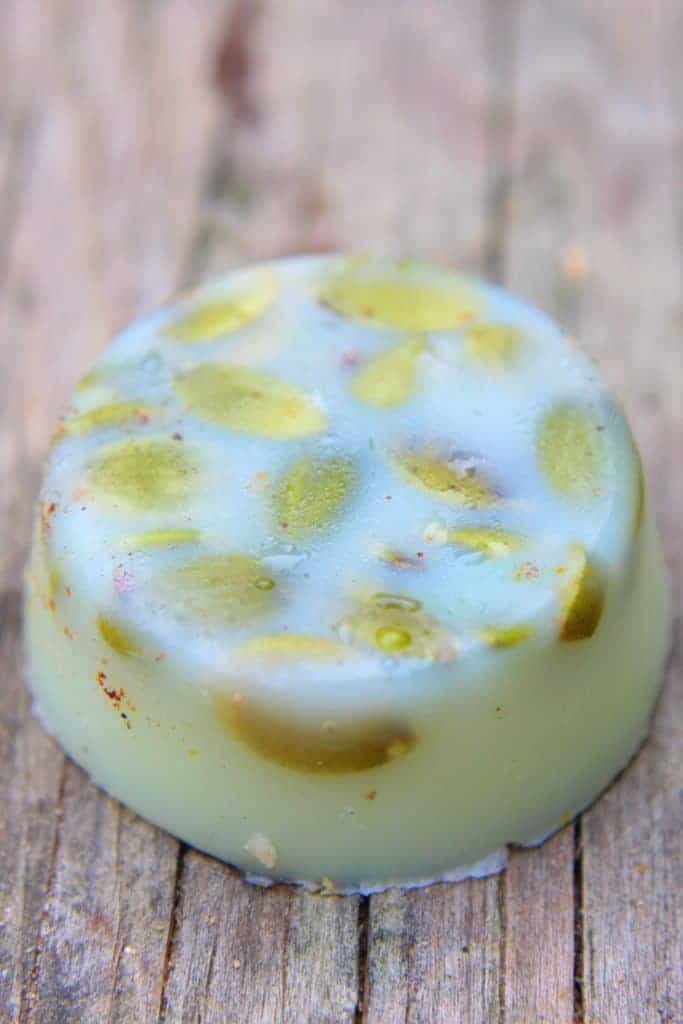
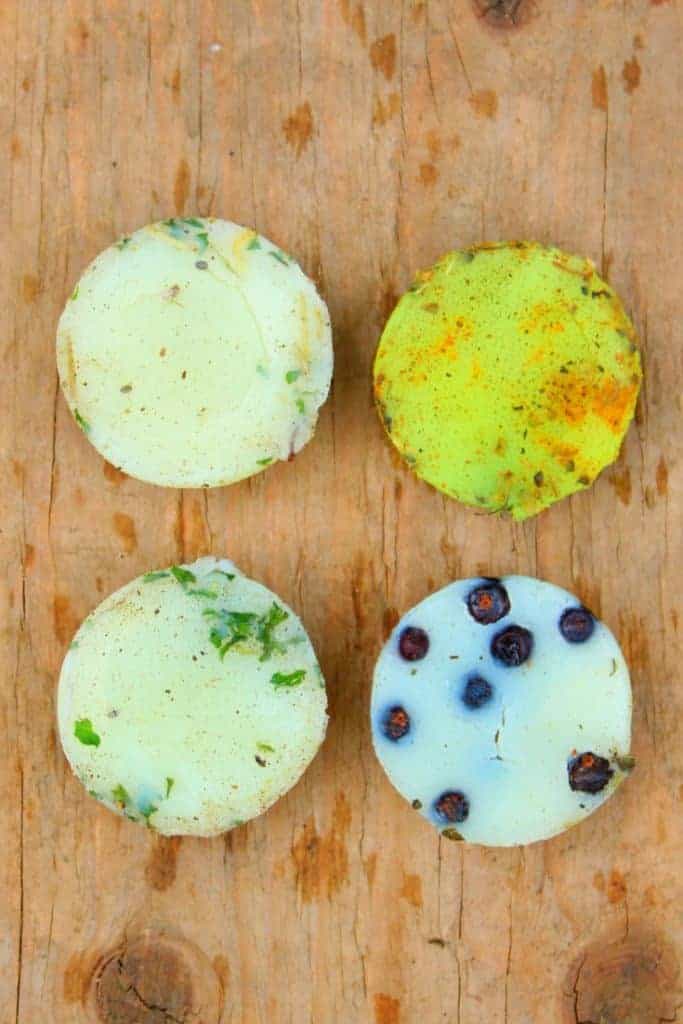
For this article, we used juniper berries, oregano, turmeric, orange peel & thyme, chia seeds and rose petals, and pumpkin seeds to make a variety of options for the flock to enjoy.

Another good option is WormBGone or chili powder for worm & internal parasite control and/or calendula for healthy egg yolks, dried insects such as black soldier fly larvae for protein, or even oyster shells for extra calcium.

Naturally, you can use any ingredients you like, as long as chickens can eat them.

But consider using colorful berries or herbs – chickens respond well to color and will naturally want to “taste test” anything in their environment. The more colorful and attractive your treats are, the greater likelihood your flock will try to eat them.

Molds for your frozen suet cakes

So, you gotta put that beef tallow in something, right? Well, all molds aren’t created equal, my friend.

Yes, you can use a regular sized muffin tin, but I’ve had good experiences with mini muffin tins. The regular sized tins create a big hunk of beef tallow, which seems to overwhelm chickens.

The smaller sized suet cakes are chicken-sized and you can usually make more than 6 treats – and more treats means everyone gets a chance at a taste.

Once your treats are frozen and ready to be eaten, simply pop them out of the mini muffin tin, arrange on a plate, and let your hens dig in!

  • 1 cup beef tallow
  • 1/2 cup seeds, berries, herbs, or other ingredient
  1. Melt beef tallow in a double boiler over low heat
  2. Once melted, pour into a mini muffin tin
  3. Add seeds, berries, herbs, or any other ingredient you want to each suet cake in the muffin tin
  4. Place mini muffin tin in your freezer until the beef tallow is frozen solid.
  5. Once frozen, remove the treats from the muffin tin and serve to your flock, making sure each chicken can have a chance at a bite.

It’s June! And there’s LOTS you can do in your coop in June to make the summer weather more fun (and bearable) for your backyard chickens!

You’re probably noticing your hens panting a bit – chickens don’t do so well in hot weather, and as their humans, we need to help them.

That’s why this month’s “to do” list includes LOTS of idea to keep your chickens cool & healthy (and avoid heat stress!)

So, here’s this month’s list of What To Do In Your Coop In June!

Make & feed frozen treats

Chickens can’t sweat, so to help them be a bit cooler, we can feed frozen treats including frozen suet cakes!

Add herbs such as oregano, bee pollen, lemon balm, and garlic to boost their immune systems in case they do get heat stress to reduce the potential for a latent infection to get worse.

Chicken eating frozen suet cakes

Install misters to cool air temps if temps are over 95 degrees consistently

While you don’t want to spray your chickens directly, installing and running misters will help cool the ambient temperature a bit. Be sure to install them OUTSIDE, not inside the coop, to avoid moisture and mold build up.

Add ice to waterers/freeze waterers overnight for cool water longer

For this one, you should buy several waterers so there’s 24 hour access to water in the coop). Put half in your freezer overnight, then put them out in the morning.

Make sure there’s shaded areas in the run (tarps are an easy option) & place waterers under them.

Install fans

If you have electricity to your coop, you can use fans to circulate the air. Be sure there’s no way the chickens can accidentally hurt themselves.

You can install them behind a guard or grating, or come up with an idea that’ll work for your flock.

what to do in your chicken coop in june

Combine water with thyme and citrus juice

In studies, chickens fed a blend of citrus WITH thyme were less likely to experience heat stress. 

Use coop refresher to reduce moisture and humidity

Humid and moist coops FEEL warmer than they are, and the moisture will do a number on your flock’s health.

There ARE all natural coop refreshers that you can use 2-3 times a week to reduce ammonia & mold build up from manure in hot temperatures. Here’s how to make one at home!

Add an extra window or two, if possible, to aid air circulation.

Be sure to install a single hung or double hung window (costs about $30 – $60 depending on manufacturer) so it can be shut during storms so mold & mildew don’t build up inside the coop.

Another option is to install hardware cloth on windows so they can stay open all night for better circulation but keep your flock safe

Watch out for gnats, ticks, mites etc

Double down on keeping mites and other pests out of your coop with some of these ideas. 

They’ll try to suck blood and nutrients out of chickens, which can impede their immune system, especially if they’re already stressed from the heat.

Also consider fermenting feed to add extra beneficial bacteria to their digestive systems & reduce pathogens.

Look at eggs for signs of heat stress

Eggs might look funny when chickens are heat stressed, so watch out for very wrinkled eggs or eggs that have pigmentation loss on the shells 

If you think your hens might be heat stressed, give extra calcium with oyster shells. Be sure to also provide extra protein with dried insects such as black soldier fly larvae and mealworms.

You can learn how to raise your own black soldier fly larvae here, or if mealworms are more your thing, you can raise mealworms with these instructions.

If you just want to feed dried insects to your flock, head over to the store to treat your hens to black soldier fly larvae or mealworms.

What chicken coop DOESN’T need an adorable sign or some other accent piece to make it feel like home?

The right sign or toy for your flock can turn a ho hum chicken coop into a eye-catching piece of your property.

And in this week’s Adorable Coop! series, we’ve got some coop signs that you’ll want to DIY for your own coop! (You might also want to check out our rustic Welcome sign tutorial here, from guest writer Jenn).

None of these coops signs look too hard to recreate, and you can be sure to give it your own special flair so it compliments your flock’s home perfectly!

And if you need inspiration for building your own coop, here’s 55+ free chicken coop plans!

Enjoy!

https://www.instagram.com/p/BgooiODH9aJ/?tagged=chickencoopsign

https://www.instagram.com/p/BO2ZxAyFt17/?tagged=chickencoopsign

https://www.instagram.com/p/BjkECk0A7B-/?tagged=chickencoop

https://www.instagram.com/p/Bjk3BFMg_NQ/?tagged=chickencoop

https://www.instagram.com/p/Bc3zLKagF_W/?tagged=chickencoopsign

And here’s a coop that just looks really cool:

https://www.instagram.com/p/BjkW_y4l50j/?tagged=chickencoop

Hey y’all! Here’s this week’s sneaky peek photos of life on our farm!

These images also appear on my Instagram account where I share MANY more photos and stories from the farm!

If you aren’t yet following me there, you can right here.

Enjoy the photos & be sure to share some of yours with me!

https://www.instagram.com/p/BjOH607gw8C/?taken-by=pamperedchickenmama

https://www.instagram.com/p/BjQvwzQhbBr/?taken-by=pamperedchickenmama

https://www.instagram.com/p/BjTUktfhG7W/?taken-by=pamperedchickenmama

https://www.instagram.com/p/BjV5H2WgGfg/?taken-by=pamperedchickenmama

https://www.instagram.com/p/BjYeLMiA7tr/?taken-by=pamperedchickenmama

https://www.instagram.com/p/BjbC7BOBNwL/?taken-by=pamperedchickenmama

https://www.instagram.com/p/Bjdnv_DBXQw/?taken-by=pamperedchickenmama

One thing I’ve noticed over the years is that not everyone really understands what foods are in season throughout the year.

Since most grocery stores ship in their fruits and vegetables from other areas around the globe, many of us don’t realize that we’re eating foods that aren’t in season locally.

I always recommend that you look into buying food from your local farmers market. Not only does it taste WAY better, but you also are supporting local farmers! And I love local farmers! All of the local farmers I’ve met are some of the best people I know, and so I love shopping at my local farmers market to try support them in any way that I can.

Since I’ve realized that many people don’t know what foods are in season during each month, I’ve decided to write an article every month listing some of the most common foods that are in season that month.

Obviously this will vary depending on where you live in the United States (and it will definitely vary for my readers outside of the U.S.) so this is a very general guide of what fruits and vegetables are the ones you should be looking for each month at your local farmers market.

One of my favorite tools to use is the Seasonal Food Guide. I love using this website because it can tell you EXACTLY what is in season in your area. You just put in your zip code and it tells you exactly what to look for at the farmers market!

Now if you live somewhere like California, you’re a lucky duck because EVERYTHING is in season for most of the year. Which makes it a lot easier to eat a variety of yummy fruits and vegetables year round.

However, if you’re like me and live somewhere that doesn’t have the amazing weather California does, you have to be a little bit more creative during the winter. Which is why I use the Seasonal Food Guide to help me find things that are in season.

Another tip I have for those of you who live in an area with long winters is to preserve some of your fresh fruits and veggies.

I personally prefer other methods besides canning, mostly because I think it’s easier and tastes better. In fact there are many ways you can preserve foods without canning!

https://www.instagram.com/p/9f8pKoAcGB/?tagged=dryingfruit

I’ll buy some extra fruits and veggies at the farmers market and preserve them, so that I can eat local fruits and veggies year round.

Another thing I recommend that you do is see if any local farmers near you have a weekly farm share you can buy.

In my area there are several farms that allow you to purchase a “farm share” at the beginning of the growing season, and then you get to pick up fresh fruits and vegetables every week!

It’s a great way to motivate yourself to try new fruits and vegetables that are in season in your area and support local farmers.

Alright so let’s get going! Here is what you should buy at your farmers market in June!

Apricots

So apricots are my FAVORITE! My grandma had a huge apricot tree that produced like crazy during June and so her yard was speckled with little orange apricots that fell off the tree before my grandpa could pick them. Needless to say there were always A LOT of apricots around.

I love apricots if only because they remind me that peach season is coming up (I love peaches and I look forward to them being in season every year, so apricots just get my peach cravings started!)

One of my favorite things about apricot season is apricot jam. I love this recipe from The Vintage Mixer because it’s easy. And I’m all about easy.

Speaking of easy, I always check my local farmers market for homemade jam. Mostly because I’m lazy and hate making jam myself, but also because other people’s jam tastes way better than mine.

Eggs

Ok, ok. I do love chickens and I love eggs. I highly recommend that everyone have their own chickens! In fact I wrote a whole book about how you can naturally raise your own backyard chickens!

But I understand that it’s not possible for everyone to raise their own chickens. If that’s the case for you, then you should buy your eggs at your local farmers market!

https://www.instagram.com/p/BivRbPCBjs-/?taken-by=pamperedchickenmama

It is really important to me to know that the chickens laying the eggs I eat are raised naturally and are happy, healthy hens. So I always feel better buying eggs from a local farmer. Then I can talk to them personally about how their chickens are treated and I can eat my eggs happily!

I’ve collected more than 50 egg recipes (We have a lot of eggs around here) that you can use after you buy your delicious eggs from the farmers market! You can find them right here!

Peas

So June is when peas are in full swing around here. And I love peas. I think they’re an amazing snack! Just down the street from me there’s a farmer who actually sells his peas shelled. And it’s amazing. It’s the lazy person’s way to eat peas and I love it!

One thing I love to do is freeze peas every year. That way I can eat peas all year long. I don’t blanche my peas before I freeze them. All I do is spread my freshly shelled peas out on a cookie tray and then put them in the freezer for about a day. Then after they’re frozen, I scrape them off with a spatula and put them in gallon size freezer bags.

It’s so easy to do and it allows you to have yummy peas all year long! Check out this super yummy Pea and Parmesan Wonton Ravioli recipe! It’s a great way to use some of your frozen peas.

Blueberries

One of my favorite things about June is the beginning of the berry season! I love berries, and I could eat them all day! Blueberries are definitely one of my favorites!

https://www.instagram.com/p/k-jECOTATM/?hl=en&tagged=blueberrymuffininamug

One of my favorite things about blueberries, is making blueberry muffins. But I’ll be honest, if I make an entire batch of blueberry muffins, I’ll eat ALL of them. So I like to make blueberry muffins in the microwave! This recipe is super easy and you get a delicious muffin you can make in a mug! I use my awesome chickens are cheaper than therapy mug to make these amazing muffins!

Fresh Herbs

Depending on your area, June is when fresh herbs start showing up at the farmers market! Not only a herbs great for your chickens, but they also add an amazing flavor to any meal!

One of my favorite herbs to buy at the farmers market is oregano. I use oregano in the coop, and I use it in a lot of my meals as well! I even sell dried oregano in the store here that you can use all year round!

Here are some of my favorite summer recipes that use fresh herbs! I also highly recommend that you try growing herbs yourself! Herbs are fairly simple to grow and they have huge benefits for your chickens and they taste great!

What are you planning on buying at your local farmers market this month? I’d love to hear about it!

Creating a welcoming entry up to your house can be tricky.  If you don’t have the perfect walkway up or your home is built at a weird angle it can seem like you have no options.  

In this post, I’m going to share how to build outdoor wall decor to help give your home a welcoming feel.

If you are new to DIY or don’t think that you can create decor that looks like it comes out of the Pottery Barn catalog I’m here to tell you that it’s completely possible and it doesn’t have half of the price tag that you see in that catalog.

This project uses supplies that you can find anywhere and the tools that I used you probably already have at home.

You probably don’t know me since I’m new here.  My name is Jenn and I am completely obsessed with DIY.  

I look at things at the store and think about how I can make it better.  Recently it was time for me to update my front “porch” area.

I quote the word porch because it’s really a long shot for me to call it that.  My home is in an L shape with 2 big windows up front so I find it quite challenging to create a welcoming entrance.

Since I finally figured out how to add some decor to my front windows, (you can check that out here) I wanted a welcome sign to display.

I started with kind of a blank slate.  With just open space with the house numbers, I would usually add some flowers to a hanging vase and call it a day.  

But I just build this stair planter that added some much-needed color to my front area.  It was time for a little bit more.

I started scouring the internet, Home Goods, and my neighbor’s front porches trying to get some inspiration for a welcome sign (in a non-stalker way).  

I had seen a lot of welcome signs that was vertical that laid against the wall but I wanted something to hang so I decided to create something horizontal with a rustic farmhouse feel.

If you’d like the complete shopping list and dimensions you can get that by clicking the button below.

The supplies you’ll need are:

  • 2 cedar planks 5.5”x5’
  • W, E, L, C, M, E letters
  • Boxwood greenery
  • Wood glue
  • 3 straight brackets
  • Wood stain
  • Top coat
  • Saw
  • Drill
  • ½” drill bit
  • ¼” Rope
  • Sander
  • Hot glue gun
  • Hot glue
  • Drop cloth
  • Craft paint
  • Paintbrushes
  • Finishing nails
  • Hammer
  • Ear and eye protection
  • Mask

I started off with the cedar planks.  I love working with them because they’re cheap and you have an instant rustic feel.  The ones I use are fencing planks and they’re about $2 each.

Now I needed to cut the wood down to size.  I laid the letters out on the wood. I wanted about 3 inches on each end.  I cut the boards to size and started securing the 2 boards together.

Since the letters that I’m using are about the same size as the wood I needed to make the wood bigger so I glued the pieces together and then secured them with brackets on the back to really make sure they’re held together.

Just add a bead of wood glue to the top of one of the boards and then place the other on top.  Lay the wood down and screw in the brackets.

I allowed the wood to dry for about 30 minutes.

Once the glue had a chance to dry, it was time to stain.  I wanted a dramatic look so I used the espresso stain color.  I like to let the stain dry overnight.

While the stain is drying it’s time to prepare the letters.  I purchased these letters from Michael’s they’re the 5.5″ MDF letters.  They’re about $1.50 each.

To give the aged look I was going for I painted the letters with a dark blue color, allowed that to dry for about an hour and then went over the letters again with white. I then allowed the letters to dry overnight.

I used the same technique before in another sign I built here.

Now that the wood and letters are dry it’s time for the fun part, assembly.

Start off by placing the letters where you want them on the boards giving a 1-inch gap between each letter.  Make sure you leave enough room to add your O. I left a 6-inch gap in that space.

Once you’re happy with the placement of the letters add some wood glue to the back of your letters and then secure them with some 1-inch finishing nails.  I nailed 2 nails into each letter.

Then I wanted to give the sign an even more aged looks so I took my sander to the board and letters.  Be careful with this step because you can take a lot off quick.

Once you get your desired look it’s time to plug in your hot glue gun to start building your O.

I purchased 2 boxwood greenery pic’s from Michaels for $1.50 each.  This gave me enough greenery to use to make a nice full O.

I took the pic apart and used 2 stems at a time.  I would add a little hot glue to the board and then place the greenery.

I’d hold it there for a few seconds and then add a little more hot glue. I continued this process until the O was complete.

Now it’s time to drill 2 holes so you can hang your sign.  I drilled the 2 holes with a ½” drill bit. Then I added the ¼” rope.  

I cut the piece about 6 inches longer than I wanted it so I could have enough space to tie the knots.

For extra security, I tied 2 knots.  One on the front of the sign and on the back of the sign.  I did that on both sides so I knew it wasn’t going anywhere.

I finished off by applying a coat of top coat to the sign.  Since I was using MDF letters and hot glue I didn’t want the weather to destroy my sign so I thought this step was necessary for longevity.

I allow the sign to dry for about an hour and then hung it up.

What do you think?

All in all, I was really happy with how this turned out.  If you are new to DIY and are wanting to get your “hands dirty” then I think this is a perfect project to start.  

You don’t need to buy a ton of weird tools or supplies. Everything you need you will find at any big box store (or even Amazon).

Since I owned most of the supplies this project cost me under $20 to make.

If you’d like to make this yourself, I created a checklist you can follow that includes the shopping list, cut list, exact dimensions, and the steps to take to make this sign yourself.

Click here to subscribe

I want to thank you so much for hanging out with me, I hope you enjoyed this project as much as I did.

About Jenn: Jenn is a mother of 2 daughters and a wife of a very patient man.  She loves to build furniture, create home decor, and develop creative ways to organize different areas of her house.  When she isn’t crafting up her newest blog post at Home by Jenn she is enjoying the outdoors with her family and training for the next marathon.  You can learn more about her at HomebyJenn.com.