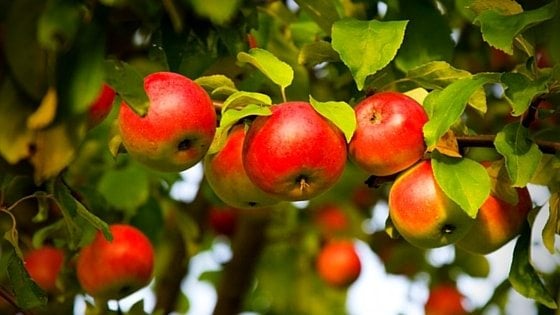
Ah, the mighty green bean.
It’s one of the quickest – and most prolifically – growing vegetables you will find. Although green beans are packed with tons of health benefits, including fiber and plenty of vitamins and minerals, it’s easy to get sick of them over time.
Luckily, there are several methods of preserving green beans at home. You will not only be able to enjoy your green beans in the off-season, but you won’t feel guilty about not being able to eat them all up now, too.
Table of Contents (Quickly Jump To Information)
Freezing Green Beans
One of the most common methods of preserving green beans is to freeze them. In fact, frozen green beans are better for you than any other type of green beans (with the exception of raw beans, of course).
This is because freezing the beans helps to preserve their nutrition content even when they need to be stored for a long period of time.
To make sure you are storing highly nutritious beans, you need to blanch them first. This sounds complicated but is actually quite easy.
To blanch your beans, simply dunk them in boiling water. Let them boil for about three minutes, and then freeze them – this will ensure that they retain their color, texture, and vitamins after they have been frozen.
You can freeze your green beans after blanching by simply stashing them in freezer-safe containers. However, if you don’t want them to clump together, I recommend freezing them individually on a cookie sheet first. Once they have frozen (this will take about 12 hours) you can put the separate beans in a container and freeze in bulk.
Make Dilly Beans
Dilly beans, also known as pickled green beans, are delicious to eat fresh out of the jar. They can also be added to salads or stir-fries for a unique spin on a classic dish.
Dilly beans can be made out of yellow, purple, and of course, green varieties of beans. You can use sprigs of fresh dill or dried dill – whatever you have on hand will work.
Here’s a quick recipe for making dilly beans.
Sterilize your canning jars and leave them in hot water until you are ready to use them. Then, fill a water bath canner with water and bring it to a boil.
While you are doing this, you should wash and trim your beans. Pack them into pint jars. Then, add ⅓ tsp crushed red pepper, 12 tsp mustard seeds, and ½ tsp dill seeds. You can also add some garlic to taste.
Combine equal parts (5 cups of each is recommended) vinegar and water in a large saucepan. Once this has heated, add ½ cup of pickling salt. Once the mixture has been borough tot a mobile, you can pour the liquid over the beans, allowing half an inch of headspace to remain.
You will process the jars in a water bath canner for about 5 minutes. Remove the jars from the canner and allow them to cool for 24 hours.
Don’t want to go through the entire time-consuming process of water bath canning your green beans? Not a problem. You can just stick them in the refrigerator instead. Just make sure you let them sit for at least 24 hours so that they develop their full flavor first.
Ferment Your Green Beans
Fermenting green beans is a fantastic method of preserving green beans that will serve you well. Fermented green beans are rich in nutritious probiotics, and you really don’t need any fancy equipment to get started.
All you need to do is dissolve two teaspoons of non-iodized salt in three cups of filtered water. After washing your green beans, pack them into a canning jar. Make sure they are packed in tightly. Pour your brine over the top of the green beans, ensuring that they are totally covered.
Cover up the jar loosely with a lid, placing it on a tiny plate to catch the overflow. Leave the jar at room temperature for up to two days. After about 24 hours has gone by, you’ll notice that there are some bubbles in your jars. You might also notice a refreshing sour scent. This is a good sign that the beans are fermenting!
After the beans have begun to ferment, you can transfer the jar to your refrigerator. Generally, the door is the best spot as it will allow a bit of warmth to reach your beans.
Fermented beans are generally ready about one or two weeks after you make them. You can also store them for the long term – just make sure you move the jar to a cooler section of the refrigerator.
Dry Green Beans
You can easily dry green beans in order to preserve them without refrigeration or freezing. Also known as “leather britches” in the southern portions of the United States, dried green beans keep indefinitely and can be dehydrated easily.
In fact, when they are rehydrated, they taste not unlike canned or frozen green beans.
To dry your beans, start by washing them and snapping off the ends. You don’t have to blanch them before drying, but it does help retain their color. Otherwise, they will develop a darker color as they dry.
Using a large needle, like an embroidery needle, along with some unflavored dental floss, thread a green bean. You can do this by piecing it about one inch down from the end of the bean. You will make a strand of green beans, threading them on with about half an inch of space between each.
The goal here is to make it so that air can reach all the surfaces of every bean. When you reach the end of the string, remove the needle and tie a knot.
You will hang this bean strand somewhere in which you can get good air circulation on all sides. Once the beans are dry, they will have shrunk quite a bit. Their texture will be comparable to leather, a bit brittle in nature. Usually, it takes about a week for your beans to dry.
Once they’ve dried completely, you can put them in clean glass jars and stash them in a cool, dark place. To use them, you will need to pour hot water over them and allow them to soak. This will help them rehydrate and soften.
Make Bloody Mary Green Beans
Most Bloody Mary beverages have celery as the stirring mechanism. Switch things up with your green beans! You can easily make stirring sticks for your Bloody Mary with green beans.
To make Bloody Mary beans, you should trim and wash your beans. Place a teaspoon of celery and mustard seeds into a pint-sized canning jar along with a few black peppercorns. Once the spices are in the jar, add your beans. Layer them and then add a clove of garlic, a dash of chile pepper, and some fresh thyme.
Add more beans until they are all packed tightly together. Then, add a mixture of hot sauce, water, salt and vinegar to a stockpot. Bring it to a boil and then pour it over the beans. Leaving an inch of headspace, totally cover the beans.
Wipe the rim of your jar with a cloth to make sure there is no debris on the ring of the jar. Screw on your canning lids and store the jars in the refrigerator for two months. If you want longer storage, you can process the beans in a water bath canner for 10 minutes.
Canning Green Beans
Green beans are considered low acid vegetables, which means you must process them in a pressure canner if you do not add any vinegar. Water bath canning raw, unprocessed green beans is not safe, as the temperatures don’t get high enough to eliminate the likelihood of botulism contamination.
Luckily, canning green beans in a pressure canner is incredibly easy. You will need to wash and sterilize your jars and lids as you would if you were using a water bath canner.
While you are doing this, you can also be preparing your green beans they should be washed and trimmed so that they can fit into the jars.
Raw pack your string beans into hot jars, making sure you leave about an inch of shed space. If you want to add salt, you can, but this is not mandatory.
Boil several cups of water on the stove. Once it’s hot and boiling, you can ladle it over your beans, allowing for about one inch of headspace.
Once the jars are full and the lids are fastened securely, you can move them to the pressure canner. Once the canner is full, add more water until the jars are completely submerged.
Follow your canner’s specific instructions for how long can your green beans. Usually, you will need to clean them for 0 minutes at 10 lbs pressure. Depending on your altitude and the manufacturer of your canner, you may need to add more or less time.
Why Preserving Green Beans is the Way to Go
There’s no reason to throw out all of your extra green beans! Instead, consider one of these easy methods of preserving them. With a little bit of work now, you’ll be enjoying green beans all throughout the cold winter months.
After all, there’s nothing better than green bean casserole on Thanksgiving Day, is there?
Maat van Uitert is a backyard chicken and sustainable living expert. She is also the author of Chickens: Naturally Raising A Sustainable Flock, which was a best seller in it’s Amazon category. Maat has been featured on NBC, CBS, AOL Finance, Community Chickens, the Huffington Post, Chickens magazine, Backyard Poultry, and Countryside Magazine. She lives on her farm in Southeast Missouri with her husband, two children, and about a million chickens and ducks. You can follow Maat on Facebook here and Instagram here.