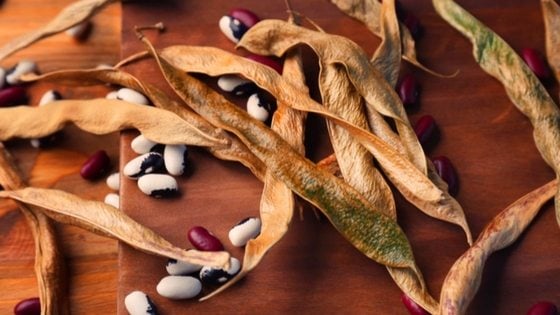
If you grow your own garlic – or simply love cooking with it so much that you always have tons on hand at home – you might be wondering how you can make it last longer.
There are several easy tips for storing garlic that can make it last longer, but preserving garlic is the best way to keep it tasting fresh long after the harvest.
Here’s what you need to know.
Table of Contents (Quickly Jump To Information)
Harvesting and Storing Garlic
Raw garlic that has been dried can be stored for several months in a cool, dark environment. Otherwise, it will sprout quickly.
The best tips for storing and preserving garlic always start with the garlic that is the freshest and best for cooking. Look for heads of garlic – whether you are growing your own at home or buying at the store – that are full and have not yet sprouted.
Next, squeeze the garlic. If it’s soggy or soft at all, it’s no good – the same goes for its smell. A head of garlic should not smell sour, moldy, or mildewy at all. You might notice a few brown spots on the cloves. This isn’t a sign that your garlic is rotten but simply indicates when the garlic was harvested. These can be trimmed off after peeling.
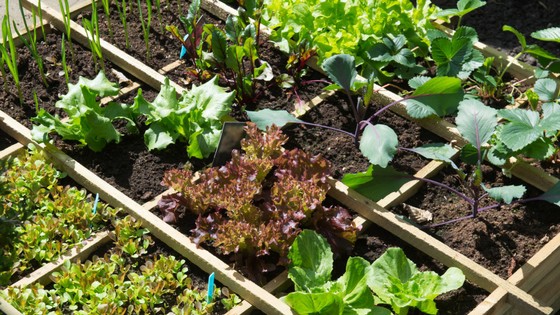
If you are harvesting garlic from your own garlic, you will want to follow a few simple tips. First, keep in mind your local climate and the time you planted garlic. Your ideal harvest date will vary depending on these factors.
However, a telltale sign that your garlic is ready to be harvested is that the bottom leaves on these talks will become brown – the upper leaves should still be green. Gently lift the garlic from the dirt using a tool instead of pulling on the stems. This will prevent damage to the stalks and bulbs.
Lightly rinse the soil from the bulbs. Allow the bulbs to cure after harvest so that they do not rot. To do this, find a well-ventilated location that is sheltered from direct sunlight and precipitation – a covered porch is ideal. You should then spread the garlic, with the leaves and roots intact, on newspapers or hang them in bundles of ten plants.
Within three weeks or less, the skins on the bulbs will become papery. At this time, they have been properly cured. The exact amount of time it will take for your bulbs to cure will vary depending on your environment. In a more humid environment, it may take a bit longer than three weeks. Some varieties of garlic, like elephant garlic, require more time for curing – up to six weeks in some cases.
Once you have cured your garlic, you can remove the outer layer of skin and slice off the roots and tops. Then, proceed to one of the preservation methods I’ve described below.
Peeling Garlic for Preservation
Many of the methods of preserving garlic that I’ll tell you about involve peeling it. This can be the most frustrating and time-consuming aspect of it, leading many people to question whether preserving garlic is worth the effort at all.
The mistake is in believing that you have to peel each and every clove of garlic by hand. To get it done faster just hit the clove with the flat side of a knife. Be careful not to smash your garlic, but doing this can help the peels fall right off.
Other home cooks prefer to place their garlic cloves in a glass jar with closed lids, and then shake vigorously until the skin is loosened. This can be highly effective, too – just make sure you don’t damage the cloves.
Some people even use microwaves to loosen up the skin before peeling. Whatever you choose to do, just make sure the cloves are still intact and not damaged in any way after peeling so that you can produce the best final product when all is said and done.
After you’ve peeled your garlic, go ahead and rinse the cloves. Then you can proceed with a preservation method as needed.
Preserving Garlic by Canning
One option for preserving garlic is to can it. It’s not recommended that you can garlic using a water bath canner because it is a low-acid vegetable that requires high temperatures in order to remove the risk of foodborne illness.
However, while you can safely can garlic using a pressure canner, you are likely going to find that the taste and texture are off. Pressure canners heat food at much higher temperatures, which causes the garlic to lose its flavor and become somewhat soggy. As a result, there are no formal processing times when it comes to canning garlic.
You can, however, simply store canned garlic in the refrigerator. Here, the garlic can stay fresh for up to a year (but more often just a few months or so). This method is the easiest way to store garlic, but it takes up a lot of space. If you want to preserve your garlic without the need for refrigeration, you will need to use another method.
Otherwise, you can submerge peeled cloves in undiluted vinegar or wine and stash them in the fridge. The vinegar or wine will provide an acidic environment so that bacteria cannot grow. Red wine, dry white wine, or wine vinegars are the best for this application – balsamic vinegar is safe, but it may impart a strong flavor on your garlic.
You can store your garlic for roughly four months in this way – storing it longer won’t make you sick, but mold can develop around the ring of the jar and you may notice a change in flavors. Do not store your garlic at room temperature, even if you’ve submerged it in wine or vinegar. It will rapidly mold.
If you’d like, you can also add ingredients like herbs to the mixture. This is simply a matter of taste and won’t impact the safety of your finished product.
You might notice that your garlic turns blue after being submerged in vinegar. This is nothing to worry about- the garlic is still safe to eat. This happens because garlic contains anthocyanins, which are water-soluble pigments that turn blue in acidic environments. The color change is more likely to happen when you harvest and preserve immature garlic.
Preserving Garlic in Cold Storage
If you have a storage area that will allow you to store garlic at temperatures of around 32 degrees, then you’re in luck – you can easily store soft neck garlic for up to nine months at these temperatures. Hardneck garlic will store for six months. As long as you keep the garlic in a well-ventilated place that is cool and dark, you will not have any problems storing cloves.
After some time, the cloves may begin to shrivel or sprout. While it will still be safe to eat, it won’t be at the top quality. If you are keeping garlic at ambient temperatures of about 68 to 75 degrees Fahrenheit (room temperature) it will last about one or two months.
Preserving Garlic by Freezing
Garlic can be prepared for a number of ways by freezing.
The first requires you to first chop your garlic into fine pieces. Then, you can wrap it in a plastic freezer bag and freeze it. You can just break off the amount you need every time you want to use it.
You can also place full garlic bulbs or cloves, either peeled or unpeeled, in a freezer bag or container. Remove entire cloves as needed.
The final way to freeze garlic is to peel the cloves and then puree them with oil in a blender at a ratio of one part garlic to two parts oil. Put the mixture in an airtight container, allowing for about an inch of headspace.
This mixture needs to be frozen immediately -since the garlic is already low-acid and then you are removing air (by mixing it with oil), you have a perfect environment for bacteria to grow.
Preserving Garlic by Submerging it in Oil
Garlic-infused oil is a popular way to preserve garlic and is perfect for self-proclaimed foodies. However, you need to be careful when preserving garlic in this way, for the reasons mentioned in the above tips – garlic, when submerged in oil, provides the perfect environment for bacteria to grow and produce toxins.
If you preserve garlic in oil, follow the steps listed above by pureeing garlic and mixing it with the oil of your choice. You can also use dehydrated garlic in oil, but you need to make sure all the moisture has been removed and that no moisture is added later on.
If you’ve ever bought garlic in oil products at the store, you might be wondering how those products remain shelf-stable. Simply put, commercial garlic in oil products are prepared under strict guidelines and contain citric acid to increase the acidity of the mixture.
You can acidify your own garlic in vinegar, but it’s a long, time-consuming process (it can take a week or more for the garlic to fully acidify). As a result, this is not a method of preserving garlic that’s recommended for home food preservationists.
Preserving Garlic by Dehydration
You can also dehydrate garlic. This is a popular method of preserving garlic for people who don’t have a great environment for storing garlic but also don’t have the freezer space necessary to store it in that way.
Start by selecting firm, fresh cloves without any bruises. Peel the cloves after separating them. Then, cut them in half lengthwise. You can then dehydrate using a food dehydrator or you can dehydrate in an oven.
Usually, you will need to dehydrate your garlic at about 140 degrees for two hours before switching to 130 degrees for another four to six hours. Upon removing your garlic, you should find that it is somewhat crisp – not pliable, and breaking when bent. You can pack the garlic in an airtight container and store it at room temperature. It can also be frozen.
Some people even make garlic salt with their dehydrated garlic. To do this, you will simply need to process your garlic in a food processor and then add salt at a ratio of four parts salt to one part garlic powder. Blend it for two seconds.
Maat van Uitert is a backyard chicken and sustainable living expert. She is also the author of Chickens: Naturally Raising A Sustainable Flock, which was a best seller in it’s Amazon category. Maat has been featured on NBC, CBS, AOL Finance, Community Chickens, the Huffington Post, Chickens magazine, Backyard Poultry, and Countryside Magazine. She lives on her farm in Southeast Missouri with her husband, two children, and about a million chickens and ducks. You can follow Maat on Facebook here and Instagram here.