Today I’m going to share a quick homemade ice cream recipe with you that I’m sure you’ll love!
This homemade ice cream recipe is the perfect activity for kids because you make the ice cream in a bag that they get to throw around.
This was my FAVORITE thing to do as a kid! My brother and I loved making homemade ice cream in a bag because we got to play catch with our ice cream! This ice cream is SOOO fun to make and it is super simple too! You mix the ingredients together and then toss a bag around for 20 minutes. It’s great for a game of hot potato or catch and you get ice cream out of it too!
Here’s the recipe:
Ingredients
- 1 heaping T of instant pudding (in the flavor of your choice)
- 1 t vanilla
- 1/4 c of sugar
- 3/4 c. cream
- 1 cup milk
- 2 c rock salt
- 4 cups ice
You’ll also need 2 quart sized Ziploc bags, 2 gallon sized Ziploc bags, duct tape, newspaper, and some plastic grocery bags.
Instructions
In one of your quart sized Ziploc bags mix together the pudding mix, vanilla, and sugar.
You can choose the pudding mix of your choice! You can even experiment and mix flavors together. I’m dying to try caramel and chocolate mixed together. If you’re doing two different flavors just do a 1 ½ teaspoons of each flavor.
Close the bag (make sure it is closed tight!) and squish the ingredients together.
Next add cream and milk into the same Ziploc bag and then squish all of the ingredients together again.
Place your quart sized bag into another quart sized bag (the extra bags are to stop the ingredients from leaking all over. If your kids are rough with this kind of stuff, add extra bags for more protection)
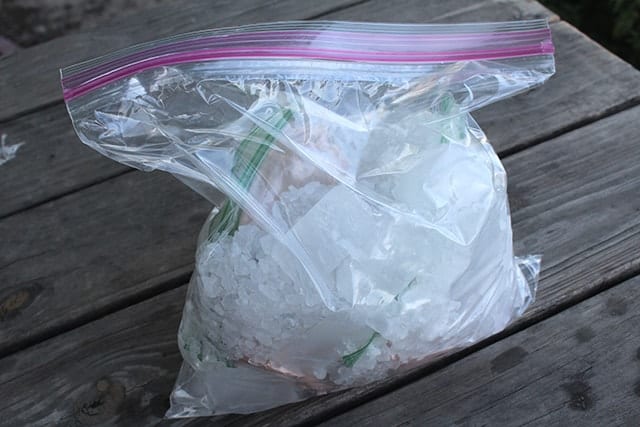
Place your bags inside of a gallon sized Ziploc bag. Place 2 cups of rock salt and 4 cups of ice in the gallon sized bag, and spread equally on either side of your quart sized bags.
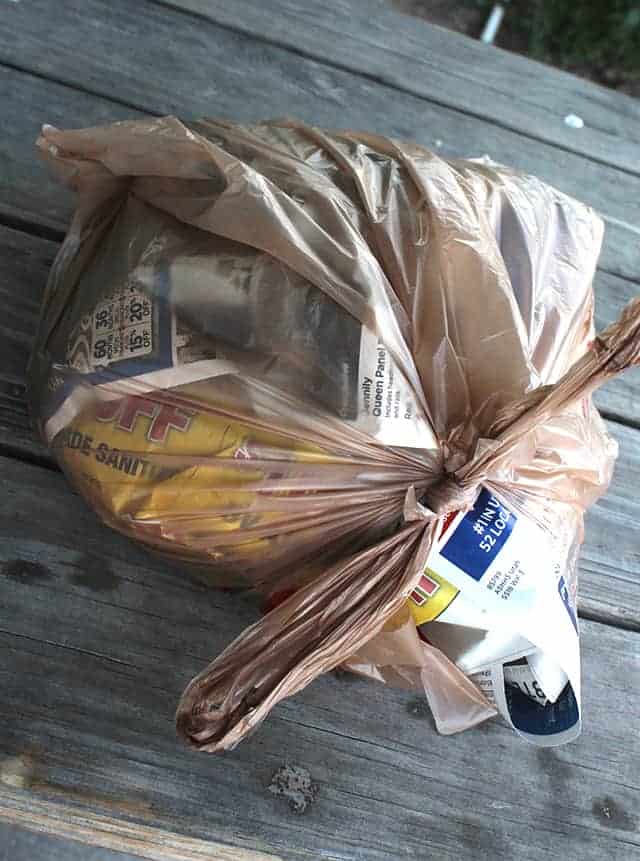
Place this bag into another gallon sized bag and begin to wrap with newspaper. I wrap it with at least 5 layers of newspaper and then tape it all together with duct tape. Then I wrap a couple grocery bags around the outside for extra protection and tape them down with duct tape.
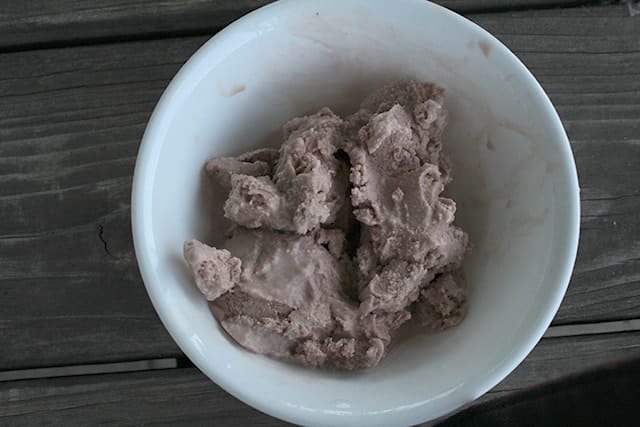
Then comes the fun part! Toss the bag for about 15-20 minutes. After tossing for 20 minutes your ice cream will be ready! If you unwrap it and it isn’t quite done, just wrap it up again and keep tossing it!
Before you open the last bag that has the ice cream in it, I recommend that you gently wash off the bag with cold water or a wet rag. This gets off any of the rock salt that might have been on the bag which prevents you from having salty ice cream!
I hope you enjoyed this quick and easy recipe! What flavor of ice cream are you going to try next?
Homemade Ice Cream in a Bag
Make your own delicious homemade ice cream using ziploc bags!
- 1 heaping tbsp of instant pudding (in the flavor of your choice)
- 1 teaspoon vanilla
- 1/4 cup sugar
- 3/4 cup heavy cream
- 1 cup milk
- 2 cups rock salt
- 4 cups ice
- You’ll need 2 quart sized Ziploc bags, 2 gallon sized Ziploc bags, duct tape, newspaper, and some plastic grocery bags.
- In one of your quart sized Ziploc bags mix together pudding mix, vanilla, and sugar.
- Close the bag (make sure it is closed tight!) and squish the ingredients together.
- Next add cream and milk into the same ziploc bag and then squish all of the ingredients together again.
- Place your quart sized bag into another quart sized bag (the extra bags are to stop the ingredients from leaking all over. If your kids are rough with this kind of stuff, add extra bags and newspaper for more protection)
- Place bags inside of a gallon sized Ziploc bag. Place 2 cups of rock salt and 4 cups of ice in the gallon sized bag and spread equally on either side of your quart sized bags.
- Place this bag into another gallon sized bag and begin to wrap with newspaper. I wrap it with at least 5 layers of newspaper and then tape it all together with duct tape. Then I wrap a couple grocery bags around the outside for extra protection and tape them down with duct tape.
- Toss the bag around for about 15-20 minutes.
- Open the bags and serve the ice cream! Before opening the last bag (the one with the ice cream in it) wash the bag off with water or wipe it down with a rag. This prevents any of the rock salt from getting into your ice cream.