From time-to-time I come across a product that’s so great I want to share it with you. The WonderMix is one of those products.

I love making bread, and it’s definitely a skill I need to work on, but sometimes having to knead and mix is such a drag. 

With its 900-watt motor, this machine can mix and knead up to 8 loaves of bread at the same time in its 22 cup (5.5 qt) BPA-free mixing bowl!

Bread making just got a whole lot easier.

There’s more features, such as:

3 Speeds + Pulse
Heavy Duty Tru-Mix Dough Hook
Convenient bowl handle
Cord Storage Compartment
No Walking Base
Overload Protection
Quiet Operation
Dishwasher Safe Bowl
Safety Bowl Locking System
Double Beating Whisks
Designed, Engineered & Licensed in Germany

WonderMix has been so generous, and is offering the chance for one lucky entrant to win a WonderMix package valued at $619.80! You don’t want to miss this contest!


Ready to Win a WonderMix mixer and Meat Grinder Attachment?

I know you are!

Use the Rafflecopter widget below. Sign in with your Facebook account or your email address and follow the instructions in the widget. It’s that easy!

This giveaway is open to US residents only and entrants must be 18 years or older to qualify. Giveaway runs from March 18th-24th. Winner will be chosen randomly, notified by email and given 24 hours to respond before another name is drawn.

wondermix-giveaway


a Rafflecopter giveaway

This isn’t your grandmother’s jam.

Bold statement, I know.

Jam is a big-time favorite in my house, and we can go through a jar in a day, no problem.

I can pretty much eat it with anything, from bread to crackers, and as an accompaniment to cheese. I’m truly addicted to pairing it with runny cheeses.

jamThe problem with this is traditional jams are high in sugar. Once upon a time, the sugar in traditional jam didn’t concern me, but I’ve found as I get older, I’m less interested in eating sugar, and more interested in eating healthy.

I’ve started cutting back on refined sugar as I’ve started to approach middle age. Not good for my already-ailing teeth, not good for my health. There had to be another solution.

When looking for a more whole foods-type recipe with some nutritional punch, I began researching alternatives to traditional jam, which included sugar-free jam recipes. I wanted to steer clear of alternative sweeteners, and wanted to sweeten my jam (if necessary) with something natural.

Honey is pretty natural, and with it’s antibacterial properties, it seemed like a good fit. Honey is also one of those ingredients that subtly lends its flavor to recipes without being overbearing. 

However, without sugar and without pectin (I’m not a fan of pectin in jam), I needed something that would gel my jam so it wasn’t runny.

I was familiar with chia as a natural cleanser, and knew about its health benefits. I thought their gelling property might be a good substitute for sugar. Turns out, I was right! 

The nutritional benefits of chia seeds take jam to a whole new level.

Why Chia?

IMG1823
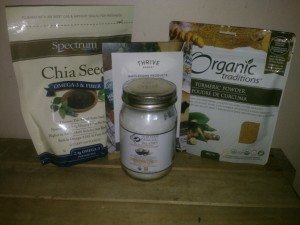
I hadn’t really tried chia until I joined Thrive Market. One of the first things I ordered were chia seeds. It was time to give them a whirl, and since I can’t find them in my area, I needed to buy them online. You can buy your chia seeds here (affiliate link).

I decided to try them simply because I heard so much about the nutritional benefits of chia. Turns out they also make a pretty good jam!

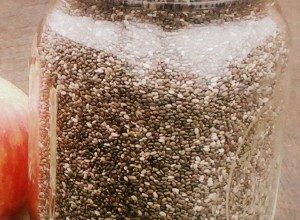
Chia seeds naturally gel. Some people reportedly use them as a cleanser for their intestinal system, and I know of some people who feed them to their livestock to promote healthy guts, since the nutritional benefits of chia seeds also keep livestock healthy.

This gelling property also turns out to be pretty handy for jam – no need to use pectin or sugar to gel your jam.

Boom! Jam just got a whole lot healthier.


chia seeds
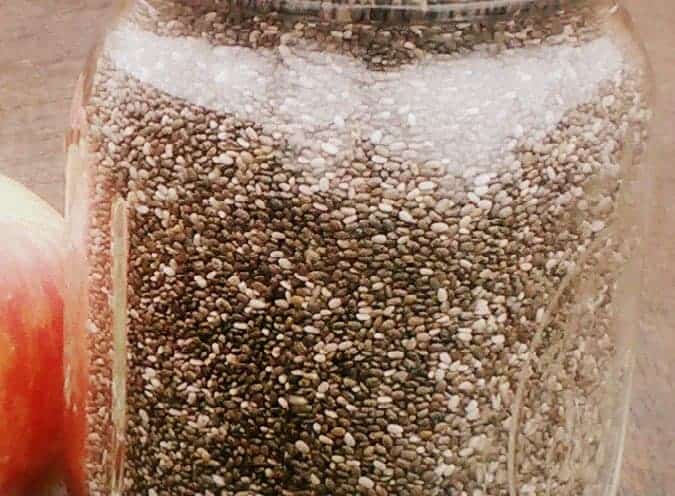
What are chia seeds?

Chia seeds are the tiny black, white, or brown seeds from the chia plant (a member of the mint family), a native of Mexico and Guatemala. Chia seeds are traditionally consumed by cultures in Mexico, Guatemala, Paraguay, Boliva, and Argentina for their health benefits.

They’ve been consumed by humans for centuries, and there’s evidence to suggest it was grown as a sort of maize, and was a staple of Aztec diets.


What are the nutritional benefits of chia seeds? 

High in omega-3 fats, their texture is similar to poppy seeds, and in fact, you can replace your poppy seeds with chia. The nutritional benefits of chia seeds is pretty solid: chia seeds contain a wealth of our daily vitamin B (thiamine and niacin) requirements, and are a rich source of our daily requirements of calcium, iron, magnesium, manganese, phosphorus, and zinc.

Unlike flax, chia seeds can be eaten whole or ground up, and are also an excellent source of fiber. They reportedly offer 5 grams of fiber per tablespoon.

They’re like little tiny nutritional powerhouses.

How to use chia seeds

IMG1890-1You can add chia seeds to anything if you want to incorporate them into your diet. For example, you can add them to your favorite salad dressing or use them in place of poppy seeds in lemon poppy seed muffins. Or in my case, to jam!

If you want to try something new, you can mix 1 tablespoon of chia with 6 tablespoons of water to make chia gel. Replace one egg with one tablespoon of chia gel in your recipe.

Add them to granola for an omega-3 and fiber punch. The possibilities are endless.

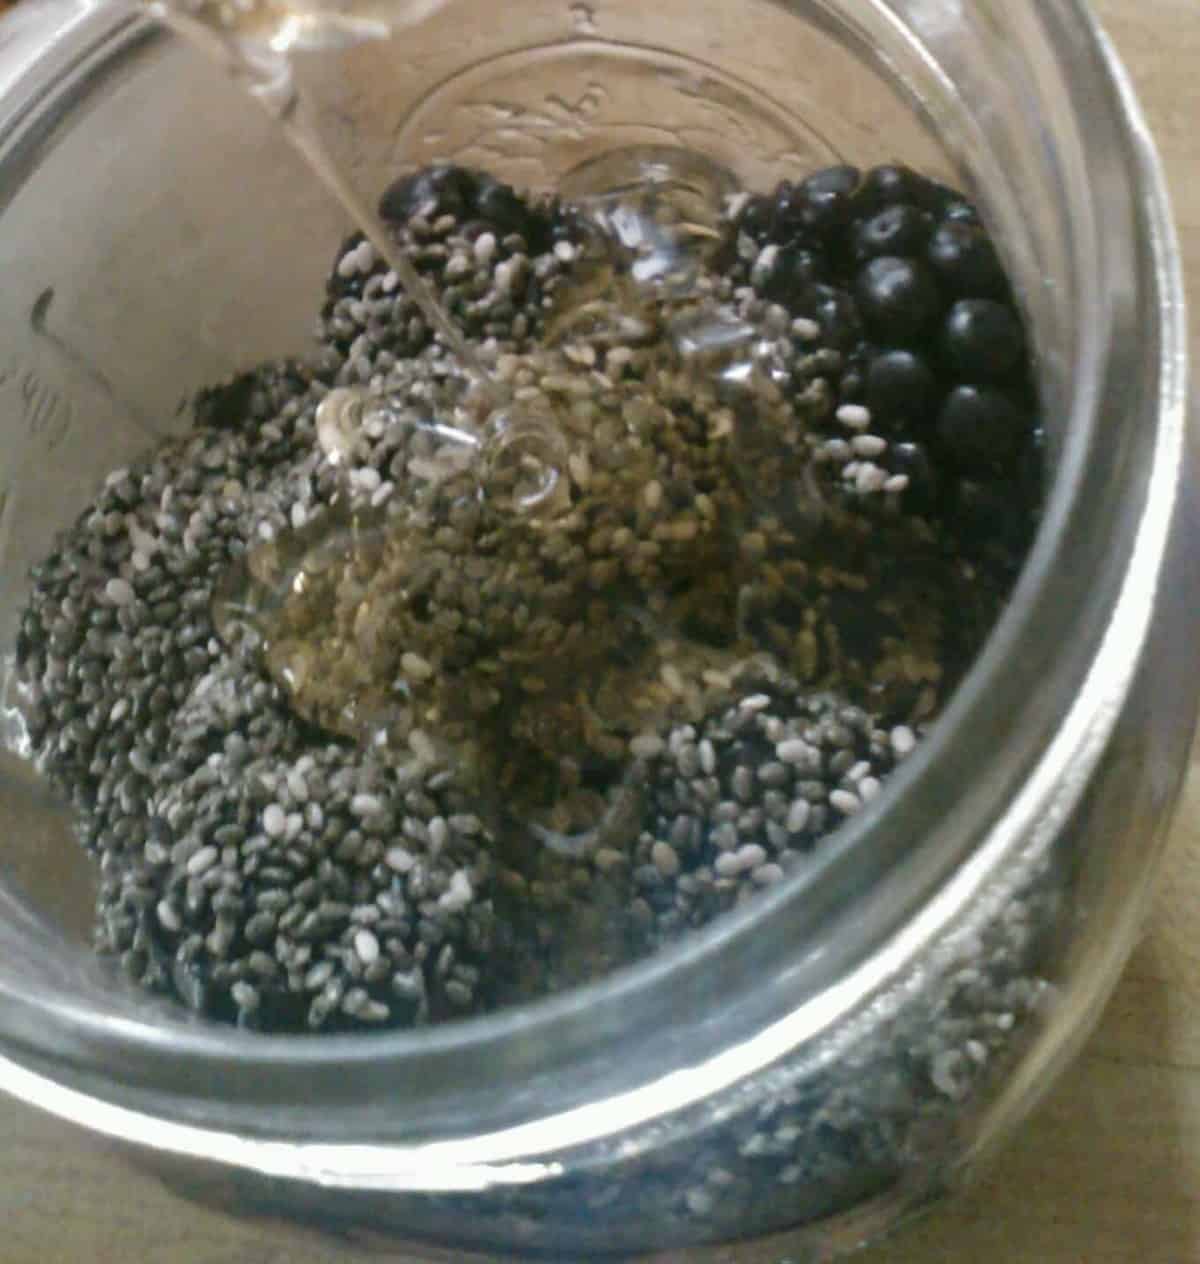
Adding it to my jam was easy, and when mixed with the water, they gelled as promised. The gel wasn’t gooey, and I couldn’t tell they had gelled, except it changed the texture of the jam so it was less runny. When heated, they softened, and were easy to chew.

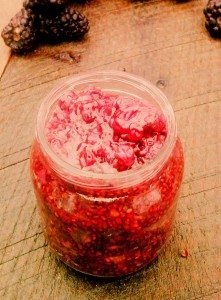
Making this blackberry jam with chia seeds was easy, and instead of reducing the berries for a while in the pot, I was able to just blend them with a fork.

The best part of this jam is that it’s kid friendly, while still being healthy! 

Use this jam in place of traditional jam, as an accompaniment with fruit, and even, yes, with runny cheeses.

How to make Blackberry Chia Seed Jam

This recipe is simpler and takes less time than traditional jams.


Making Blackberry Chia Jam is super simple.

First, I combined all ingredients in a mason jar, then stirred with a fork until combined.

CYMERA_20150312_181257

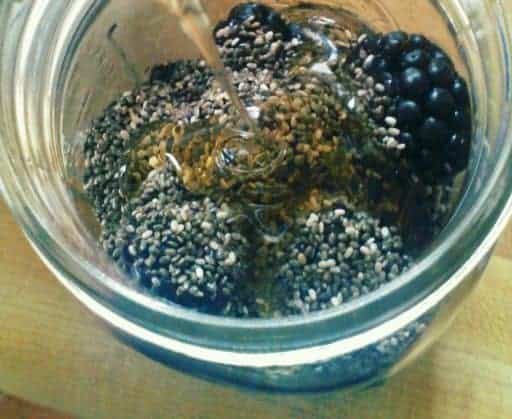
The combination of the berries, honey, seeds, and water made a thin paste. It smelled really fresh!

I then transferred the mixture a pot, and heated over medium heat until the jam started to bubble.

I let it simmer for a couple minutes, until the blackberries and the chia started to break down a little.

Once it broke down a little, I transferred to a clean mason jar and let it sit for an hour until it was cool.

jam

That’s it!

Blackberry Chia Seed Jam isn’t as sweet as traditional jam, but it tastes lighter and fresher. 

How will you incorporate chia into your diet? I’m curious to know! Comment below or shoot me an email!

Learning how to grow wheat is something every aspiring homesteader should do. 

And it’s easy enough to do!

One big step towards self-sufficiency is producing your own grain, so it’s at the top of my to do list this spring, and now that the weather is finally warming up, I can start spring seeding.

In particular, I’m focusing on wheat, both for bread and for fodder. Wheat is commonly grown in my area (in fact, my house is surrounded by wheat fields), so wheat seed is easily accessible.

IMG1282
Sprouted hard red winter wheat seed

Uses for wheat

One use for wheat on the homestead, obviously, is that it can be ground and baked into bread. Wheat seed also makes an excellent fodder, and grows easily in a container. Add a tablespoon of bleach to a gallon of water before soaking your fodder seeds to reduce mold.

I’m also testing out wheat grass as pasture for horses this year. This wheat won’t be grown for harvest, but to supplement my horses’ diet (the main reason for this is for the added protein and because last year I was talked into disking a pasture and now nothing grows but weeds. Since wheat grows so well here, I thought I’d give it a shot).

Super important: if you’re using wheat seed for fodder, be sure to get organic seed. Seed wheat is tested and sprayed with chemicals. You don’t want your livestock eating it.

Different types of wheat

This is an important topic.

There’s different types of wheat, but the two main ones you need to know about when learning how to grow wheat are spring wheat and winter wheat.

Winter wheat is planted in late fall, before the first frost date. It starts growing in fall, stays green all winter (which makes it great to plant on your lawn – no dreary brown winter grass), and then really takes off in the spring. It’s usually harvested in June. Winter wheat requires a freezing period before it will produce seeds, so don’t try planting it in spring – you won’t get seeds. One example is hard red winter wheat (what I plant).

BreadSpring wheat is planted in spring, and is harvested in late summer. It’s planted after the last frost date. Like winter wheat, once planted, it pretty much takes care of itself until harvest.

For bread, sow hard red winter wheat or hard red spring wheat. For pasta, you’ll want to plant durum wheat.

You can buy organic, non-GMO wheat seed from various sellers, or you can buy wheat seed locally. If you buy non-organic seed, realize the seed will be sprayed with chemicals.

Be sure to buy seed that’s been tested for germination. Both organic sellers and non-organic sellers alike test their seed for germination. It will save you a lot of hassle and time. No one wants to plant a garden that doesn’t grow. Just ask your vendor if the seed has been tested for germination quality.

Breaking ground and adding compost

Growing your own grains is fairly easy. When we planted wheat last fall, I had to do little more than broadcast them and cover. My husband has over 20 years of experience sowing and harvesting wheat on a large scale, so I’ve relied on him whenever I’ve had a question about how to grow wheat.

photo (26)
The wheat fields around the homestead

The best thing about growing your own grain is it doesn’t require much space. A 20′ x 50′ space is enough to produce a year’s worth of wheat for my family. I was able to break ground and add compost in little more than an hour.

The photos you see of endless wheat fields are photos of commercial operations. For the self-sufficient homesteader who wants to learn how to grow wheat for self-sufficiency, large acreage isn’t necessary.

I tilled the dirt a little so it’s not too hard to establish roots, then added rotted manure to the top. To the bed I created, I added about 4″ of rotted manure. You can add compost, I chose rotted manure because I have an abundance thanks to my horses.

Wheat likes a fairly neutral pH, about 6.4, and I already had our soil tested, so I know my soil’s pH is perfect for wheat.

Protecting your wheat from critters

I learned fairly quick, when I started learning how to grow wheat, that it’s necessary to cover your wheat seed to protect it from hungry critters. I’ve had more than one bed devastated by chickens and hungry squirrels, so this year I’m mulching with old hay. As the wheat grows, it will grow through the hay.

If you drill in your wheat seed, this step is not as important, but I would mulch anyway to keep down weeds.

Another option is to build a temporary hoop house over your seed. This is particularly a good idea if you live in an area that might have a frost after the frost date.

Wheat grass
Young wheat grass

Watering and growing

In my opinion, wheat pretty much takes care of itself, but in the hot, dry summer, supplementing rainfall with water is a good idea, and since the area isn’t too big, it’s easy enough to do.

The compost or rotten manure you incorporated into your bed is enough fertilizer. You don’t want to add any more and alter your pH.

Allow your wheat to grow until it dries out, and the heads start to droop, and it’s time to harvest.

WheatGrowing more than you need

If you’re a savvy marketer, one way to bring in extra income for your homestead is to grow more wheat than you need, and sell your extra crop. Since it takes a fairly small area to produce a year’s worth of wheat, this is realistic for any homesteader.

You will have to harvest and thresh it yourself, but especially if you grow organic, non-GMO wheat, you will have a ready market.

In my next post, I’ll cover how to harvest and thresh wheat!

To read more in depth about how to grow wheat, check out The University of Missouri Crop Resource Guide.

The chicken coop is part of the proverbial hearth and home of our homestead.

The chicken coop is where a lot of the self-sufficiency of any homestead comes from, since the chickens provide and help prepare so much of our harvest. From producing eggs and compost to helping turn over dirt for spring planting, chickens touch on almost every aspect of homestead life. Continue reading “16 Sustainable Ways to Upgrade Your Chicken Coop”

Need to reconnect with your husband? It happens to us all.

Days at home become routine, and as we plod through our day-to-day, we start to neglect those smaller parts of our relationships until the edges become frayed. It becomes necessary to refresh ourselves, and a great way to do that is to reconnect with your husband.

Nothing breathes new life into your soul like a little romance, right? Strengthening your relationship means strengthening yourself.

Most of these 30+ date ideas are free, and you can start using them today

(Just FYI, I’ve put together a bonus guide at the end of the post with even more detailed ideas): Continue reading “30+ Frugal Ways to Reconnect with your Husband that You Can Start Using Today”

Whole food with flavor is what flies around here.

If it’s sweet, it’s even more popular. If it’s something I can grow or produce on the homestead, I’m golden.

That’s why this recipe for sweet potatoes with homemade butter and brown sugar is a go-to recipe we use time and again. It’s easily adjusted for different diets, and if you don’t want to use brown sugar, you can easily substitute a sweetener that works with your diet.

This recipe is gluten-free also! Continue reading “Southern-Style Sweet Potatoes – Whole Food Recipe”