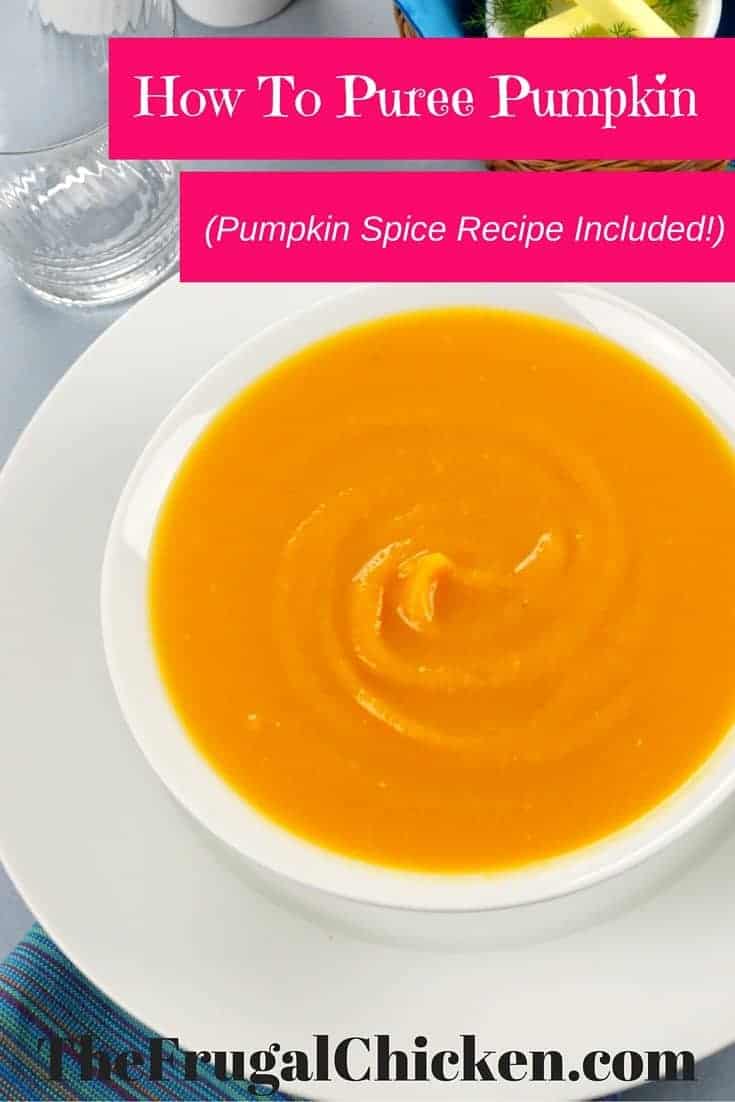
Now is the time of year that I get superpsyched – time to make pumpkin puree!

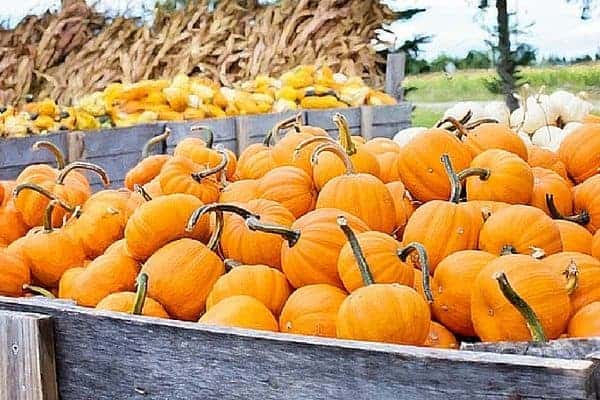
I get excited for the post-Halloween time not just because I can make pumpkin puree, but because those round orange squash become super cheap at the store – which means I can feed pumpkin to my chickens and pigs for a very low price.

But back to pumpkin puree (which you can feed to chickens too, by the way).

Pumpkin puree is really easy to make, and you won’t believe how much better it tastes than the stuff in the cans. 

And of course, as homesteaders, we like buying items we can use in multiple ways, and pumpkin is no different. 

Grab some pumpkin and let's make pumpkin puree! It's a versatile pantry staple, and I've even thrown in a pumpkin spice recipe to get you started. From FrugalChicken

In addition to pumpkin puree, you’ll also have seeds for toasting and the remaining guts to feed your chickens.

This method for making pumpkin puree works also for other squashes, like Hubbard, you name it, so feel free to become a puree making fool this fall!

So, let’s look at how to make pumpkin puree for pies, soups, or whatever your imagination can think of!

Grab some pumpkin and let's make pumpkin puree! It's a versatile pantry staple, and I've even thrown in a pumpkin spice recipe to get you started. From FrugalChicken

How to make pumpkin puree

For this recipe, we’ll just use sugar pumpkins (also called a pie pumpkins) – they’re the most commonly used for homemade pumpkin puree, and easily found at any market in the fall.

They’re called sugar pumpkins for a reason: They’re the best for baking and making pumpkin puree

Typically, they’re 6-8 inches in diameter, which is an easy size to lift and cut up without getting too overwhelmed, and you can expect about 16 oz of pumpkin puree.

Preheat your oven to 350 degrees (as you know, food should not ever be put in a cold oven or on a cold pan if you plan to roast, so pre-heating is a very important step.)

Grab some pumpkin and let's make pumpkin puree! It's a versatile pantry staple, and I've even thrown in a pumpkin spice recipe to get you started. From FrugalChicken

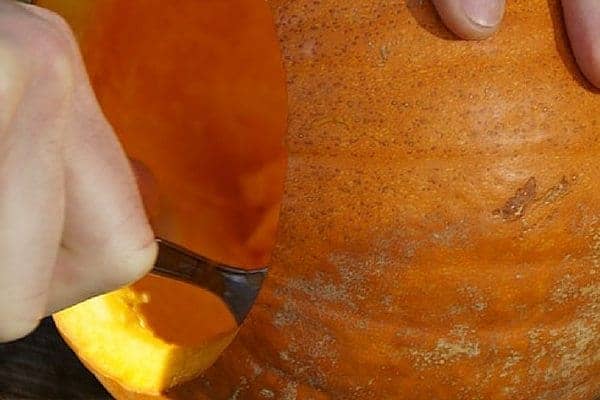
Remove the guts of the pumpkin, set aside to remove the seeds for roasting later.

Slice up your pumpkin into 1 inch size pieces. 

Grab some pumpkin and let's make pumpkin puree! It's a versatile pantry staple, and I've even thrown in a pumpkin spice recipe to get you started. From FrugalChicken

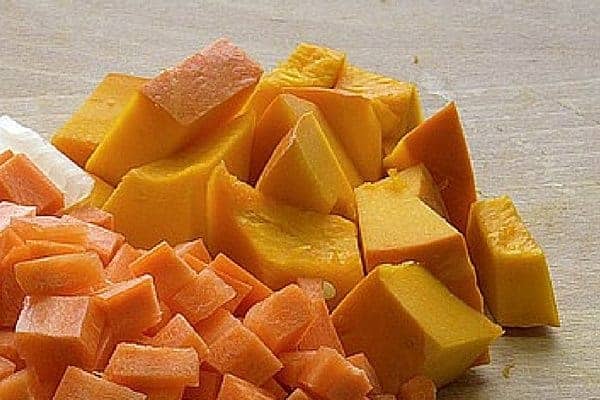
Place in a roasting pan that already has 1/2″ of water in it. The water is necessary to keep the pumpkin from burning.

Cook until done, which should be about 45 minutes. Pierce the pumpkin with a fork or knife to check if it’s done – if it slides right off, it’s ready!

Remove the pumpkin from the oven, and allow to cool.

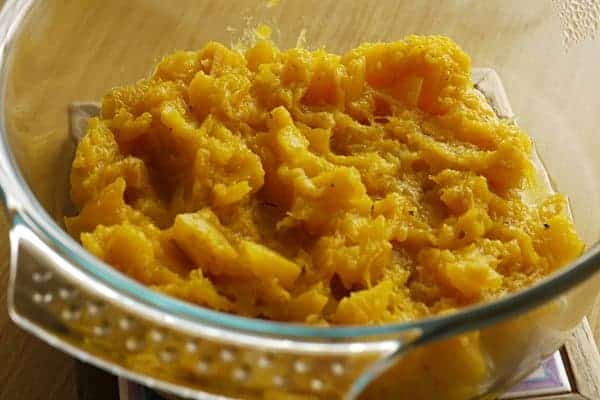
Once the pumpkin is cool, scoop the flesh away from the peel. (The pumpkin peel should be relatively soft, so feel free to give it to your animals, or compost).

Blend the remaining flesh in your blender until a puree is formed. 

Grab some pumpkin and let's make pumpkin puree! It's a versatile pantry staple, and I've even thrown in a pumpkin spice recipe to get you started. From FrugalChicken

You can use the puree right away in your favorite recipe, or store in the fridge for 2 days.

If you’re not going to use your puree right away, store it in the freezer.

You can also freeze enough pumpkin puree to last the year – just make sure to hit the sales after Halloween to grab pumpkin at a cheap price.

Now that we’ve made pumpkin puree…

Let’s talk about spices.

Making your own pumpkin pie spice is as simple as…well…making pumpkin puree.

Grab some pumpkin and let's make pumpkin puree! It's a versatile pantry staple, and I've even thrown in a pumpkin spice recipe to get you started. From FrugalChicken

Grab the following (if you’re not sure where to buy fresh spices, we’ll talk about that in a minute):

Homemade Pumpkin Pie Spice

1 tbsp + 1 tsp ground cinnamon

2 tsp ground ginger

1/2 tsp all spice

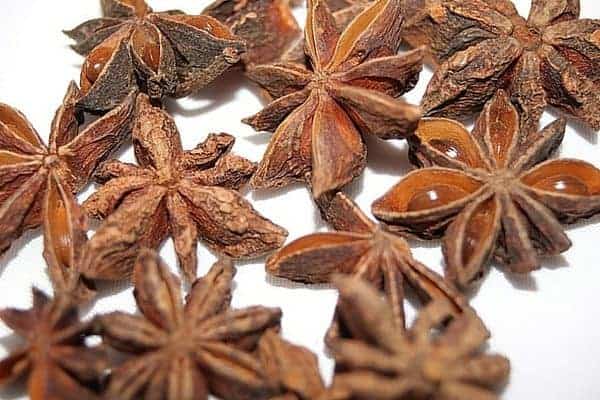
1 star anise pod, ground

1/2 tsp nutmeg

Combine in a mason jar to store, or just immediately with any recipe using your pumpkin puree.

Now that wasn’t hard, was it?

Okay, as promised, here’s where to buy your fresh spices:

I’d like to hear from you!

How do you think you’ll use pumpkin puree this season? How about the spice? Contact me at [email protected] or comment below!

If you’re interested in using essential oils with your chickens, you’ll want to tune into this episode of What The Cluck?! where we discuss just that.

In this episode of What The Cluck?! we talk about 4 essential oils you can use to raise a healthy chicken flock.

We also examine reasons to use essential oils over traditional Western medicine, as well as times when you might want to avoid using essential oils.

the better egg ad final

We also talk about specific recipes for making your own chicken first aid items to have on hand in case of an emergency.

If you’ve never considered using essential oils on your homestead, I hope this episode helps you begin or your essential oil journey with your chickens.

In this episode you will learn:

  • Which 4 essential oils you can use to improve the health of your chickens
  • Recipes for wound care and to improve skin issues
  • How to make homemade cleaners for your coop
  • How to give your chickens essential oils without purchasing them

Links I discuss in this podcast:

Chicken Farms Try Oregano As Antibiotic SubstituteThe New York Times

How To Make Home Cleaners With Essential Oils From Untrained Housewife

Antimicrobial activity of essential oils and five terpenoid compounds against Campylobacter jejuni in pure and mixed culture experiments. – Pub Med

Composition and antibacterial activity of the essential oils of four commercial grades of Omani luban, the oleo-gum resin of Boswellia sacra FLUECK. – Pub Med

Wound Care Ointment Using Frankincense Essential Oil From Timber Creek Farm

Where to Purchase Essential Oils Through Timber Creek Farm

Natural Fly Repellent You Can Make In Your Own Kitchen – FrugalChicken

FrugalChicken Instagram page

FrugalChicken Facebook group

Feeding Your Hens Right!

Additional Reading:

5 Ways to Use Coconut Oil

Raising Chickens: Your Top 10 Questions Answered!

I’d like to hear from you!

How do you use essential oils with your chickens? What would you like to learn about using essential oils with chickens? Email me at [email protected] or comment below!

Selective breeding is, in my opinion, the best way to create and maintain a self-sustaining chicken flock tailored to your own specific needs and purposes.

On our farm, I’ve devoted a lot of time and thought to the qualities we want in our breeding stock.

In this episode of What The Cluck?! we talk about how we began our chicken flock, how we selected our breeding stock, and the qualities we look for when selecting which roosters and hens to breed.

I hope it helps you create and maintain your own self-sustaining chicken flock.

In this episode you will learn:

  • How to begin a self-sustaining flock
  • How to choose breeding stock
  • How to decide which qualities to look for
  • When to breed and when not to breed

Links I discuss in this podcast:

FrugalChicken Instagram page

FrugalChicken Facebook group

Feeding Your Hens Right!

Additional reading: 

How to Hatch Chicken Eggs

10 Abnormal Chicken Eggs

Adding A Rooster To Your Flock: Care & Quirks

Create a self-sustaining chicken flock, tailored to your needs, through selective breeding. In this podcast, we talk about how to choose breeding stock and more. From FrugalChicken

I’d like to hear from you!

Are you trying to create and maintain a self-sustaining flock? What’s working for you? What isn’t? Email me at [email protected] or comment below!

Whether or not to let your chickens free range is one of those decisions every chicken owner needs to make.

Unfortunately, there’s no simple yes or no answer. In this episode of What The Cluck?! we look at reasons to let your hens free range, as well as potential problems and pitfalls of free ranging.

In this episode, you’ll learn:

    • Advantages and disadvantages of free ranging
    • How to decide if free ranging is right for your flock
    • Health factors you need to consider
    • Alternatives to free ranging

Links I discuss in this podcast:

Building Your Own Chicken Tractor

FrugalChicken Facebook Group

FrugalChicken Facebook Fan Page

FrugalChicken on Twitter

FrugalChicken on Instagram

Feeding Your Hens Right

Additional Resources:

Effects Of Vitamin D Deficiency In Chicken Embryos

So let’s get to it in this latest episode!

I’d love to hear from you!

I’d love to hear your thoughts on this episode. You can reach me always at [email protected] or by leaving a comment below.
If you like this episode, please feel free to share it on social media using the bar on your left.

the better egg ad final

Planting organic garlic is one of those autumn activities that can make you feel like a real homesteader.

During a time when most gardeners are shutting down their patches for the season, you can create a 4th season with organic garlic, and get a head start on next spring.

For years, I didn’t plant garlic. I didn’t see much point.

Organic garlic, especially in urban areas, is pretty cheap and pervasive. I had no trouble sourcing it (you can even get it shipped to you by Amazon.)

But there’s something about planting and harvesting your own organic garlic that screams independence.

Planting organic garlic is one of those things that makes you feel like a ''real" homesteader. Here's what you need to know to successfully plant organic garlic. From FrugalChicken

Maybe it’s because as homesteaders, we tend to have the gardening itch year round, and, with our autumn crop choices being fairly limited, planting garlic lets us continue to live self-sufficiently during even the coldest months.

And, as it turns out, planting organic garlic is also fairly simple.

So, let’s dive in to the basics!

Planting organic garlic is one of those things that makes you feel like a ''real" homesteader. Here's what you need to know to successfully plant organic garlic. From FrugalChicken

Sourcing Organic Garlic

There’s plenty of places to source your organic garlic for planting, but here’s a (short) list:


I’m sure there are others out there, but these are the only companies with which I have experience.

The number one thing when sourcing your organic garlic is to look for a reputable dealer (like those above) that will sell seed garlic that has a high likelihood of growing.

I’ve purchased seed garlic from big box stores, and there’s a measurable difference.

The garlic from the big box store was dry, brittle, and probably a few years old.

The garlic from a reputable source, however, was clearly harvested this year, robust, and could be used in cooking (a tell-tale sign of quality).

Since your organic seed garlic will be in the ground for a few months, you don’t want it rotting, and an inferior product has a higher likelihood of trouble.

You get the picture.
Do yourself a favor and go to the right source. You probably won’t even pay any more than you would at a big box store.

When to purchase your organic garlic

It’s never too early to get your order in for your garlic. Most companies don’t ship until late summer/early fall (another sign of quality).

Why?

Because they sell seed garlic from the same year’s crop, meaning you have to wait for the seed garlic to be ready.

To ensure you get the type of garlic you want (more on that later), getting your order in around July is a good idea.

They ship based on when your order was received, so if you wait until the last minute, you might be waiting in line.

Reputable organic garlic dealers will also send a set of planting instructions with the garlic, and might even have some sort of guarantee. 

When is the best time for planting garlic?

The ideal time for planting organic garlic is September and October, depending on your location. 

In the South (where we’re at), October is a perfect month. Up North, where October might mean snow and frost, September is a better option.

Planting well before the first frost date in your area will ensure your garlic is able to set roots before the winter freeze comes on.

Either way, planting your garlic in the fall for a summer harvest is best – a spring planting rarely yields satisfactory results.

How much organic garlic should I purchase?

Well, that depends on how much garlic you want to harvest. 

Bear in mind that each individual clove in a head of garlic will be planted and should grow into it’s own head. 

Generally speaking, 1 pound of seed garlic is enough for a 25 foot row.

So, to determine how much organic seed garlic to order for planting, guesstimate how much garlic you will use in the next year, then reverse engineer.

Bear in mind, also, that different types of garlic will yield different amounts.

Planting organic garlic is one of those things that makes you feel like a ''real" homesteader. Here's what you need to know to successfully plant organic garlic

One pound of Elephant garlic does NOT equal one pound of Siberian garlic in terms of the amount of organic garlic heads you will eventually harvest.

In one pound of Elephant garlic, you might only receive 10 cloves, while you might receive 50 cloves of Siberian garlic – so the amount of organic garlic you will harvest in spring will differ.

Something to keep in mind while gazing wistfully at those catalogues. 

Planting Organic Garlic

Once your organic garlic has arrived, you’ll want to plant it as soon as possible, when the seed garlic is freshest.

You want to ensure the garlic can establish itself after planting, and before winter sets in. 

When you’re ready for planting, separate the garlic into it’s cloves. 

(note: some organic garlic might already be separated. I learned this one the hard way after crushing a couple cloves when I wasn’t paying attention).

Leave the papery skins on! Don’t remove them – they provide a necessary barrier so the garlic doesn’t rot in the ground. 
If some skins are removed by accident, don’t sweat it, but don’t intentionally peel your garlic at all.

Untitled design (10)

Next, dig a trench about 4 inches deep – deep enough so you can plant your garlic 2 inches or so below the frost line. 

Where the frost line occurs will depend on your location. When in doubt, go for 4 inches, and be sure to pile straw on top of the planting location (more on that in a minute). 

Planting below the frost line is necessary to keep the organic garlic from dying off during the cold weather.

next…

Plant your organic garlic cloves pointy side up – the pointy side is what produces the green scapes, while the bottom is where the roots will shoot out from.

Planting organic garlic is one of those things that makes you feel like a ''real" homesteader. Here's what you need to know to successfully plant organic garlic

I like planting my garlic first, then going back to fill in the soil.

Once you have each clove buried, top with a 4 or so inches of straw or hay, and leave it there throughout the winter, adding as necessary.

The straw will act as an additional barrier against the cold, making sure your garlic cloves are in a great position to start growing bulbs.

When to harvest your organic garlic

Your garlic will be ready for harvest several months after planting, usually in July or August. 

The good news is that in the meantime, you will have other garlic goodness to harvest, such as early shoots and scapes.

When June rolls around, snap off any scapes to harvest them – this will help the bulbs will grow to maturity before you harvest.

Planting organic garlic is one of those things that makes you feel like a ''real" homesteader. Here's what you need to know to successfully plant organic garlic

I’d like to hear from you!

Which garlic will you plant this year? Contact me at [email protected] or comment below!

If your chickens are not laying, it’s a super frustrating position to be in.

In this session of What The Cluck?! we discuss the various reasons why hens stop laying and what you can do about it.

We cover:

  • Ages chickens start laying
  • Vitamin and mineral deficiencies that can slow egg production
  • Nutritional needs of laying hens
  • What you can feed to improve egg laying performance

Resources I mention in this podcast:

Chicken Nutrition: Feeding Your Hens From Chick To Layer From FrugalChicken

Chicken Nutrition: A step-by-step system to feeding your hen from chick to layer (free e-book)  —> Get it here.

Feeding Your Hens Right (coming soon!)

How to calculate protein in your homemade chicken feed:

  1. Identify the amount of protein in each ingredient
  2. Add those amounts together
  3. Divide by the number of ingredients

This formula assumes a 1:1 ratio of ingredients.

(I didn’t explain the formula very well in the podcast, so I wanted to give you a better resource.)

Here’s where you can buy:

Further reading:

Why Your Hens Stopped Laying

What To Feed Your Chickens For Great Tasting Fggs

What Do Chickens Eat Plus Your Top 10 Questions Answered!

I’d like to hear from you!

Have you experienced problems with your chickens not laying? What did you do about it? Email me at [email protected] or comment below!