You might not believe raising mealworms, red wrigglers, or crickets for your chickens will save you money, but if you aren’t farming at least one of these 3 insects, you’re missing out.
Although raising insects to feed your chickens isn’t the most thrilling idea to some people, it’s a very easy way to save some money while providing a lot of extra protein for your chickens (which translates into better layers).
If you’re not on this bandwagon, by the end of this podcast, I might just have convinced you to give it a try (it’s up to you to talk your spouse into it though).
I love giving my hens insects, and I’m sure they love them just as much. In addition to the extra protein punch, insects give cooped hens the opportunity to hunt like the predators they naturally are.
You’ll learn:
-
- Why raising mealworms, red wrigglers, and crickets for chickens is the best idea you’ve had in a while
- How to set up an insect farm in 5 minutes
- Why (and how) these three insects will save you money
- Which insect is easiest to raise and preserve (and won’t make your spouse too mad)
Links we discuss:
Where to buy red wrigglers
Where to buy crickets
More about raising crickets
Ideal container for a mealworm farm
Healthy Coop Boot Camp
Where to buy dried mealworms (if you don’t want to raise your own)
Transcript:
Hi there, and welcome to session 34 of What the Cluck?!, a podcast devoted to keeping chickens for fun and self-sufficiency.
I’m Maat from FrugalChicken, and in this episode we’ll talk making a mealworm farm and alternative protein sources for your chickens, including mealworms, red worms, and crickets.
By the end of this episode, you’ll know how to make homemade farms for mealworms, red worms, and crickets, and why they’re a good alternative protein source that might save you money.
Just as a reminder, you can get this episodes show notes at TheFrugalChicken.com/Podcast34, that’s podcast with the numbers 3 and 4.
So stay with me!
So, the first thing you’re probably wondering is why we, as chicken owners, should bother raising insects in the first place.
And there’s a good answer, namely, that it can save money while providing a healthy source of protein for your flock. It’s widely known that insects are full of protein, and in some areas of the world, they’re eaten by people for just that reason.
You can also be sure of the source of your chicken’s food, the quality of the food, and you know exactly what the insects have eaten. So, you can better control the quality of their diet.
Now, even if raising mealworms, red worms, or crickets for your chickens doesn’t appeal to you, and I’m sure this won’t appeal to everyone out there, it’s still worth listening to this podcast because you can find them for sale out there on Amazon.
I’ll put links in the show notes for where you can find all these critters, and it’s worth knowing why they might work for your flock.
Each of these farms is easy to set up and maintain, and in just a few weeks, you’ll have a sustainable source of protein for your chickens.
And it should be said that chickens love mealworms, redworms, and crickets, and they love the hunting aspect to it. So, while you’re saving money, you’re also making your chickens happier.
So, let’s get started with discussing mealworms.
Mealworms are full of protein and they’re easy to raise, are cost-effective, and don’t take too much time to maintain.
So first, what exactly are mealworms?
Mealworms are actually the immature form of the darkling beetle.
The beetle will lay eggs in dark, dry places such as grain bins, flour sacks, etc, and the eggs hatch, and the mealworms then start feeding on their surroundings and begin their lifecycle again. Needless to say, they can destroy a bag of livestock grain fairly easily.
So, while this seems kind of boring, it’s important for you to know about the lifecycle of the mealworm so you know how to properly set up their home and when to harvest them.
First, the darkling beetle lays eggs, which hatch in 2 weeks into small mealworms.
The mealworms then grow for another 3 months, then at that time, they go into a pupa stage for an additional month, then they emerge as adult darkling beetles, and everything starts all over again.
Each female darkling beetle will lay up to five hundred eggs before she dies in just a couple months, which is hugely advantageous to us as chicken owners that want to breed these critters as a protein source – the more mealworms we harvest, the better for feeding our flock.
When breeding mealworms, you always want to make sure you leave some of them behind so you always have a fresh set of beetles to begin laying eggs again, to ensure this becomes an easy, sustainable source of protein.
How to Make a Mealworm Farm
You can always buy a mealworm farm kit, but they’re so simple to set up yourself, that you might as well DIY it.
Sourcing a home for your mealworms
First, identify a container that you can grow them in. Some people use an aquarium, some of the best mealworm farms I’ve seen have actually been plastic storage drawers, and I’ll put a link in the show notes to an example.
But a lot of people like those storage drawers because you can move the insects around so all the beetles are in one drawer, etc.
Something like an aquarium or storage drawers let you look in on your insects to see how they’re developing, and as an aside, this is a great project for kids, especially if you homeschool your children.
It’s completely up to you, and what matters is that it’s a container you’re comfortable dealing with.
Your container should be around 12 inches long by 24 inches wide, by 12 inches deep to make sure there’s enough room, and it will need a top. A mesh screen helps ensure there’s enough air circulation to keep your mealworms alive.
Next, figure out where you’ll keep your mealworm farm. In the summer, this is less of an issue because you can keep them outside, but in the winter, you certainly don’t want them freezing and have to start all over again, so find a spot that will work for whatever season you’re in.
In the winter, you can also use a heat mat or something else to keep the container warm, but again, that’s completely up to you and what fits into your lifestyle.
Mealworms like it to be around 80 degrees, and they like the dark. So, a basement would work, or a garage in the summer.
Feeding Your Mealworms
Next, let’s talk about substrates, or rather, what you’ll grow your mealworms in. You’ll want to use something that they can eat, such as rolled oats or wheat bran, and this has the added benefit of saving you time from feeding them all day.
In a pinch you can use chicken crumbles or cereal crumbs, but rolled oats and wheat bran are what’s usually used, and wheat bran is pretty cheap, it’s about $17 for a 50 pound bag here, which will last you a while.
One thing you might want to consider doing is sterilizing your substrate to makes sure no other pests that can harm your mealworms are present, and this is easy enough to do.
To sterilize your wheat bran, simply spread it out on a cookie tray and bake in the oven for 20 minutes at 140 F.
The thing about this is you don’t need to sterilize the entire 50 pound bag at once – just sterilize the small amount you plan to use, as you use it. This cuts down on the workload.
Don’t let your substrate get wet, otherwise it will mold.
In addition to wheat bran, you can feed your mealworms things like carrots.
To do this, simply slice them into 1 or 2-inch pieces, then place them into the container. The insects will find the carrots, and feed on them. Remove the carrots every so often, when they begin to look wilted.
Adding mealworms
At a minimum, you want to add 500 mealworms to your container, although obviously, the more insects you have, the more you’ll eventually have to feed your chickens. So, this is the case of the more the merrier.
You can buy them at feed stores or online, and I’ll put a link in the show notes where you can buy some.
Once you have purchased your mealworms, gently pour them out into your container and apply your cover to the container – the cover is to keep things out rather than the insects in.
At this point, it’s best to let them do their thing for a few months, make sure their fed, and allow them to turn into beetles and let the females lay eggs. Replace the wheat bran as needed.
In no time, you’ll start to have sustainable mealworms for your hens to eat.
Harvesting mealworms
To harvest mealworms, you can simply gather as many as you want from the container and feed them to your chickens.
Depending on the amount of chickens you have, ½ cup of mealworms per 5 hens is a good place to start. You can increase that amount if you want to use the mealworms as a large portion of your hens diet.
But let’s say you don’t have a place to keep them in the winter, or you have so many mealworms you can’t possibly use them all. Then you can freeze dry them.
To freeze dry mealworms, first harvest your insects, and place them in a container large enough to hold them.
Cover the container and place it in the freezer. This is considered a humane way to kill the mealworms quickly. Leave it in there for 20 minutes to ensure they’re dead.
You can store them in your freezer, although I’m sure most people wouldn’t really want a bunch of mealworms in their freezer. If that sounds like you, then you can roast them to preserve them in a more shelf-stable manner.
In a roasting pan, put down a layer of cornmeal. While the cornmeal isn’t strictly necessary, it will stop the mealworms from sticking to the pan.
Layer the mealworms and spread evenly to ensure that they cook at the same rate, and cover them with a lid to ensure they get evenly cooked.
Roast for 4 hours, or until the mealworms are a dark brown. Remove from heat and cool. Once cool, place in a storage container.
Worms
Next, we’ll talk about how to raise and harvest worms for your chickens.
These are a little messier than mealworms, but red worms, also called red wrigglers, also have the added benefit of providing castings for your farm, which is some of the best fertilizer out there. So, there’s a dual benefit.
You can find red wrigglers at gardening stores and bait shops, and you can also buy them online. I’ll put a link in the show notes to a source I recommend.
One pound of red wrigglers is about 1,000 worms, and that’s enough to keep your worm farm in business. They breed based on the amount of food available, so the more you feed them, the more worms you’ll have to feed your chickens.
Building a worm farm
Building a worm farm for your chickens is really, really easy, and you can do it anywhere. I know, because I had a worm compost bin in my condo before we moved to the farm.
To make a worm farm, you’ll need 2 large Tupperware bins with lids, and they need to be at least 12-inches deep. I use 18 gallon bins. Make sure to pick a dark color because worms like the dark.
Drill holes in the bottom of both bins with a ¼-inch drill bit. I put about 10-15 holes in mine.
The worms will go through the holes to get from the top container to the bottom one. This lets you harvest their castings while being able to harvest the worms, too.
To keep the worms from leaving the containers, I just put one lid under the entire farm.
You’ll also need to put air holes in one of the tops, to allow for air circulation.
Next, place one bin inside the other, and add strips of newspaper or torn up cardboard. You can also add some dried leaves.
Wet it down until it’s the consistency of a wet sponge. This is the ideal bedding for red wrigglers.
Next, add your worms and some food. Table scraps such as vegetables and bread are best. Avoid or animal products like bone, meat or fat, or dairy such as butter or yogurt.
Bury the scraps in the newspaper, and let your worms have at it.
The next step is to add some newspaper on top of your worms. This creates a dark area and it keeps out fruit flies.
Red wrigglers can eat their own body weight each day so for maximum benefit, if you put in a pound of worms into your worm farm then add a pound of food each day, and more as they start to breed.
To harvest your worms for your chickens, all you need to do is start putting food in the bottom container along with some newspaper, and let the worms start to move to the second container.
You can also dig through your bin to harvest the worms.
Crickets
Last on our list are crickets. While these are less popular with backyard chicken farmers, they’re easy to grow, and are packed with more protein than beef, according to experts.
So, for chickens, they’re a healthy way to increase their protein intake with little trouble for you.
I don’t personally raise crickets, so I researched a bit about how to do it, and here’s what I came up with. You can buy crickets online or at pet stores.
To create a cricket farm, start with a 14-gallon bin with a mesh top for air circulation. A bin that size can hold up to 500 crickets. The bin’s walls should be smooth so the crickets can’t escape.
Crickets like temperatures of 86 degrees, so find them a warm place to keep their container. Feed them things like cucumber, lettuce, fruits, and gourds. Check their food regularly for mold as well.
How to breed crickets
Crickets breed by laying eggs in soil. So, place a shallow container of soil in their habitat. It must be kept moist, so spray it frequently until you see eggs in there. The eggs will look like pieces of rice.
Next, incubate the eggs in a separate container. Use a heating pad or heat lamp to provide heat. After about 7-10 days, you’ll see baby crickets emerge, and they’ll be the size of a pin head.
The baby crickets can eat things like tofu as they grow, they will need a lot of protein to grow to a large enough size to make them worth feeding to your chickens.
You can harvest them when they’re ½ inch long or so, but you should keep some out of every hatch for breeding stock. Crickets only live a couple weeks, so you will need a constant supply of breeders if you want to continue to raise them.
I’ll also put a link in the show notes to a more extensive discussion about how to raise crickets, but for our purposes today, they’re a great source of sustainable protein for your chickens, and raising them to save on chicken feed is definitely something to consider.
So, that’s this week’s podcast. Out of all of these insects we discussed today, I think you’ll have the easiest time raising mealworms, but the red worms will provide the most overall benefit for your farm.
Now, if you’re new to chickens or maybe you’re an old hand, and want to do something fun, I have a 15 day boot camp coming up called the Healthy Coop Boot Camp.
You can sign up at HealthyCoopBootCamp.com and each day you’ll get an email with a video chock full of information you need to know to raise happy, healthy chickens.
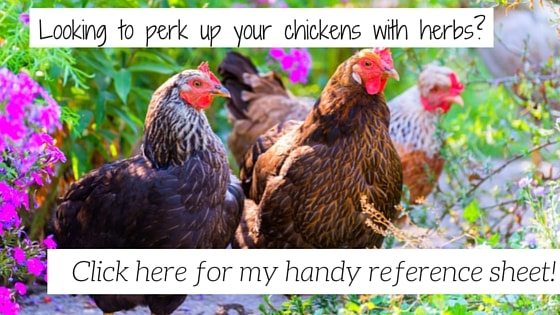
If you’re not sure what to do with chicks when you get them home, or when to switch feeds, or if you’re interested in raising chickens naturally with things like herbs, then my boot camp is for you.
My Healthy Coop Bootcamp is completely free.
Thanks for listening to this episode of What The Cluck?!, and I’ll see you next time!