What do you do when the place you call home doesn’t have room to accommodate your love of gardening?

What do you do when you want to feed your family as frugally as possible without sacrificing nutrition or resorting to frequent fast food meals?

How about re-thinking your living space?

Vertical gardening is a smart way to enjoy a love of gardening in limited spaces such as apartments and homes in urban areas, and offers an eco-friendly, budget-friendly, inventive way of growing plants, fruits, and vegetables at home.

Low on space? Here's how to maximize it with vertical gardening!

Vertical gardening has a very minimal footprint because they take up so little space in your home.

Back in the day, before we moved to our homestead, I became the master of vertical gardening. I had a very small space to grow, which meant I couldn’t grow in traditional garden beds….but I could grow vertically!

We had some great tomato harvests in our 3-foot by 6-foot balcony, and even got to grow cucumbers, zucchini and, one year, we even did sweet potatoes!

If we had enough light in our living room or kitchen, I probably would have grown a living wall of herbs in the house as well! An indoor vertical garden can reap a harvest all year long without worry of frost or other outdoor climate conditions.

Vertical gardens are much easier to harvest than a traditional garden, and are also in some ways easier to manage and maintain (less weeding). Here are the steps you need to take to create your own vertical garden!

How to maximize space in your vertical garden

In all likelihood, you’ve already chosen a space for your vertical garden – it might be a balcony, patio, indoor or outdoor wall. You can also create a simple, freestanding wall on your own.  Just make sure your location is easy to get to, easy to water, and easy to harvest.

You will need containers – go with something 4 to 6 inches deep at a minimum, depending on the vegetable you’re growing. Any smaller, your plants will have difficulty absorbing nutrients and become root bound, especially as they begin to bear fruit.

Hanging planters also let you maximize your space – you can grow down as well as up.

For vining plants, you will need trellises. You can buy trellises, or make them yourself out of any material you choose.

We used bamboo sticks like these. They’re easy to manipulate and last a while. Be sure to install your trellises BEFORE planting to limit damage to your vegetable plants’ roots.

Low on space? Here's how to maximize it with vertical gardening!

Deciding what to grow

The location of your vertical garden, the climate you live in, and the amount of sunshine it receives are major factors in what you can grow successfully.

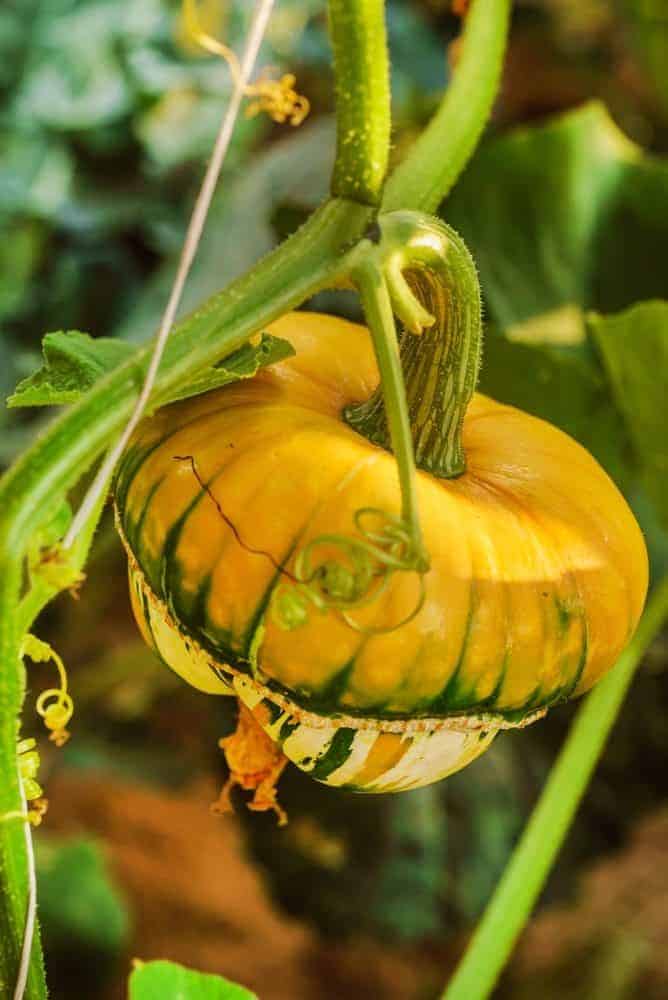
We did best with cherry tomatoes, cucumbers, and squash/zucchini. Tomatoes grew easily in 4-inch deep hanging planters like these.

Whatever vegetables you decide to grow, it’s best to go with bush varieties since they require less space and look tidier (if you’re looking into vertical gardening, I’m guessing you have neighbors – lots of trellises and sprawling plants might make them roll their eyes.)

Peas, greens like lettuce, and beans are other safe bets because they do not require deep soil. Choose vegetables that grow well in vertical settings using climbing vines and geo-bags for root management.

Herbs are another option, and we had good luck growing them in even shady areas (the exception is cilantro – we didn’t have much luck because the taproot is long and the plant itself is finicky). You can grow herb in pots – we would hang them off a wall, since they can live happily in a 6-inch pot.

Don’t forget that you can also grow edible flowers – pansies and violets are two that we love. If you want to grow medicinal plants, roses, dandelions, lavender, and calendula are some easy options (and the nosy neighbors are less likely to object to flowering plants.)

Just like with any garden, you should grow the food you actually like to eat – there’s no point in growing zucchini if you don’t like it. If you prefer tomatoes or greens, then grow more of them instead.

Remember, as well, that you will need to feed your vertical garden heavily – the plants will have a smaller area from which to draw nutrients. This is easily accomplished by watering with a compost tea – your plants will get water PLUS nutrients.

You CAN buy commercial fertilizers, but you’re wasting your money. You can usually source manure for free (you only need a couple gallons to make enough tea for the summer).

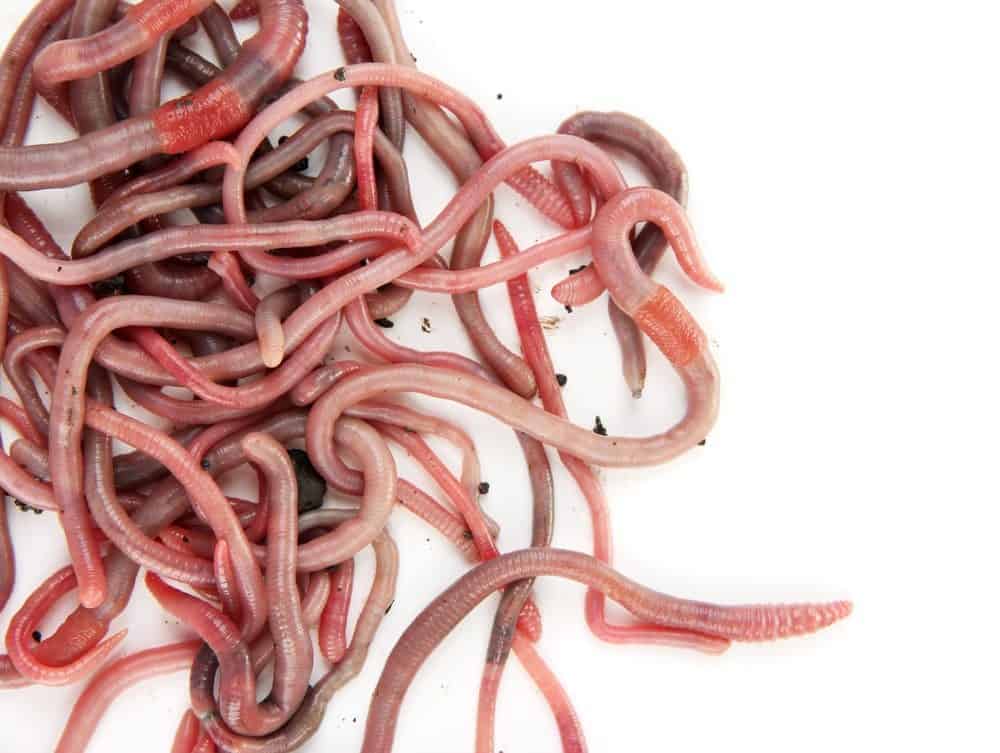
If you want to take your gardening experience a step further, you can create your own compost with a worm compost bin. It’s easy – we did it for years in a condo, and you can gather the worm castings as needed (and have a place to recycle your scraps).

I’d like to hear from you!

Are you a vertical gardener? What are you currently struggling with? Leave a comment below!

Buying grain for your livestock can add up – ask me how I know.

This year, we decided to do something different – we planted a garden to grow greens for our rabbits and chickens.

It’s been a success and now we have enough free food for everyone to have an extra bite every day – and it’s lowered our overall feed bill.

(Want some help with growing a garden? Grab my #1 Amazon best-selling book about organic gardening, Organic By Choice: The (Secret) Rebel’s Guide To Backyard Gardening – now available in paperback!)

We even have one rabbit who is picky about his feed – if it’s not exactly the right brand, he won’t eat it.

With the help of all the greens he’s been getting, his weight has picked up – and even on his snootiest “it’s not perfect so I won’t eat it” day, he’ll still chow down on fresh greens.

We’ve been using 5-foot by 10-foot raised beds similar to this one, which allows for 50 square feet of space devoted to growing. You can easily replicate this amount of space in your own backyard.

What should I grow for free food?

Glad you asked! We’ve had the best luck growing greens – they don’t take that long to mature (30-60 days, depending on variety), and you can grow a lot in a small space.

This year, we’ve been growing:

Some other options include arugula, carrots, and chard. Since rabbits can’t digest cabbage that well, avoid feeding it to them – use it for sauerkraut instead.

Bear in mind that you can’t necessarily replace ALL of your rabbits’ or chickens’ diet with greens, unless you can grow a large quantity. You will still likely need to supplement their diet with pellets and hay.

For your chickens, you can just bunch the leaves together and allow your hens to peck at the treat as a form of entertainment.

For ducks, your best bet is to tear the leaves up and toss them into a clean pool water for your flock to dig out – they’ll love it! Ours look forward to their “treat” every day (shhh….don’t tell them it’s good for them!)

How much space do I need?

In a 1-foot by 5-foot area, we’ve grown enough turnip greens to feed our 30 rabbits a healthy supplemental meal every day.

The amount of space you will need depends on what species of animal you’re feeding as well as how many – it’s best to start small and build up from there. You can experiment, weigh your harvests, see how your animals do with it, and scale up from there.

This fall, we will be devoting about 200 square feet to growing and overwintering greens for our rabbits.

Even if you have just a small space, for example, a table like this, you can still grow something – and anything is better than nothing! It adds up after a while.

Trust me when I say that getting their greens is the highlight of our rabbits’ day – they look forward to it, and it provides some excitement during an otherwise dull afternoon.

I’d like to hear from you!

Do you grow greens to feed your rabbits and chickens? What are your best tips? Leave a comment below!

Got a garden that’s not quite flush with healthy green veggies? So did we – so we created garden fertilizer with a worm compost bin!

And we now have a healthy, consistent source of fertilizer – totally free.

(This article is an excerpt from my book, Organic By Choice: The (Secret) Rebel’s Guide To Backyard Gardening which is a #1 Amazon Bestseller in Organic Gardening! Grab a copy here!)

This is a fun activity (especially for kids who are into creepy crawlies) if you want to create compost for your garden, but don’t have room for (or aren’t allowed to have) a compost pile.

Back in the day, we enjoyed doing this in our condo before we got our homestead, and believe it or not, we were able to grow cherry tomatoes and cucumbers even though our only source of sunlight faced North.

Yes, worm poop is really that powerful. Here’s how to start a worm compost bin – you can keep it indoors or outdoors, whichever you prefer.

Where to source worms for your compost bin

The worms you want to use are red wiggler worms (Eisenia fetida). You can either purchase them online, go digging for some, or if you have friends with green thumbs, see if they will let you adopt some worms.

Build a worm compost bin for free garden fertilizer!

How to build a worm compost bin

While you CAN do this in a pile outside, keeping your worms in a composting bin makes it easier to keep them in one place and to ensure contaminants or pests don’t invade your healthy garden fertilizer.

To start your composting bin, you will need two containers for your worms. We used food-safe plastic bins like these. Dark is better!

The idea is the worms eat kitchen scraps in one bin. When the first bin is full of healthy compost and worm castings, you allow them to travel to the second bin (positioned below the first bin) using holes you drilled into the bottom of each bin.

The process then starts over again as you use the compost in your garden.

Tools needed:

  • 2 small food-safe plastic bins with lids
  • Drill with ¼-inch bit
  • Newspaper torn into strips
  • A handful of soil
  • Kitchen scraps
  • Red wrigglers (I like these)

First, drill several holes on the bottom of each bin. The worms will crawl through these holes once the bin is no longer habitable and it’s time to harvest the castings for your garden.

Next, layer strips of newspaper lightly until the bins are full. You can spray down the newspaper, but it’s not strictly necessary.

Be sure to toss a handful of dirt into one of the bins, as well as kitchen scraps. This will start the composting process and provide beneficial nutrients and microorganisms for each worm.

Good options are apples, carrots, tomatoes, and leafy greens. We noticed that citrus scraps weren’t a big hit. Test with your worms, but don’t be surprised if your orange peels need to find a different resting place.

Don’t use dairy or meat products in your worm bin; stick to vegetable, fruit, and egg kitchen scraps. The diary and meat will start to smell eventually, attract pests, and produce less-than-optimal fertilizer.

Finally, place your new worm friends in the bin, covering the with some of the newspaper scraps. They like the dark!

Stack the bins on top of each other.

Each worm will naturally start gravitating towards the food, consume it, and leave healthy castings and compost for you to use in your garden.

They will also start breeding, and soon your worm count will multiply.

How to feed red wigglers in your compost bin

Replace the kitchen scraps every few days, or when your worms have eaten them all. Keep a close eye on this – you don’t let them go without food, or you will have no compost!

Also be sure to not put TOO many food scraps in there – this will attract fruit flies and other pests. It’s a bit of a test, but if you look in the bin every other day or so, you’ll soon figure out when it’s time to give more food.

I’d like to hear from you!

Have you tried creating a worm compost bin? What’s your best advice? Leave a comment below!

Have you ever moved to a new home and realized you didn’t quite know what you were getting into?

That’s what happened when we moved to our farm. We were very used to easy sources for herbs, creme fraiche, and other yummy ingredients.

(Want more great down-home gardening advice? Grab your copy of my new book Organic By Choice: The (Secret) Rebel’s Guide To Backyard Gardening available now on Amazon!)

Buuuuttt…good luck finding them in a 50 mile radius in this rural town.

In fact, part of the reason we started our homestead was so we could have access to fresh, organic ingredients that otherwise we would have zero access to (or at least ingredients that hadn’t been sprayed with a ton of Round-up or shipped from questionable sources overseas) – herbs included.

If you’ve found yourself in a similar situation, or just want to bring the garden indoors, here’s 10 easy, versatile, and gourmet herbs we’ve had success with!

You can grow them in your own kitchen, and they’ll have your friends convinced you’re either a green-thumb savant and/or Gordon Ramsay himself.

Enjoy!

Basil (Ocimum basilicum)

You can grow basil as an annual herb. For classic and aromatic flavor; you can try Genovese Basil. Grow Lemon Basil for a citrus flavor and Spicy Globe if you’ll like a Basil herb that grows compactly (8 to 10 inches tall). Spicy Globe basil looks great in pots. Plant in at least a 6-inch pot, keep watered, and fertilize with compost once a month. Ready to harvest when the plant is 6-inches tall, well established, and consistently growing leaves. Easy pesto anyone?

Bay (Laurus nobilis)

Although this initially grows very slowly, with enough patience, it will eventually form a bush or small tree which you can easily train into a wide array of shapes, or even a topiary. To make it easy start, you can purchase a young, organic, 1- to 2-foot plant and begin nurturing it. Perfect for soups and stews.

Chervil (Anthriscus cerefolium)

Also known as French parsley, this annual herb shares a striking similarity to delicate overtones of anise in terms of appearance and taste. Water regularly, and feed compost every other month. To harvest Chervil, all you need to do is snip the outer leaves and stems.

Chives (Allium schoenoprasum)

This is a grass-like herb with a mild onion flavor. Perfect on baked potatoes, or whenever you need a delicate, fresh, onion flavor. When harvesting, it is highly important to cut small bunches of leaves back into the soil level in order to keep new ones growing constantly.

Cilantro (Coriandrum sativum)

Plant in a deep pot because Cilantro has a long taproot, and needs room to grow. It’s best to plant is where you intend to keep it because it doesn’t do well with transplanting. Keep in a sunny area since it loves warmth, and water regularly.

Dill (Anethum graveolens)

Dill is an aromatic annual herb which is best known for its leaves when it is grown indoors. You can also grow it for its seeds – if you’re able to stop yourself from eating it! Add to soups and curries, or with fish. Fernleaf dill is a compact herb which is perfect for indoor growth.

Marjoram (Origanum spp.)

This herb originates from the Mediterranean and it is a member of the oregano family. However it stands out from other members of its botanical family in terms of flavor, which is distinctly sweeter and more delicate. Sweet marjoram can be grown in pots on a sunny kitchen window sill. Plant in a 6-inch pot, and water regularly.

Mints (Mentha spp.)

Peppermint and spearmint are both awesome choices for your kitchen. You can harvest it for tea or as flavoring in a salad. It’s hardy and easy to grow as long as it gets water regularly (if the soil is dry below the surface, it’s time to water.) If growing outdoors, you should ensure to put mint in its own personal container as it can easily outgrow and choke other herbs. When the plant is young but established, snip off new growth to encourage the plant to spread and develop more stems.

Oregano (Origanum vulgare ssp. hirtum)

There’s a few different types of oregano. For one that packs a lot of flavor, Greek oregano can grow up to about 12 inches in pots (plant in a 6 to 8-inch pot for best results). Ensure to harvest oregano leaves regularly in order to encourage the growth of new ones.

Parsley (Petroselinum spp.)

Both Italian flat-leaf and curly-leaf parsley grow effectively when put indoors. When harvesting, ensure that you cut off the outer leaves. Doing this will spur the growth of new leaves from its center and will keep it productive for a long period of time, possibly several months.

I’d like to hear from you!

Do you have a favorite herb to grow in your kitchen? Leave a comment below!

Ever heard of Apple Cider Molasses?

Whether you have or haven’t, you’re in for a treat, because apple cider molasses is a sugar-substitute that’s healthy, all-natural, and you can make it right in your kitchen, even if you live in the tiniest apartment.

(This recipe is adapted from A Cabin Full Of Food by Marie Beausoleil. Find this incredible book on Amazon by clicking here.)

That’s a lot of fanfare, but it’s justified.

Apple cider molasses is a very old recipe, older than the United States, but during the Colonial era, it was used as an alternative for sugar, honey, and molasses, and could be relied on when other sugar substitutes had failed.

People could make it at home with apples they grew in their backyards, and when the prices of sugar soared or became scarce, people knew they could turn to good ol’ apples to save the day.

It was used both as a substance sweetener and as a sort of apple cider concentrate to which you could easily add water, the result of which would yield in a refreshing and stunning drink.

Apple cider molasses was stored in a cool and dry environment such as a root cellar, and had the ability to last far longer than regular cider.

It also doesn’t go “hard” or develop any alcoholic features, and was a way to preserve the harvest in a useful and relatively shelf-stable way. 

Great! So how do I make apple cider molasses?

I’m glad you asked! The process of making boiled apple cider, although it might be a tad time-consuming, is super simple and easy to complete.

In a nutshell, to make apple cider molasses, you’ll be boiling down apple cider (not juice) until it turns into a thick syrup, the consistency of sugar molasses. The resulting molasses will be about 1/7th of the amount of cider you start with.

Ever heard of apple cider molasses? It's an all-natural sugar substitute that's healthy and safe!

I’ve made cider molasses with both pasteurized and unpasteurized apple cider, and both worked equally well.

When I make cider molasses, I start with a gallon of cider – so you’ll need a large pot like this one to accommodate it all. A gallon of cider will reduce to about 2 cups of cider molasses.

It will take quite a while for the cider to boil down – anywhere from 3-7 hours. You want it to boil, but not be so hot that it scorches.

You will have to play with the heat on your stove a bit, since every stove is different. When the cider thickens, you will want to stir constantly so it doesn’t get stuck to the bottom of your pot and scorch.

But at the end, you will be left with a thick syrup.

Ever heard of apple cider molasses? It's an all-natural sugar substitute that's healthy and safe!

You should be looking to get something with a really thick and gooey texture; just like it is for regular molasses. When completed, you’ll notice that if you insert a spoon, the molasses will stick well to it, leaving it coated.

As it cools, it will thicken, but not harden. You can use it in place of sugar molasses, honey, or sugar.

I’ve successfully replaced 1 cup of the above ingredients with 1 cup of the cider molasses, but you will have to play with it a bit in your favorite recipes. Just bear in mind that the cider molasses will (surprise, surprise) taste a bit like apples.

How to store apple cider molasses

The safest way to store a bowl of apple cider molasses is to refrigerate it. Once you do that you’ll notice that it might become solid. Don’t worry, you can just warm it up a bit in order to serve it and drizzle it over whatever you want to eat it with.

Apple cider molasses is made completely from apple cider, no added sugar or preservatives. It’s naturally acidic, so you don’t need any extra additives in order to preserve it. I’ve been able to store it on my shelf for a while without it going bad, but my official recommendation is to refrigerate it.

Making apple cider molasses CAN take a lot of time, but if you have a free Sunday afternoon, the end result is VERY worth it!

I’d like to hear from you!

Have you ever tried apple cider molasses? Leave a comment below!

When your garden is in full swing, and you’re harvesting more than you can eat, what do you do?

Preserve your hard won vegetables of course!

Even if you shop at the farmer’s market, chances are, you won’t be able to pass up that great deal on cauliflower, radishes, and more, right?

Pickling your veggies is a way to preserve them that happens to also be crazy delicious. To help you out, here’s 101 pickle recipes for every vegetable from beats to watermelon rinds!

Beets

Pickled Beets

Quick Pickled Beets

Pickled Beets With Apple Cider Vinegar & Honey

Roasted Pickled Beets

Pickled Beets With Caraway

Pickled Beets With Dill

Paleo Pickled Beets

Pickled Beets with Cloves and Cumin

Pickled Beets with Red Wine

Pickled Beets & Fennel

Brussels Sprouts

Pickled Brussels Sprouts

Traditional Quick Pickled Brussels Sprouts

Refrigerator Brussels Sprouts Pickles

Hot Pickled Brussels Sprouts

Brine Pickled Brussels Sprouts

Zesty Pickled Brussels Sprouts

Pickled Sweet Brussels Sprouts

Carrots

Pickled Dilly Carrots

Quick Pickled Carrots

Vinegar Pickled Carrots

Mexican Pickled Carrots

Vietnamese Pickled Carrots

Moroccan Style Pickled Carrots

Vietnamese Daikon Pickled Carrots

Spicy Garlic Carrot Pickles

Lacto Fermented Carrots

Canning Pickled Carrots

Mint Pickled Carrots

Pickled Carrots & Radishes

Ginger Pickled Carrots

Black Pepper & Cumin Pickled Carrots

Pickled Carrots With Garlic & Cumin

Five Spice Pickled Carrots

Spicy Pickled Carrots With Honey

Pickled Carrots With Dill & Serrano

Lemony Pickled Carrots

Cauliflower

Pickled cauliflower

Curry Pickled Cauliflower

Lemony Pickled Cauliflower

Spicy Quick Pickled Cauliflower

Pickled Cauliflower With Hot Pepper & Cumin

Turmeric Ginger Pickled Cauliflower

Quick Pickled Purple Cauliflower

Celery

Quick pickled celery

Spicy pickled celery

Brine pickled celery

Super spicy pickled celery

Eggs

Chipotle Pickled Eggs

Green Beans

Pickled Green Beans

Homemade Pickled Green Beans & Carrots

Spicy Pickled Green Beans

Hot & Quick Pickled Green Beans

Overnight Pickled Green Beans

Spicy Pickled Dilly Beans

Sweet Pickled Green Beans

Lemon Rosemary Pickled Green Beans

Dill & Garlic Green Bean Pickles

Bloody Mary Pickled Green Beans

Spicy Cajun Pickled Green Beans & Carrots

Garlic Pickled Dilly Beans

Tarragon Pickled Green Beans

Jalapenos

Pickled Jalapenos

Onions

Quick Pickled Onions

Yucatan Style Quick Pickled Onions

Old Fashioned Pickled Onions

Instant Pickled Onions

Lacto Fermented Onions

Citrus Pickled Onions

Traditional British Pub Style Pickled Onions

Italian Roasted Pickled Onions

Balsamic Vinegar Pickled Onions

Asian-Style Pickled Onions

Grandma’s Pickled Onions

Wine Pickled Onions

English Pickled Onions

10 Minute Red Pickled Onions

Pickled Onions With Lime Juice

Peas

Sugar Snap Pea Pickles

Peppers

Sweet Pickled Peppers

Sweet Pickled Banana Peppers

Whole Pickled Snacking Peppers

Pickled Garlicky Red Peppers

Sweet & Spicy Pickled Peppers

Mildly Spicy Pickled Peppers

Jamaican Hot Pickled Peppers

Char Roasted Pickled Peppers

Pa’s Pickled Pepper Recipe

Hot Pickled Pepper Relish

Radishes

Spicy Quick Pickled Radishes

Fermented Pickled Radishes

Bread & Butter Pickled Radishes

Pickled Korean Radishes

Sugar Free Pickled Radishes

Tomatillos

Mexican Pickled Tomatillos

Watermelon

Russian Pickled Watermelon Rinds

Pickled Watermelons

Pickled Watermelon Rind with Jalapenos and Ginger

Pickled Watermelon Radishes

Quick Pickled Watermelon

Vinegar Pickled Watermelon Rind

I’d like to hear from you!

What’s your favorite pickle recipe? Leave a comment below!