(This is a sponsored post. Even though Goddess Garden sent me their sunscreens to try, all opinions are my own. If I love it, I’ll tell you. If I hate it, I’ll tell you too.)

Want to snag Goddess Garden? Here’s where to grab it!


Of course if you’re going outside, you should cover up and wear a hat. But if you’re like me (and devoted to your tank tops and flip flops), that’s not always going to happen. So, we look to a sunscreen to protect us from any harmful UV rays.

Three weeks ago, I was sent Goddess Garden Organic sunscreens to try for 30 days, and now it’s time for me to tell you why I’ll make the switch to their sunscreens.

1. They’re not your average sunscreen

They don’t smell like normal sunscreen, and they’re not made of the same harmful ingredients as average sunscreens. 

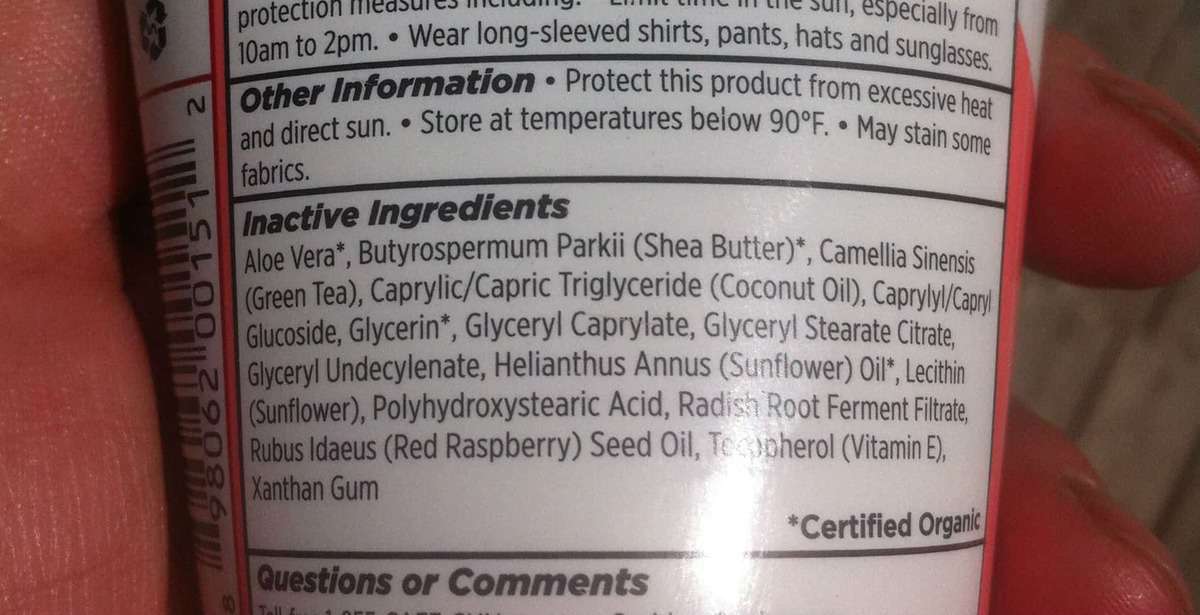
2. They’re made of all-natural ingredients, and a lot of these ingredients grow in my own garden.

I know their ingredients are safe – they’re items I consume every day (like raspberry oil and coconut oil). 

Who doesn’t have raspberries growing in their garden, or at least consume raspberries every now and then?

3. These sunscreens are made of ingredients that are reportedly non-nano.

There’s concerns that the ingredients in average sunscreens could damage your body on a cellular level, since they’re made of ingredients that can penetrate your skin.

Goddess Garden sunscreens are made of ingredients that can safely be used on your skin, without worry they’ll cause cellular damage or lead to cancer, like other sunscreen ingredients.

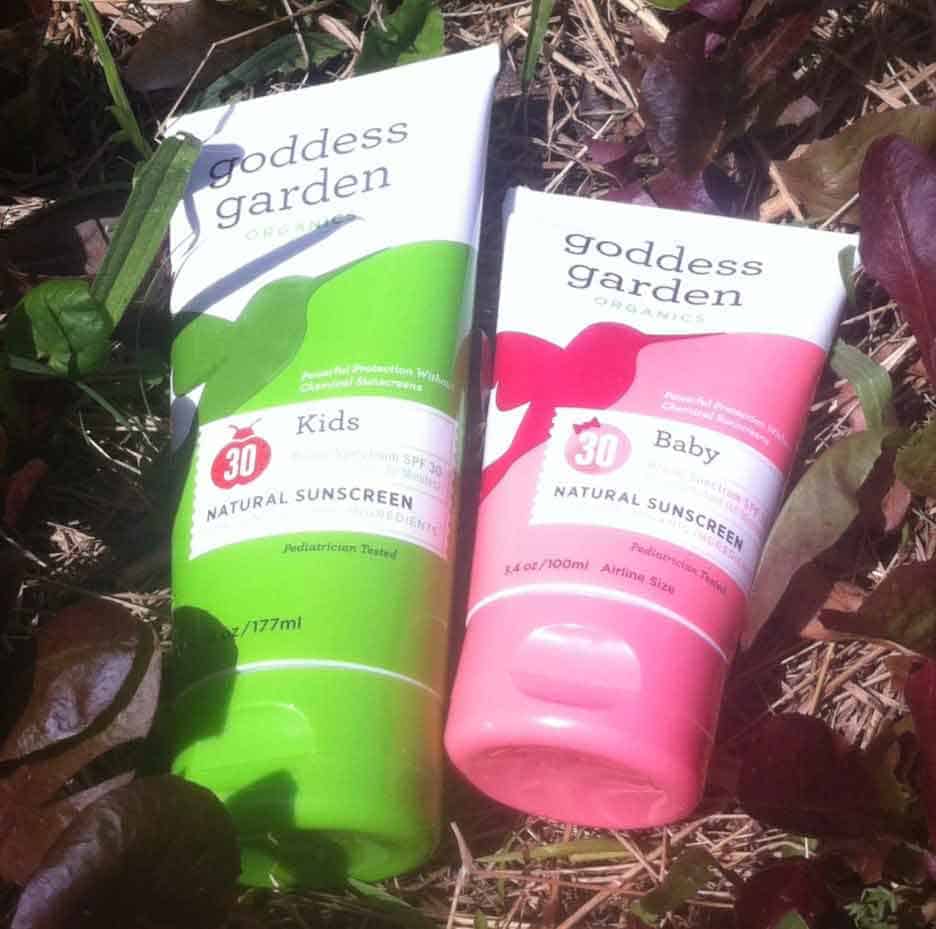
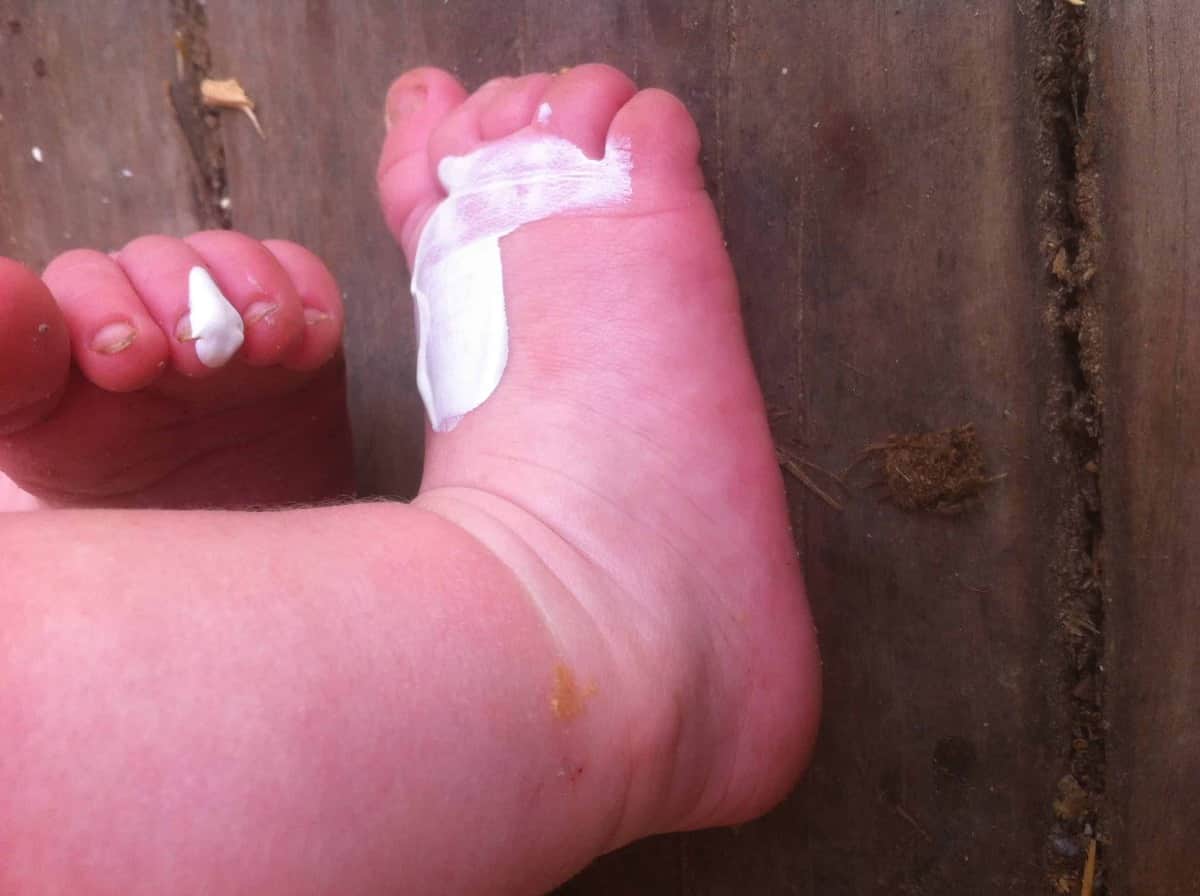
4. They’re tailored to different skin-types.

Young babies, children, and adults have different needs when it comes to skin care. I love that Goddess Garden sunscreens are made from ingredients that are customized depending on who will be using the product.

For example, the children’s sunscreen has shea butter, which moisturizes the skin as well as nourishing it.

It’s great to know the children’s sunscreen is gentler for younger skin!

5. They smell incredible.

I’ve had some stressful days on the homestead. Did Goddess Garden completely take away the stress?

No.

Not much can take away the stress of a dog attacking your goat.

But did offer some creature comfort during those times, and I’m sure the smell of lavender (known to relax you) did help. 

It’s rare I devote a whole post (let alone 3) to a single product line, but I wanted to make sure I really liked these sunscreens before recommending them, and the short answer is I really do like Goddess Garden.

Will I personally make the switch to Goddess Garden?

Yes. I wouldn’t recommend these sunscreens unless I use them personally and believe in them!

Knowing how to make strawberry jam is a super simple way to take the leap towards self-sufficiency.

It’s also pretty hard to mess up, making it a perfect first start to becoming more self-sufficient. Store bought jam doesn’t compare to jam made from fresh-from-the-garden strawberries, and if I can make it, so can you.

How to Make Classic Strawberry Jam - A Simple Recipe That's Easy To Master. Try it today for fresh jam for breakfast!

To make strawberry jam, I start out with about 10 cups of fresh strawberries. Cut off the tops, and set them aside (you can dry the leaves to use in teas, or feed the tops to your chickens, or compost them).

photo (41)

Also be sure to cut out any parts of the strawberries that aren’t fresh.


photo (40)
A lot of these strawberries were ok, but a couple had some not-as-fresh parts I cut out.


Before you start liquefying the strawberries, you can cut them up to speed up the process, or you can leave them whole. I cut mine in half only, because I like large chunks of strawberries in my jam. If you want a smoother, more consistent texture, or to speed up the process, you can cut them up into smaller pieces.

I’ve always used raw sugar for my jam, but you can substitute honey for the sugar if you don’t want to use it.

The amount of sugar to use is dependent on your taste. I use 2 cups.

I don’t use pectin when making strawberry jam (I’m a “less is more” kind of person), although you certainly can add it if you want to speed up the gelling process.

Add the strawberries to a large pot with the sugar, and turn the heat on medium high. When making jam, you’re breaking down the fruit and reducing the liquid so that it mixes with the sweetener.

I let the strawberries take a while to break down, so I use a low heat setting. I tend to forget about food I’m cooking on the stove, and I’ve found using low heat prevents scorching (and kitchen fires).

If you’re a good pot-watcher, using medium heat is fine, as long as the strawberries break down instead of cooking. 

Stir frequently to help the strawberries break down, and use a potato masher every so often as well. You’ll know when it’s time to start mashing because the strawberries will be very soft and there will be liquid in the jam.

photo (44)
These strawberries have started the liquefying process.


The amount of time needed to break down the berries depends on how much heat you use and how consistent you want your texture to be. When I make strawberry jam, it can take anywhere from 3 to 6 hours. 

My jam tends to be thinner and chunkier, which is how I like it; the process to make it remains the same regardless of whatever texture you’e shooting for.

Once your jam is the texture you like, you can remove it from the heat and transfer it to the jars.

Use sterilized jars (boiled in water for 10 minutes). This is important not only for your health, but also to make sure the glass doesn’t shatter in the process. The strawberry jam mixture will be very hot, and if the glass is cool, it might shatter.

You will have to let the jars cool for several hours before transferring them to your refrigerator or processing them for canning. (If you’re looking for a canning guide, consider At Home Canning For Beginners and Beyond.)

The jam will set and become more solid as it cools. Once your jars are cool, you can store them, or enjoy your homemade jam!

Making jam really is foolproof, and you can substitute the strawberries for pretty much any fruit you like, such as raspberries, peaches, or plums.

[amd-yrecipe-recipe:6]

https://twitter.com/AnotherHomestea/status/596665356288135169


Are you ready to make the switch to organic sunscreens? I am.

It’s been 10 days since I switched out my sunscreen with Goddess Garden’s organic sunscreen. I’m sure you’ve been wondering how it’s been going!

organic sunscreens[contextly_sidebar id=”SeN9iunRf89dBN37Q4YceliLeU6jiZ0z”]

(In case you’re catching up: Goddess Garden believes in their product so much, they asked 15 bloggers (me included!) to test drive their organic sunscreens, and share the results. Even though Goddess Garden sent me their sunscreens to try, all my opinions are my own, so you can be sure you’re getting an honest appraisal!)

I keep talking about the smell, and that’s really because I can’t get over it. Every time I open the bottle, I instantly de-stress (and homesteading can be a frustrating lifestyle, let’s face it). The notes of tea tree oil and lavender permeate the scent of their sunscreens, and it’s wonderful that my body gets to smell like it.

As far as practicality goes, the all-natural, organic sunscreens do their job well. I’ve applied it daily, and even though I’ve been outdoors a lot lately between planting gardens and building pastures, Goddess Garden sunscreen has held up to the job. I haven’t burned AT ALL, and I’ve barely tanned (and it’s been 80 degrees and sunny).

The titanium dioxide and zinc oxide act in a way to block and scatter the sun’s rays – naturally, because they’re naturally reflective. These minerals are naturally occurring, too.

Even though I’ve been sweating and messing in the dirt, my sunscreen hasn’t worn off. The directions on the bottle state I should reapply every 4 hours, so I’ve done just that.

photo (37)2
Here’s the ingredient list, so you can see for yourself!

Most sunscreens are made of ingredients that allow nano-particles to permeate your skin and enter your bloodstream. According to Time magazine (you can read that article here), the ingredients in normal sunscreens can lead to premature aging and cancer.

I double checked with Goddess Garden, and their sunscreens are non-nano, meaning their ingredients are safe. Sounds good to me!

What’s in Goddess Garden organic sunscreen? I’ve already mentioned the tea-tree oil and lavender, as well as the active ingredients, titanium dioxide and zinc oxide, but there’s also aloe vera, raspberry seed oil, and coconut oil, among other ingredients.

There’s different formulas for children and babies. Besides the zinc oxide (the same ingredient in diaper rash cream, so you know it’s safe), there’s also aloe vera, shea butter, lavender oil, coconut oil, radish root ferment (who doesn’t love a good ferment?), and sunflower oil.

photo (34)
It’s a messy process trying out the baby sunscreen!

If this sounds like it might work for your family, good news, you can buy Goddess Garden through Amazon! It’ll be delivered right to your doorstep. (I do get a small affiliate commission when you buy from Amazon at no extra cost to you, so thank you in advance if you do buy!)

There’s still time left in my 30-day test drive, and I can’t wait to fill you in on how it’s going!

(This is a sponsored post. Even though I’m being compensated, all opinions and research are my own, so you can be sure you’re getting an honest appraisal. If I love it – I’ll tell you. If I hate it, I’ll tell you that too!).


Until next time!

Looking to kick your summer recipes up a notch? I think herbs should be involved. Fermenting too. 

I don’t have to tell you the benefits of both. You already know, I’m sure.

There’s not much better than the probiotics that come with fermenting, and the same goes for the bubbly taste, too. Keeps things interesting, right?

And herbs just add enough pizzazz to remind us that summer, although it’s brief, can be captured in a tiny leaf.

Just in time for summer, here’s 5 recipes featuring herbs that will get the party started right.

5 Killer Recipes (Featuring Herbs!) To Kick Your Summer Off Right! Nutritious Real Food Recipes! From FrugalChicken

Bubbly Probiotic Lemonade

5 Killer Recipes (Featuring Herbs!) To Kick Your Summer Off Right! Nutritious Real Food Recipes! From FrugalChicken
Photo courtesy of Learning and Yearning

What would summer be without lemonade? It’s practically essential.

Probiotic lemonade is just what it sounds like – lemonade times, like, a million! The lemons are fermented, which of course means Bubbly Probiotic Lemonade isn’t just regular lemonade. It’s super healthy and full of good enzymes, and the fermenting process makes the lemonade bubbly and fizzy.

If this sounds like something good to you, check out Bubbly Probiotic Lemonade from Learning and Yearning.

Try a twist: You can replace the lemons with limes or oranges if you want to try something different. To kick it up an extra notch, try some cayenne, for a spicy twist, or lavender for a smooth drink to help you de-stress.

Peach Basil Salsa

5 Killer Recipes (Featuring Herbs!) To Kick Your Summer Off Right! Nutritious Real Food Recipes! From FrugalChicken
Photo Courtesy of Homestead Honey

The combination of peaches, onions, and basil in this salsa recipe is unreal. The spice of the onions with the Mediterranean feel of basil combined with the sweetness of the peaches screams summer.

Pair this with homemade tortilla chips (psst…sign up for the freebie at the end of this articles for this and other recipes!).

Try a twist: You can add mango for a tropical twist, or include cilantro for a classic-salsa feel.


Chamo-Berry Banana Smoothie


5 Killer Recipes (Featuring Herbs!) To Kick Your Summer Off Right! Nutritious Real Food Recipes! From FrugalChicken
Photo from Herbal Academy of New England

The ginger in this smoothie gives it that “endless summer” taste, and the chamomile means it will be great for those stressful days. Sometimes you just need to relax right? Right.

Chamomile is the star of this smoothie, and not to be outshown by the strong taste of banana. And the strawberries just kick it up a notch.

This recipe is from the Herbal Academy of New England, and when it comes to herbs, they really know their stuff. Give it a try, you won’t be disappointed.

Try a twist: Add some kale or cucumbers for a “Green Goddess” taste! 

Fermented Dill Pickles

5 Killer Recipes (Featuring Herbs!) To Kick Your Summer Off Right! Nutritious Real Food Recipes! From FrugalChicken
Photo courtesy of Simple Life Mom

Love pickles? Me too. Love fermented pickles? If you do, or if you’re not sure, you need to try this recipe.

Fermented Dill Pickle are different than what you get in the grocery store – those cukes are just pickled in vinegar. Fermenting your cucumbers is a whole ‘nother story.

You’ll ferment the pickles for 3-5 days (less in hotter weather), and you’ll know they’re done when they stop making bubbles. You can read the entire recipe at Simple Life Mom!

Try a twist: Did you know you can ferment pretty much anything? Add carrots to this ferment for something different!

Queen Anne’s Lace Flower Jelly

5 Killer Recipes (Featuring Herbs!) To Kick Your Summer Off Right! Nutritious Real Food Recipes! From FrugalChicken

If you want to try something different, the Queen Anne’s Lace Flower Jelly is a great recipe to try.

Queen Anne’s Lace flowers are pretty ubiquitous during summer, so it shouldn’t be hard to find some. You’ll need about 20 flowers to make this jelly, but it’ll be worth it.

Be sure you pick the right flower, and not Queen Anne’s Lace’s ugly stepsister, Poison Hemlock (hint: Queen Anne’s Lace has a hairy stem). The recipe isn’t any harder than making fruit jam – but this one is more fun! For the full recipe, visit Pixie’s Pocket!


Do you have a favorite recipe that reminds you of summer? Leave a comment below!


The question of whether you should let your chickens free range is a complex one, at least as far as chicken keeping goes.

I’ve had plenty of questions about the subject of whether chickens should free range lately, and I’ve presented both sides of the argument.

There are die-hard advocates of both schools of thoughts, and it’s a little like the American electoral system, with leftists, right-wing conservatives, and moderates.

free range chickens

[contextly_sidebar id=”rMoCAG5TkumI0TbXwuB65lcwdPwJO3C2″]

The pro-free ranging group believes chickens are healthier when free-ranged and allowed to choose where they go. Other people believe chickens should remain in a coop with a run, while moderates believe allowing chickens to free range while supervised is appropriate.

I’ve tested this subject for a while, and I believe the answer is (drumroll….):

It depends.

Sorry, I know that’s not a very satisfactory answer. But truth be told, I think it’s up to the individual owner and what you can live with.

If you aren’t sure whether to free range, ask yourself one question:

Can I afford to lose chickens?

IMG_3374

I’ve allowed my chickens to free range, and I’ve kept them cooped. There’s a lot of pluses and minuses with either direction.

The top priority, regardless of the direction you go, is the overall health of your flock. I underscore the phrase “overall health of your flock” because you should take into account the well being of your collection of cluckers, and not necessarily the health of one chicken if it risks the health of your entire flock.

For example, let’s say your favorite chicken is snatched by a predator, so you decide to coop everyone permanently. Your chickens might remain healthy, but very bored and start picking on each other, or they might start to lose important nutrients because their diet has altered.

Or perhaps the opposite happens. One chicken just wasn’t getting enough water in the coop because every time she tried to drink, the other hens ran her off. You decide to free range, but coyotes are a problem where you live. 

Do you risk your overall flock because of one chicken’s needs? I wouldn’t.

So, let’s look at some of the pros and cons of free ranging versus cooping your chickens.

When you don’t free range you risk:

  • Low protein levels, which can effect egg production and the lifespan of your hens. Studies show chickens will consume up to 70% protein when they free range.
  • Certain chickens not getting enough food/water because of the pecking order, even if you build enough stations.
  • Low levels of Vitamin D and other nutrients (particularly if you keep them cooped inside a lot), which effects calcium absorption and is linked to late embryonic death (if you incubate your eggs).
  • Issues such as picking, feather plucking, etc., if there’s too many chickens in one space
  • Certain skin issues, such as lice, are more likely to spread, and you’ll have to offer a dust bath in the coop.

The advantages to free ranging are:

  • Your chickens are likely to have a high-protein diet, which creates those golden yolks
  • They satisfy their natural urges to scratch, peck, and hunt
  • You won’t have to feed as much grain, so you’ll save money
  • Your chickens will get a varied diet
  • You don’t need to provide a dust bath – they’ll make one themselves!

photo (30)

If you choose to free range however, you will lose chickens. That’s pretty much a given, so you should expect it.

In my opinion, the choice to free range depends on whether you can afford to lose chickens or not.

Things get slightly easier if you have a rooster – he can alert you to danger and fend off some predators, but he’s useless against a hawk (that swoops very quickly from above and breaks your hen’s neck) or a very aggressive dog (ask me how I know).

Still want to free range but don’t want to lose any hens?

If you can’t afford to lose chickens, but still want to free range, then offering a large run or a tractor that you move daily is an option, and so is supervised free ranging.

A tractor is an excellent option if you don’t have a lot of hens (if you have 50 or so, moving a tractor that fits all of them gets trickier) because not only are your chickens safe, but you can use them to turn up a compost pile or a garden bed.

I’ve seen runs that are very tall so chickens can’t get out, but that don’t offer any protection from hawks or an adventurous raccoon or possum that wants to climb to get a meal. A chicken run like this will offer some protection, but I would still worry about predators getting in. (And really, if you take the time and money to care for a chicken, do you want a rogue possum to make a meal out of her, and lose all the eggs she could have laid?)

Let’s look at the advantages of using a coop:

  • Your chickens will be secure
  • You can control their diets and make sure they’re getting all the nutrients they need
  • Easier to gather eggs (no hiding them in odd places)
  • Protection from outside diseases, since they’re less likely to come into contact with other birds

If you don’t coop your chickens:

  • You will probably lose a chicken every now and then
  • You have to be more alert to predators
  • You will likely have to hunt for eggs
  • You’ll still have to supplement their diet to make sure they’re getting everything they need nutritionally
  • You might have a hard time medicating your entire flock if need be (for example, if you need to give them antibiotics in their water).
eggs
Interested in a daily Easter egg hunt?

The choice whether to coop or not is a personal one, and is dependent on your individual situation. There’s advantages and disadvantages to each, and only you can decide if it’s right for your flock.


https://plus.google.com/+MaatvanUitert/posts/eJbZSqW8xPM

I was recently told that podcasts are dead, but there are plenty of homesteading podcasts out there, and they’re a rich resource of information.

They also happen to be a convenient way for a homesteader, who’s likely busy about the farm or with children, to absorb information.

The best part? They’re free.

When you’re out and about, planting an orchard, tending a sick goat, or breaking ground on a new bed, you can still educate yourself with homesteading podcasts without losing the pace of your work (and this time of year, who can afford to stop working?) and without spending a dime.

At least, that’s what I do.

Although milking Dahilia is riveting work, I like to multitask. When you visit my farm, you’ll find me mucking about with earphones listening to homesteading podcasts, learning about time-tested skills or ground-breaking research that will improve my farm.

Homesteading podcasts are also a good learning tool for children, because even if your child can’t read yet, he or she can be introduced to self-reliance and traditional skills by listening.

I’ve found several homesteading podcasts that I listen to regularly that are full of helpful, relevant information. Whether you’re an urban farmer, live on 10 acres, or are lucky enough to have a hundred acre plot, the value of these homesteading podcasts remains the same.

Hit the Subscribe Button on These 4 Homesteading Podcasts:

UPDATE:

Since writing this article, I’ve started my own podcast about keeping chickens for fun & self-sufficiency. 

You can subscribe on iTunes or view all the episodes on FrugalChicken here.

Each week we look at a different aspect of chicken ownership, and you’ll learn stuff like:

My podcast is weekly, and comes out on Fridays.

Mountain Woman Radio at TrayerWilderness.com

The Trayer family lives on a 100% off-grid homestead in Idaho. In addition to focusing on on different homesteading skills, the Trayer Wilderness podcast, interviews every-day homesteaders about their experiences on their farms.

Her interviewees are from diverse homesteads, both suburban and very rural. There’s something to be learned from both.

I’ve personally been a guest on Mountain Woman Radio, and Tammy strives to fill her listeners in on the homesteading life, and to make it accessible.

The guests on Mountain Woman Radio often discuss their products, such as books or other learning tools, so in addition to all the great information on the podcasts, there’s bonus resources for you listen to, buy, or watch.

I’ve had a lot of “ah ha!” moments, which always happens when I listen to other homesteaders and how they run their farms. With over 94,000 subscribers to TrayerWilderness.com, you know it must be good, and it’s one of the best homesteading podcasts out there.

Pioneering Today at MelissaKNorris.com

Melissa teaches different skills on her homesteading podcasts, many of which are becoming lost arts. Learn how to salt cure a ham, save time cooking from scratch, and make candles among other skills.

A lot of her podcasts merge traditional skills with modern needs, such as saving time. For example, her latest podcast 7 Time Saving Tips when Cooking from Scratch is for busy homes that still want to eat nourishing food.

One of my favorite episodes is How to Make Bone Broth & 5 Ways to Preserve it at Home, and Melissa isn’t just a resource for homesteading skills; she mentions where she finds her information, so her listeners have even more material to use.

Know Your Food Podcast from GNOWFLIGNS

I’ve recently become a fan of Wardee and her website, GNOWFLIGNS.

The Know Your Food Podcast focuses on eating and cooking traditional, whole foods and getting as much nutrition from them as possible through methods such as fermenting, pickling, and culturing. (These methods also add new and complex flavors to foods, I should mention).

This podcast covers a diverse range of topics from help for seasonal allergies to nourishing breakfasts, to advice on how to start your day out great.

They’re easy, informative homesteading podcasts with a wealth of information that take a holistic approach to living.

The bottom line is podcasts allow a group as geographically broad, diverse, and time strapped as homesteaders to stay connected, share information, and celebrate our lifestyle, while keeping traditions very much alive and accessible.

Which homesteading podcasts do you listen to? Share your favorite podcast or learning tool in the comment section!

I’d like to hear from you!

Which homesteading podcasts are your favorite? Email me at [email protected] or comment below!