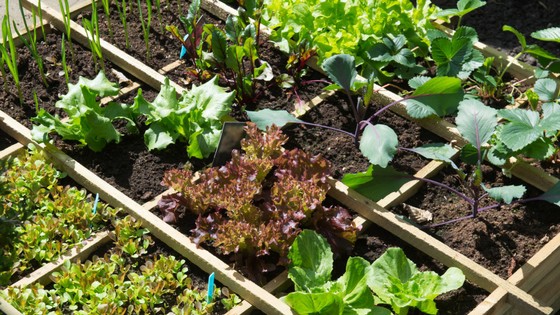
Nothing is more frustrating than planting seeds only to have just a few (or none) actually sprout (we’ve all been there).
We used these 2 super simple hacks to help our seeds sprout – and ended up with more veggies than we can harvest!
And these are two tricks you can easily repeat at home.
Want to learn more about starting specific vegetable plants? Grab a copy of my bestselling book Organic By Choice: The (Secret) Rebel’s Guide To Backyard Gardening on Amazon!
Want to learn what they are?
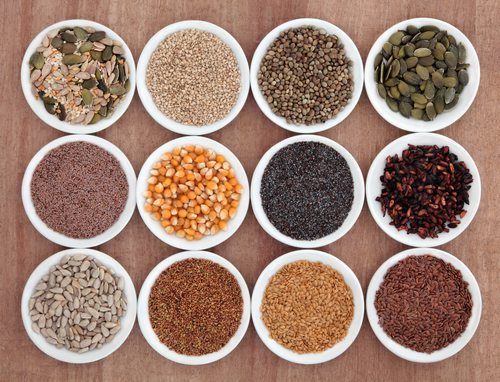
So, you know how seeds such as beans, peas, watermelon, and tomatoes are so hard?
Well, those hard shells protect the seeds…but it also takes more energy for life to emerge from them BECAUSE of those hard shells.
And if you don’t also have the right growing conditions? Forget about it!
In this article, we’re going to show you how soaking seeds and scarification can help your seeds germinate easier – and give you a bigger harvest!
Why does this work?
As we’ve said, some seeds have hard shells – good for protection, makes germination a little tougher.
Soaking the seeds helps loosen the hard shells, making it easier for tender young seedlings to sprout.
It also gives seeds a little more hydration before dropping them in the soil – which hopefully is moist, but might very well dry out in the weeks between planting time and when they’re scheduled to emerge from the ground.
Similarly, scarification helps by weakening the hard outer shell a bit before planting. Water can be easier absorbed by the seed, too, kickstarting the germination process.
What is scarification?
Scarification sounds worse than it is. All it means is chipping, scratching, or nicking the exterior seed shell so it germinates easier.
In nature, scarification takes place when an animal eats a seed and it passes through the digestive tract. Seeds are also naturally scarified by the freeze/thaw cycle of fall, winter, and finally spring.
There are some seeds that NEED to undergo scarification before they’ll germinate, such as morning glory seeds.
In other cases, scarification just helps your plants sprout.
Avoid scarring soft seeds or seeds that are very small (such as lettuce seeds), or if the seeds are easily crushed. Because of their size, they’re unlikely to withstand the scarification process, and you might end up crushing or damaging the seed so it can’t germinate.
To scar seeds, you can rub them with fine sandpaper, microplane like this one, or nick them with nail clippers. If you nick them, you want to be sure to penetrate the tough outer shell.
Another option is to put seeds in hot (but not boiling) water, and allow to cool to room temperature. Let sit for another 48 hours then plant immediately.
Soaking
If you plan to soak your seeds, fill a cup with room temperature water and add your seeds. If any of the seeds float, remove them since they won’t sprout anyway.
You can soak them for 24 hours in room temperature water. Plant immediately (so, don’t soak them a week before you decide to plant – do it just 24 hours ahead of time).
You can also soak your seeds in compost tea so they’ll have extra nutrients when planted.
A second option is to thoroughly soak two paper towels with room temperature water. Place your seeds in between both sheets for 24 hours right before planting. Be gentle in case any seeds have already started to sprout.
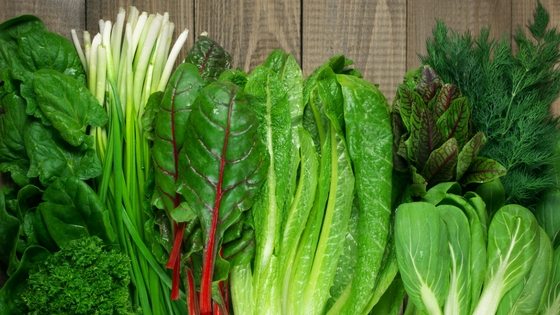
Some veggie seeds that can benefit from soaking are peas, squash, beans, okra, lettuce and other greens, and herb seeds, particularly parsley and fennel.
Maat van Uitert is a backyard chicken and sustainable living expert. She is also the author of Chickens: Naturally Raising A Sustainable Flock, which was a best seller in it’s Amazon category. Maat has been featured on NBC, CBS, AOL Finance, Community Chickens, the Huffington Post, Chickens magazine, Backyard Poultry, and Countryside Magazine. She lives on her farm in Southeast Missouri with her husband, two children, and about a million chickens and ducks. You can follow Maat on Facebook here and Instagram here.

![Save Money With A Backyard Chicken Fall Garden [Podcast]](https://thefrugalchicken.com/wp-content/uploads/2018/09/grow-a-backyard-fall-garden.jpg)

I am a regular guest on a local radio program where I play the part of a Master Gardener. A listener called in saying her Morning Glory and Moon (?) seeds hardly came up at all. So I told her to start with a quart Mason jar and a sheet of 220 grit sandpaper. Cut a disc for the bottom and one for the top. Cut a 3 1/2 inch strip the full length of the sandpaper. Glue the sandpaper pieces inside the jar … sand facing IN. Drop the seeds to be scarified in the jar, close the top, and toss for a minute. Then soak the seeds, or just plant them.